
Mixing Yellow Paint: Expert Color Tips
Mixing Yellow Paint: Expert Color Tips for Perfect Results
Yellow is one of the most versatile and vibrant colors you can use in home improvement projects, from accent walls to furniture refinishing. Whether you’re tackling a bedroom makeover, painting kitchen cabinets, or creating an outdoor feature wall, understanding how to make a yellow colour that matches your vision is essential. Many DIYers assume they can simply grab a yellow paint can off the shelf, but the reality is far more nuanced. The undertones, saturation levels, and finish types of yellow paint vary dramatically, and mixing your own custom yellow gives you complete control over the final result.
In this comprehensive guide, we’ll walk you through everything you need to know about mixing yellow paint like a professional. You’ll learn the color theory behind yellow creation, discover which base colors work best for different yellow shades, and master the techniques that professional painters use to achieve consistent, beautiful results. Whether you’re interested in soft buttery yellows, bright sunny hues, or muted golden tones, this guide will help you create the perfect shade for your next home improvement project.
Understanding Color Theory and Yellow Paint
Before you start mixing, it’s crucial to understand the fundamentals of color theory as they apply to paint. Yellow is a primary color in the traditional color wheel, meaning it cannot be created by mixing other colors together in standard paint formulations. However, when you’re working with existing paint stocks or need to adjust pre-mixed yellows, understanding how colors interact becomes invaluable.
The key to successful yellow paint mixing lies in grasping how different pigments interact with your base color. If you’re starting with white paint and want to create yellow, you’ll need to add yellow pigment or yellow paint. But if you’re adjusting an existing yellow to achieve a specific shade, you’ll work with complementary colors and undertone adjustments. Blue is the complementary color to yellow on the color wheel, meaning small amounts of blue will mute or neutralize yellow. Red and orange will shift yellow toward warmer, more golden tones, while white will create lighter, more pastel yellows.
The undertone of your yellow is perhaps the most important consideration. Undertones refer to the subtle secondary colors that influence how a color appears. A yellow might have warm undertones (leaning toward orange or red), cool undertones (leaning toward green), or neutral undertones. Understanding these nuances will help you create yellows that work harmoniously with your existing décor and lighting conditions.
Essential Supplies for Mixing Yellow Paint
To mix yellow paint successfully, you’ll need the right tools and materials. Having a well-organized workspace with quality supplies makes the difference between frustrating experiments and professional results.
- Base paint: High-quality white latex or acrylic paint serves as your foundation. Choose a paint with good coverage and consistent pigment distribution.
- Yellow pigment or paint: You can use concentrated yellow pigment, universal tinting colors, or pre-made yellow paint depending on your project scale.
- Color adjusters: Keep red, orange, blue, and white paint on hand for fine-tuning your yellow shade.
- Mixing containers: Use clean, clear plastic or glass containers so you can see the color accurately. Avoid containers with residual colors that might skew your results.
- Stirring tools: Wooden sticks, paint paddles, or dedicated stirring implements help you mix thoroughly. Avoid tools that might shed fibers into your paint.
- Measuring tools: Precise ratios are crucial for consistency. Use measuring spoons, syringes, or small graduated containers.
- Protective equipment: Wear gloves, safety glasses, and work in a well-ventilated area to protect yourself from paint fumes and potential skin contact.
- Test surfaces: Have white poster board, paint swatches, or sample boards ready for testing your color.
- Lighting: Natural daylight and artificial lighting both matter when evaluating color. Test your yellow under the same conditions where it will ultimately be used.
Investing in quality supplies from reputable home improvement retailers like Home Depot or Lowe’s ensures your mixing efforts yield professional results.
Basic Yellow Paint Mixing Techniques
The foundation of successful paint mixing relies on understanding proper technique and methodology. Whether you’re creating DIY paint colors for the first time or refining your skills, these fundamental techniques will serve you well.
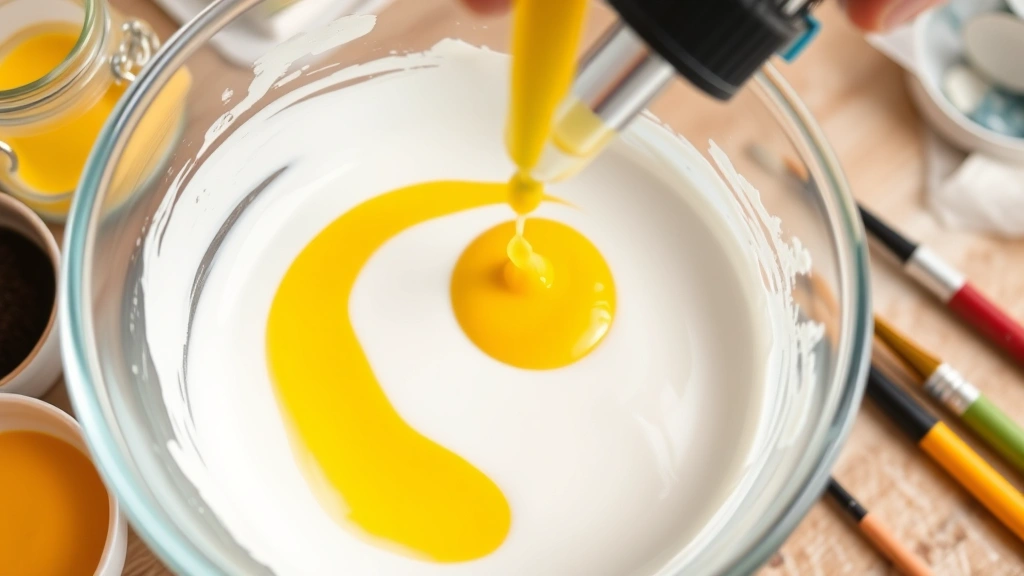
Start with your base white paint in a clean mixing container. The amount you prepare depends on your project size, but it’s better to mix slightly more than you need so you can maintain consistency if additional paint is required. Pour your white paint into the container, filling it approximately three-quarters full to allow room for pigment additions and mixing.
Add your yellow pigment or paint slowly and deliberately. The key word here is slowly. It’s far easier to add more pigment than to remove it if you’ve added too much. Begin with a small amount—roughly a teaspoon of pigment per cup of white paint—and stir thoroughly for at least two minutes. Use a mixing motion that reaches the bottom and sides of the container to ensure even distribution.
After your initial mix, observe the color carefully under good lighting. The color will appear different as it dries, so allow a small sample to dry on a test surface before making final assessments. This drying process typically takes 15-30 minutes depending on humidity and paint type. Once dry, compare your sample to your target color. If you need to deepen the yellow, add more pigment in small increments. If the yellow is too intense, add white paint to lighten it.
Maintain detailed records of your mixing ratios. Write down exactly how much base paint you used and precisely how much pigment or color additive you added. These notes become invaluable when you need to mix additional batches or when you want to replicate the color in future projects.
Creating Different Shades of Yellow
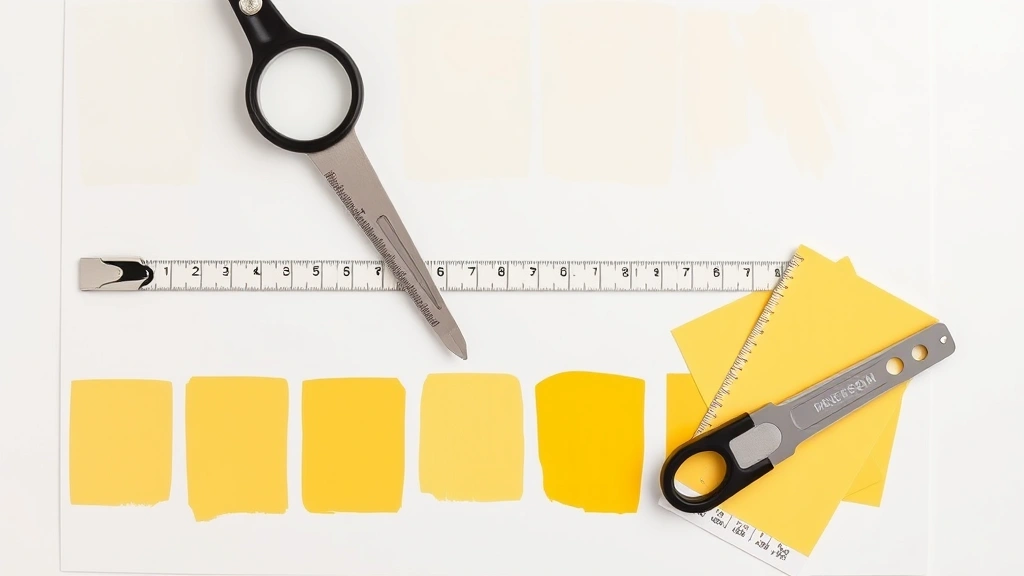
Yellow offers an impressive range of possibilities, from pale buttery tones to deep golden hues and bright sunny shades. Understanding how to create specific yellow variations expands your design options considerably.
Light and Pale Yellows: To create soft, pale yellows suitable for bedrooms or nurseries, start with your white base and add yellow pigment very sparingly. These delicate shades work beautifully with subtle accent techniques in home design. Maintain a ratio of roughly 1 part yellow to 10 parts white. Test frequently as you approach your target shade, as pale yellows are sensitive to small pigment additions.
Golden and Warm Yellows: These rich, inviting yellows work wonderfully in kitchens and dining areas. Begin with your yellow-white mixture and gradually add small amounts of orange or red pigment. Start with a 20:1 ratio of yellow to orange, then adjust to taste. The orange shifts the yellow toward warmer, more sophisticated tones that feel cozy and welcoming. This technique creates yellows that feel less artificial and more naturally occurring.
Bright and Sunny Yellows: For bold, energetic yellows that pop, use a higher concentration of yellow pigment with white. A 1:3 ratio of yellow to white creates vibrant, cheerful tones perfect for accent walls or playrooms. These bright yellows demand careful lighting consideration, as they can feel overwhelming in spaces with excessive natural light.
Muted and Subdued Yellows: To create sophisticated, muted yellows that feel more refined, add tiny amounts of the complementary color—blue. Start conservatively with a 50:1 ratio of your yellow mixture to blue, stirring thoroughly. Blue neutralizes the brightness of yellow, creating earthy, sophisticated tones that work in contemporary and traditional spaces alike.
Golden Ochre Yellows: These earthy, museum-quality yellows combine yellow with small amounts of red and blue. Begin with your base yellow, add a touch of red to warm it, then a smaller touch of blue to create depth. This creates complex, multi-dimensional yellows that feel luxurious and timeless.
Achieving the Perfect Undertones
Undertones are the subtle secondary colors that influence how your yellow is perceived. Mastering undertone adjustment separates amateur color mixing from professional results. Different undertones work better in different contexts, and understanding these distinctions helps you create yellows that harmonize with your space.
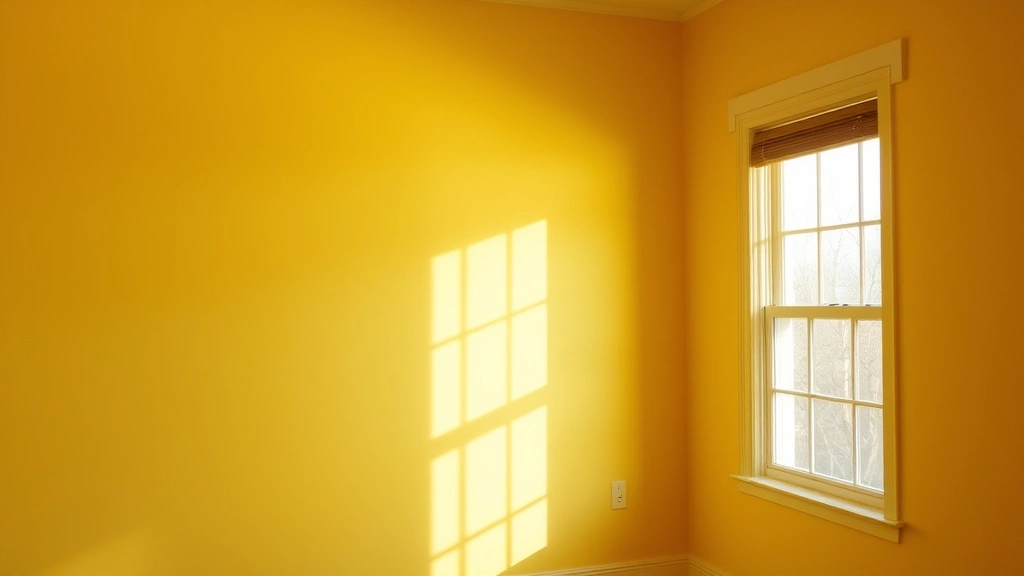
Warm undertones in yellow lean toward orange, red, or golden tones. These yellows feel energetic, welcoming, and slightly more saturated. To create warm-toned yellows, add small amounts of orange or red pigment to your yellow-white base. Warm yellows work exceptionally well in north-facing rooms that lack natural warmth, as they compensate for the cool light. They’re also ideal for kitchens, dining rooms, and spaces where you want to encourage appetite and social interaction.
Cool undertones in yellow lean slightly toward green or contain subtle blue influences. These yellows feel fresh, clean, and slightly more sophisticated than their warm counterparts. To create cool-toned yellows, add minuscule amounts of blue or green pigment to your yellow base. Cool yellows work beautifully in south-facing rooms with abundant natural light, as they prevent the space from feeling overly warm or washed out. They’re excellent choices for bathrooms, laundry rooms, and contemporary spaces.
Neutral undertones represent a balance between warm and cool influences. These yellows feel versatile and work in most contexts without requiring significant lighting adjustments. Creating true neutral yellows requires careful calibration—you’re essentially mixing warm and cool influences to cancel each other out. Start with your base yellow, add a touch of orange, then an equal (or slightly smaller) touch of blue. The goal is visual balance where neither warmth nor coolness dominates.
Testing undertones is essential because they become more apparent once the paint dries and in different lighting conditions. Paint samples on multiple walls in your room and observe them at different times of day. Morning light, afternoon light, and artificial evening light all render colors differently. A yellow that looks perfectly balanced at noon might appear too warm under incandescent bulbs or too cool under LED lighting.
Testing and Matching Your Color
Professional painters know that color testing is non-negotiable. Even small variations in pigment concentration or lighting conditions can produce noticeably different results, which is why systematic testing prevents costly mistakes on large surface areas.
Create test samples using several methods. Paint your mixed yellow onto white poster board or foam core board, creating a sample at least 12 inches square. Larger samples give you a better sense of how the color will appear on walls. Paint multiple coats to achieve the final appearance, as single coats often look different from the finished product.
Place your test samples on the actual walls where the paint will be applied. This is crucial because ambient colors, existing décor, and lighting conditions influence color perception dramatically. A yellow that looks perfect on a test board in your living room might appear entirely different when positioned next to your furniture or under your specific lighting setup.
Observe your samples throughout the day—morning, afternoon, and evening. Note how the color changes under natural light at different times and under your artificial lighting. Pay attention to how the yellow interacts with adjacent colors, trim, and flooring. Does it complement or clash? Does it feel too bright, too muted, too warm, or too cool?
If your mixed yellow doesn’t quite match your target, make adjustments systematically. Change only one variable at a time. If it’s too bright, add white. If it’s too muted, add more yellow pigment. If it’s too warm, add a tiny amount of blue. If it’s too cool, add a touch of orange. Document every adjustment so you can replicate successful results.
Consider using color-matching services available at major paint retailers. Many stores offer computerized color-matching technology that analyzes paint chips or photos and recommends specific paint formulations. While this won’t replace your personal testing, it provides a helpful starting point and validates whether your custom mix is on track.
Common Mistakes to Avoid
Learning from others’ mistakes accelerates your mastery of paint mixing. These common pitfalls trip up many DIYers, but awareness helps you sidestep them entirely.
Adding too much pigment too quickly: This is the most frequent mistake. Pigment is potent, and adding it in large amounts creates overly saturated, artificial-looking yellows. Remember that you can always add more, but removing excess pigment is impossible. Add pigment in small increments, stir thoroughly, test, and assess before adding more.
Inadequate mixing: Thorough mixing ensures even pigment distribution throughout your paint. Insufficient mixing creates streaky, inconsistent color that looks unprofessional once applied. Stir for at least two minutes per pigment addition, reaching all areas of the container including the bottom and sides.
Ignoring lighting conditions: Colors appear dramatically different under various light sources. Testing your yellow only under artificial light, then painting a room with abundant natural light, leads to disappointing results. Always test under the actual lighting conditions where the paint will be used.
Failing to account for dry color: Wet paint appears darker and more saturated than dried paint. A yellow that looks perfect when wet often appears lighter and more muted once dry. Always allow test samples to dry completely before assessing color accuracy.
Poor record-keeping: Failing to document your mixing ratios means you can’t replicate successful colors or adjust unsuccessful ones systematically. Write down everything—base paint amount, pigment type, pigment quantity, and any adjustments made.
Using dirty or contaminated containers: Residual paint or debris in your mixing containers contaminates your fresh mix and skews color results. Always use clean containers, and rinse them thoroughly between uses.
Neglecting sample drying time: Assessing color while samples are still wet gives inaccurate results. Allow samples to dry for the full recommended time (typically 15-30 minutes) before making final color assessments.
Professional Tips for Consistency
Professional painters maintain consistent results across large projects through systematic approaches and quality control measures. These professional techniques apply equally to DIY projects and ensure your yellow paint maintains consistency throughout your space.
Mix all the paint you’ll need for your entire project in one session if possible. This ensures color consistency across the entire area. If you must mix in batches, use identical proportions and the same mixing technique for each batch. Slight variations between batches become noticeable once applied to walls, especially under varying lighting conditions.
Use a paint stirrer or drill-mounted paint mixing paddle for large batches. Hand-stirring, while effective for small quantities, struggles to achieve the thorough mixing that power mixing provides. A paint mixer ensures consistent pigment distribution throughout your entire batch.
Maintain a consistent mixing temperature. Paint and pigments behave differently at various temperatures, which affects how thoroughly they combine and how the final color appears. Mix and store your paint in a climate-controlled environment, avoiding extreme heat or cold.
Label all your paint containers with detailed information: the base paint type and brand, the pigment used, the precise ratio of base to pigment, the date mixed, and any adjustments made. This information proves invaluable if you need to touch up areas later or remix the color for future projects.
Keep a sample of your finished color in a sealed container for future reference. This physical sample serves as a color standard when you need to verify consistency or match the color months or years later.
Invest in quality paint from the start. Premium paints contain higher pigment concentrations and superior binders, which means they require less pigment to achieve desired colors and produce more consistent results. Budget paints often contain fillers and lower-quality pigments that behave unpredictably when mixed.
Consider consulting with professionals at paint specialty stores rather than big-box retailers. Paint specialists often have deeper knowledge of color theory, pigment behavior, and mixing techniques. Many offer personalized color consultation services that help you achieve professional results.
FAQ
Can I mix yellow paint from scratch without a base color?
No, yellow is a primary color that cannot be created by mixing other colors together using standard paint pigments. You must start with either pre-made yellow paint or yellow pigment added to a white or neutral base. However, you can adjust the undertones and saturation of yellow by adding complementary colors like blue, or warm colors like orange and red.
What’s the best ratio for mixing yellow paint?
The ideal ratio depends on your target shade. For pale yellows, use approximately 1 part yellow to 10 parts white. For medium yellows, try 1 part yellow to 5 parts white. For bright, saturated yellows, use 1 part yellow to 3 parts white. Always start conservatively and adjust based on your test results.
How do I fix yellow paint that’s too bright or saturated?
If your yellow is too bright, add white paint to lighten and desaturate it. If it’s too saturated, add small amounts of the complementary color (blue) to mute it. Make adjustments gradually in small increments, stirring thoroughly and testing on a sample surface after each adjustment.
Does the type of paint (latex vs. acrylic) affect yellow color mixing?
The fundamental mixing principles remain the same, but latex and acrylic paints have different properties. Latex paint (water-based) is more common for interior walls and easier to clean. Acrylic paint dries faster and works well for crafts and detailed work. Use compatible pigments and additives for your specific paint type.
How long does mixed yellow paint last?
Properly stored mixed paint lasts several months to a year. Store it in an airtight container in a cool, dark location. Before using stored paint, stir it thoroughly to recombine any separated pigments. If you notice separation that won’t remix or any mold growth, discard the paint.
Can I use food coloring to tint yellow paint?
No, food coloring is water-based and won’t mix properly with latex or acrylic paint. Always use paint-specific pigments, universal tinting colors, or other paint products designed for color mixing. These products are formulated to integrate properly with paint and maintain color stability.
What lighting is best for evaluating yellow paint colors?
Evaluate yellow paint under the actual lighting conditions where it will be used. Test under natural daylight, incandescent bulbs, LED lights, and fluorescent lights if any of these will be present in the space. Yellow appears warmer under incandescent light and cooler under daylight and LED lighting.
How do I match an existing yellow color?
Bring a sample of the existing color to a paint store for computerized color matching. Alternatively, paint your mixed yellow on a board and place it directly next to the existing color under identical lighting. Make small adjustments until the colors match, testing after each adjustment.
Related Posts

Superscript in Google Docs: Expert Tips

Strikethrough in Excel: Easy Steps for Beginners
