
Seed Germination Tips: What Experts Recommend
Starting seeds indoors is one of the most rewarding aspects of gardening, giving you control over plant varieties and timing that store-bought seedlings simply can’t match. Whether you’re a seasoned gardener or picking up a packet of seeds for the first time, understanding how to germinate seeds properly can mean the difference between a thriving garden and disappointing results. The germination process isn’t complicated, but it does require attention to specific conditions that encourage seeds to break dormancy and sprout.
Expert gardeners and horticultural researchers have identified key factors that consistently produce successful seed germination: moisture, temperature, light, and air circulation. Each seed type has unique requirements, but following these fundamental principles will dramatically improve your success rate. This comprehensive guide walks you through everything you need to know about seed germination, from selecting viable seeds to transplanting healthy seedlings.
Understanding Seed Dormancy and Viability
Seeds are living organisms in a state of suspended animation, and understanding this concept is fundamental to successful germination. Dormancy is a protective mechanism that prevents seeds from sprouting at the wrong time—such as in autumn when they’d be killed by frost. Some seeds remain dormant naturally for months or even years, while others are ready to germinate almost immediately under proper conditions.
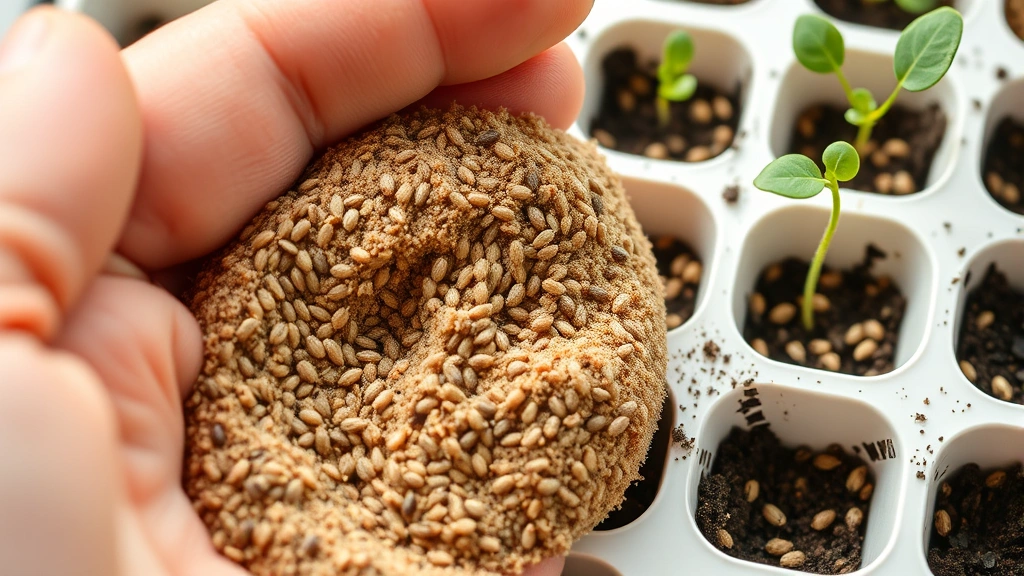
Seed viability refers to the seed’s ability to germinate and produce a healthy plant. Not all seeds are viable, and viability decreases over time. Fresh seeds purchased from reputable suppliers during the current growing season have the highest germination rates. When checking seed packets, look for the germination percentage listed by the supplier—this indicates what percentage of seeds should successfully sprout under ideal conditions.
You can perform a simple viability test before committing seeds to your starting medium. The float test works for large seeds: place seeds in water and discard any that float, as they’re typically hollow or underdeveloped. For a more accurate assessment, use the paper towel method: dampen paper towels, place seeds between them, roll loosely, place in a plastic bag, and keep warm for the recommended germination period. Count how many seeds sprout to determine viability.
Essential Conditions for Successful Germination
Every seed requires four critical conditions to break dormancy and germinate: adequate moisture, appropriate temperature, proper oxygen levels, and—for some species—specific light conditions. Getting these right is the foundation of successful seed starting.
Moisture Requirements
Seeds need consistent moisture to germinate, but not waterlogged conditions. The seed coat must absorb water to soften and allow the embryo to expand and push through. However, seeds sitting in standing water develop mold and rot. The ideal condition is moist but not wet—think of a wrung-out sponge. Most seeds germinate best when the growing medium maintains 50-70% moisture content.
Different germination methods maintain moisture differently. Soil-based starting mixes require careful watering to keep them moist without creating swampy conditions. Covered seed trays help retain moisture and reduce the need for frequent watering. Paper towel methods allow you to monitor moisture visually and adjust easily. Hydrogel crystals are another option; they absorb and slowly release water, maintaining consistent moisture for extended periods.
Temperature Considerations
Temperature dramatically affects germination speed and success rates. Most vegetable and flower seeds germinate between 65-75°F (18-24°C), though some prefer warmer or cooler conditions. Cool-season crops like lettuce and spinach germinate well at 60-65°F, while heat-loving plants like peppers and eggplants need 75-85°F for reliable germination.
Inconsistent temperatures slow germination and increase disease risk. Using a seedling heat mat maintains optimal temperature even when your home is cooler. These affordable devices plug into standard outlets and keep soil 10-20°F warmer than ambient temperature. For apartment dwellers without ideal conditions, placing seed trays on top of refrigerators or in warm closets provides gentle bottom heat.
Oxygen and Air Circulation
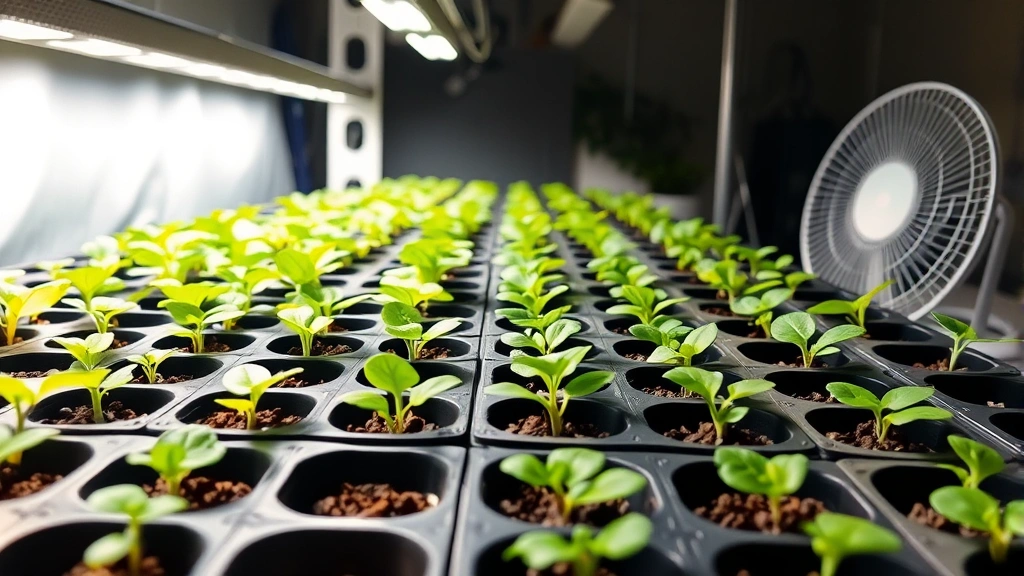
Seeds respire during germination, consuming oxygen and producing carbon dioxide. Poor air circulation creates pockets of carbon dioxide around seeds, inhibiting germination and encouraging fungal diseases like damping-off. Provide gentle air movement with a small oscillating fan set on low speed, positioned 3-4 feet away from seedlings.
Adequate oxygen also depends on your growing medium’s structure. Dense, compacted soil restricts air movement and promotes rot. Fluffy, well-draining seed-starting mixes provide the pore space seeds need for both oxygen access and proper drainage.
Light Requirements
Light requirements vary significantly among seed types. Some seeds need light to germinate—called photoblastic seeds—while others germinate better in darkness. Most common garden seeds are indifferent to light during germination but need bright light immediately after sprouting to prevent leggy, pale seedlings.
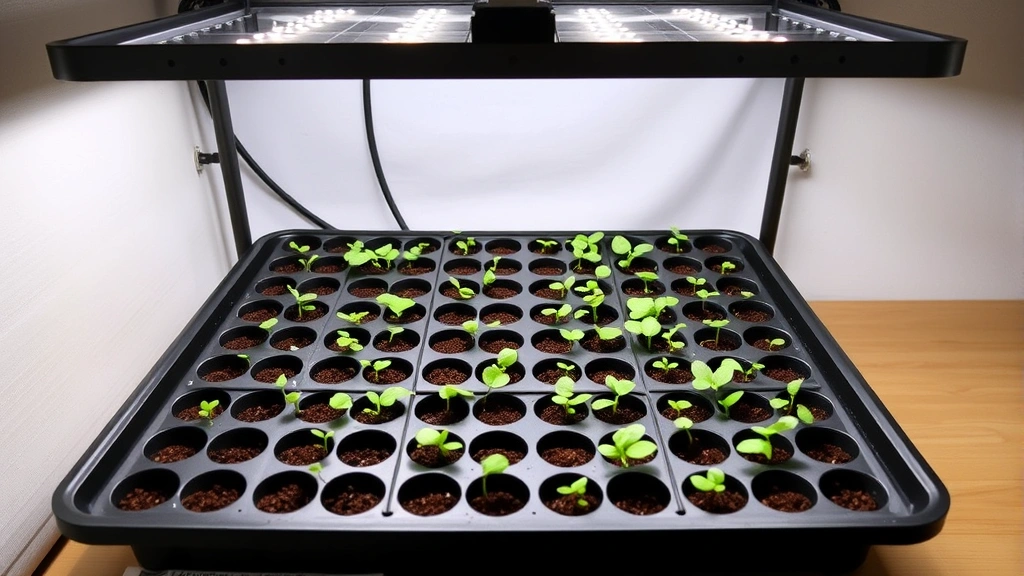
Check individual seed packet instructions for light requirements. Generally, cover seed trays with humidity domes or plastic wrap during germination, then remove covers and provide 14-16 hours of bright light daily once seedlings emerge. Position grow lights 2-3 inches above seedling leaves, raising them as plants grow.
Seed Starting Media and Containers
Selecting appropriate containers and growing media significantly impacts germination success. Your choices affect moisture retention, drainage, disease risk, and seedling development.
Choosing the Right Growing Medium
Commercial seed-starting mixes are formulated specifically for germination and are far superior to garden soil for this purpose. These mixes typically contain peat moss or coco coir, perlite, and vermiculite in proportions that balance moisture retention with drainage and aeration. Garden soil compacts too easily, restricts air movement, and often contains pathogens that cause damping-off disease.
Quality seed-starting mixes are sterile or pasteurized, eliminating fungal spores and harmful bacteria. Popular brands include Jiffy Seed Starting Mix, Espoma Organic Seed Starting Mix, and Burpee Natural Seed Starting Mix. For a budget-friendly option, make your own mix: combine equal parts peat moss, perlite, and vermiculite, then moisten before use.
Container Selection
Seed starting containers range from individual cells to large flats, each with advantages. Cell trays with individual compartments allow seedlings to develop without root competition and minimize transplant shock. Larger flats accommodate more seeds in less space but require careful separation during transplanting. Recycled containers like yogurt cups or newspaper pots work if you drill drainage holes.
Container depth matters: most vegetable and flower seeds need only 1-2 inches of growing medium. Shallow trays are ideal, providing sufficient root space without excessive medium. Ensure all containers have drainage holes—waterlogged roots cause rot and disease.
Humidity domes or plastic wrap covers maintain moisture during germination, but remove them immediately after sprouting to prevent fungal problems. Covers also block air circulation, so provide ventilation once seedlings emerge.
Step-by-Step Germination Process
Follow this systematic approach to maximize germination success across different seed types.
Step 1: Prepare Your Setup
Before opening any seed packets, ensure your germination station is ready. Fill containers with moist seed-starting mix, pressing gently to remove air pockets without compacting. The medium should be moist but not dripping. Set up heat mats if using them, and position grow lights on timers for consistent photoperiods.
Organize seeds by germination temperature needs so you can group them appropriately. Prepare labels for each seed variety—use waterproof markers on plastic labels, as pencil fades and paper deteriorates in moisture.
Step 2: Plant Seeds at Correct Depth
A general rule: plant seeds at a depth equal to their diameter. Tiny seeds like petunias barely press into the surface, while larger seeds like beans go deeper. Check seed packets for specific depth recommendations. Planting too shallow exposes seeds to drying; planting too deep exhausts the seed’s energy reserves before reaching light.
Water gently after planting using a spray bottle to avoid displacing seeds. The goal is moist medium throughout, with no standing water.
Step 3: Maintain Optimal Conditions
Place seeded containers in your prepared germination area with appropriate temperature and humidity. Keep the growing medium consistently moist—check daily and mist with a spray bottle if the surface begins drying. Most seeds germinate within 7-21 days, depending on species and conditions.
Resist the urge to disturb seeds while waiting. Checking constantly and moving containers disrupts the process. Trust your setup and check only when necessary.
Step 4: Monitor and Adjust
Watch for the first sign of sprouting. Some seeds show a tiny root first, while others push a shoot above the surface. Once 50% of planted seeds have sprouted, remove humidity domes or covers and provide bright light immediately. Seedlings without adequate light become leggy and weak, compromising their future growth.
Specific Techniques for Different Seed Types
While basic principles apply universally, certain seed types benefit from specialized germination techniques.
Hard-Coated Seeds
Seeds like beans, peas, and morning glories have tough seed coats that resist water penetration. Scarification—scratching or filing the seed coat—accelerates germination by 24-48 hours. Use fine sandpaper or a nail file to gently abrade one side of the seed, then soak in room-temperature water for 2-4 hours before planting.
Fine Seeds
Tiny seeds like petunias, impatiens, and begonias germinate better when mixed with sand for even distribution. Combine one part seeds with four parts fine sand, then carefully sprinkle the mixture across moist medium. These seeds need light to germinate, so don’t cover them—just maintain humidity with a dome or plastic wrap.
Seeds Requiring Cold Treatment
Many perennials and native plants need cold stratification—exposure to freezing temperatures—to break dormancy. This mimics winter conditions. Stratify seeds by placing them in moist sand or peat in a plastic bag, then refrigerating at 35-40°F for 4-12 weeks, depending on species. Check seed packets for specific cold periods. After stratification, move seeds to warm germination conditions.
Double-Dormant Seeds
Some seeds require both cold and warm periods to germinate. Perform cold stratification, then warm stratification, then cold again. This seems complex, but seed packets provide clear instructions for species requiring this treatment.
Troubleshooting Common Germination Problems
Even experienced gardeners encounter germination challenges. Understanding causes helps you correct problems quickly.
Poor Germination Rates
If fewer than 50% of seeds sprout, several factors might be responsible. Check seed viability first using the paper towel method. Old seeds or those stored improperly germinate poorly. Verify temperature consistency—fluctuating temperatures slow germination significantly. Confirm moisture levels; seeds in dry medium don’t germinate, while waterlogged seeds rot.
Verify light requirements: some seeds need darkness during germination and won’t sprout if exposed to light. Check seed packet instructions carefully.
Damping-Off Disease
Damping-off is the most common seedling problem, caused by fungal pathogens in soil. Affected seedlings collapse at the soil line, appearing as if cut with a knife. Prevention is far easier than treatment: use sterile seed-starting mix, ensure good air circulation with a fan, avoid overwatering, and maintain consistent temperatures.
Once damping-off appears, remove affected seedlings immediately to prevent spread. Improve air circulation and reduce watering frequency. Fungicide sprays have limited effectiveness against established damping-off.
Leggy, Pale Seedlings
Seedlings stretching toward insufficient light become tall and weak. This happens when seedlings emerge but don’t receive adequate illumination. Move grow lights closer—2-3 inches above seedling tops—and ensure 14-16 hours of daily light. Increase air circulation with a fan to promote stockier growth.
Slow Germination
Germination slower than expected usually indicates temperature issues. Most seeds need warmth to germinate quickly. Use a heat mat to increase soil temperature by 10-15°F. Verify you’re using fresh seeds; old seeds germinate slowly or not at all. Check that your growing medium isn’t compacted, restricting oxygen availability.
Caring for Seedlings After Germination
Germination is just the beginning. Proper seedling care determines whether you’ll have healthy transplants ready for the garden.
Lighting
Immediately after sprouting, seedlings need 14-16 hours of bright light daily. Position grow lights 2-3 inches above seedlings, raising them as plants grow to maintain this distance. Fluorescent shop lights work well and cost less than specialty grow lights. LED grow lights are more efficient and produce less heat.
Without adequate light, seedlings become leggy and pale, struggling to establish in the garden. Supplement natural window light with grow lights if seedlings don’t receive 6+ hours of direct sunlight daily.
Watering and Feeding
After germination, water less frequently but more thoroughly, allowing the medium surface to dry slightly between waterings. This encourages deeper root development and prevents fungal diseases. Once seedlings develop their first true leaves (the second set of leaves that appear), begin feeding with diluted liquid fertilizer weekly.
Seed-starting mixes contain minimal nutrients, so supplemental feeding becomes important as seedlings grow. Use half-strength vegetable or flower fertilizer to avoid nutrient burn.
Hardening Off
Before transplanting seedlings outdoors, gradually acclimate them to outdoor conditions in a process called hardening off. This 7-10 day process reduces transplant shock. Begin by placing seedlings in a sheltered outdoor location for 1-2 hours, gradually increasing exposure to wind and direct sun. By the final day, seedlings can handle full outdoor conditions.
Hardening off strengthens stems and prepares foliage for outdoor UV exposure. Skip this step and transplants will wilt severely or die.
Potting Up
When seedlings develop their first true leaves and fill their containers with roots, pot them into larger containers with regular potting soil. This provides more growing space and nutrient reserves before transplanting. Handle seedlings gently by leaves, not stems, which bruise easily. Bury seedlings deeper than they were in starter trays; buried stems develop additional roots.
Continue providing 14-16 hours of light and consistent moisture. Fertilize weekly with half-strength liquid fertilizer. Maintain temperatures between 65-72°F for most seedlings.
Visit our FixWiseHub Blog for additional gardening how-to guides and tips to expand your growing knowledge. If you’re interested in preserving your harvest once you’ve successfully grown plants, learn about how to freeze strawberries, how to freeze peaches, and how to freeze bananas for year-round enjoyment. You might also find our guides on how to store strawberries and how to clean strawberries helpful for managing fresh produce.
Frequently Asked Questions
How long does seed germination typically take?
Germination timing varies by seed type and conditions. Most vegetable and flower seeds germinate within 7-21 days under optimal conditions. Warm-season crops germinate faster than cool-season varieties. Some perennials and native plants require 2-3 weeks or longer. Seed packets provide expected germination timeframes for specific varieties.
Can I germinate seeds without a heat mat?
Yes, though germination may be slower. Place seed trays in warm locations like on top of refrigerators, near (but not touching) heating vents, or in warm closets. Heat mats simply accelerate the process by maintaining consistent, optimal temperatures. Many gardeners successfully germinate seeds without them by choosing warm locations and being patient.
What’s the difference between seed-starting mix and potting soil?
Seed-starting mixes are formulated specifically for germination with fine, lightweight particles that provide excellent moisture retention and aeration without compaction. Potting soil is heavier and contains more nutrients for established plants. Using potting soil for germination can lead to compaction, poor drainage, and damping-off disease. Always use seed-starting mix for germination, then pot up into potting soil.
Should I soak seeds before planting?
Soaking benefits large seeds and hard-coated varieties. Soak beans, peas, and morning glories in room-temperature water for 2-4 hours before planting to speed germination. Tiny seeds don’t benefit from soaking. Most medium-sized seeds germinate adequately without soaking if your growing medium is properly moistened.
Why do some seedlings have spots or discoloration?
Spots on seedlings can indicate fungal or bacterial infections, nutrient deficiencies, or light damage. Improve air circulation and reduce watering frequency to prevent fungal problems. Ensure adequate lighting to prevent pale, weak growth. If spots spread rapidly, remove affected seedlings immediately to prevent disease spread to healthy plants.
Can I reuse seed-starting mix?
Reusing seed-starting mix risks spreading fungal pathogens and damping-off disease. For maximum success, use fresh sterile mix each season. If you must reuse mix, sterilize it first by heating in an oven at 200°F for 30 minutes, allowing it to cool completely before use. This process kills most pathogens but may be more trouble than purchasing fresh mix.
How do I know when seedlings are ready for transplanting outdoors?
Seedlings are ready for transplanting when they develop 4-6 true leaves, are 3-4 inches tall, and have been hardened off. Their stems should be sturdy and green, not pale or leggy. After hardening off for 7-10 days, seedlings can handle outdoor planting. Transplant on cloudy days or in late afternoon to reduce transplant shock.
Related Posts

Superscript in Google Docs: Expert Tips

Strikethrough in Excel: Easy Steps for Beginners
