
Blanching Broccoli: Expert Tips for Perfect Crunch
Blanching Broccoli: Expert Tips for Perfect Crunch
Blanching broccoli is a fundamental cooking technique that transforms this nutrient-dense vegetable into a perfectly tender-crisp side dish or ingredient for countless recipes. Whether you’re preparing broccoli for a weeknight dinner, meal prepping for the week, or freezing it for later use, mastering the blanching process ensures consistent results every time. This method involves briefly boiling the florets in salted water followed by an immediate ice bath to halt the cooking process, preserving vibrant color, essential nutrients, and that desirable crunch.
The beauty of blanching lies in its simplicity and reliability. Unlike steaming or roasting, which can produce inconsistent textures depending on floret size and heat distribution, blanching delivers uniform results. The technique is used by professional chefs, home cooks, and food preservation experts alike because it works. In this comprehensive guide, we’ll walk you through every step of the blanching process, explain the science behind why it works, and share expert tips to help you achieve restaurant-quality broccoli every single time.
What Is Blanching and Why It Matters
Blanching is a two-step cooking process that begins with immersing food in boiling salted water for a short duration, typically between two and five minutes depending on the vegetable’s size and desired tenderness. The second crucial step involves immediately transferring the cooked vegetables to an ice bath—a bowl filled with ice water—where the cold temperature rapidly stops the cooking process. This technique is distinct from simply boiling vegetables because it prevents overcooking and mushiness.
The science behind blanching explains its effectiveness. When vegetables are placed in boiling water, heat penetrates the cell walls, softening the vegetable while maintaining its structural integrity. Simultaneously, the heat deactivates enzymes responsible for degradation, which is why blanched vegetables retain their color and nutritional value better than unblanched alternatives. The ice bath is equally important; it stops enzymatic activity immediately and prevents the vegetable from continuing to cook from residual heat, which would result in a mushy texture.
For broccoli specifically, blanching offers several advantages. It softens the florets while maintaining their firm bite, making them more pleasant to eat than raw broccoli for some people. Blanching also neutralizes any bitter compounds, making the vegetable taste milder and more palatable to children and those sensitive to strong vegetable flavors. Additionally, blanching is the recommended preparation method before freezing broccoli for long-term storage, as it preserves texture and color far better than freezing raw florets.
Understanding the fundamentals of proper technique ensures you can apply blanching successfully to broccoli and other vegetables. The process is forgiving enough for beginners yet precise enough to satisfy experienced cooks seeking consistent results.
Essential Equipment and Ingredients
Successful blanching requires minimal equipment, most of which you likely already have in your kitchen. The essential items include a large pot (at least three to four quarts), a slotted spoon or spider strainer, a colander for draining, and a large bowl for the ice bath. Optional but highly useful tools include a kitchen timer for accuracy, a thermometer to monitor water temperature, and a mesh strainer basket that fits inside your pot for easier removal of multiple florets simultaneously.
The ingredients are equally simple: fresh broccoli, water, salt, and ice. For every quart of water, use approximately one tablespoon of salt. The salt serves multiple purposes—it seasons the broccoli, raises the water’s boiling point slightly for faster cooking, and helps preserve the vegetable’s bright green color by maintaining the pH level. Don’t skip the salt; it makes a noticeable difference in the final product’s flavor and appearance.
When selecting broccoli, choose heads with tight, dark green florets and firm stems. Avoid broccoli with yellowing florets or loose clusters, as these indicate age and may result in mushy texture even with proper blanching. The size of your florets matters significantly for cooking time, so try to select broccoli with uniformly sized florets or cut them to similar sizes before blanching. Florets should be roughly two to three inches in diameter for optimal cooking.
Prepare your ice bath before you begin blanching. Fill a large bowl with ice and cold water, making it large enough to accommodate all your broccoli florets. Having the ice bath ready means you can transfer broccoli immediately after boiling, preventing any delay that would result in overcooking. Some cooks prefer to add a few tablespoons of salt to the ice bath as well, as this further lowers the temperature and accelerates cooling.
Step-by-Step Blanching Instructions
Step 1: Prepare Your Broccoli
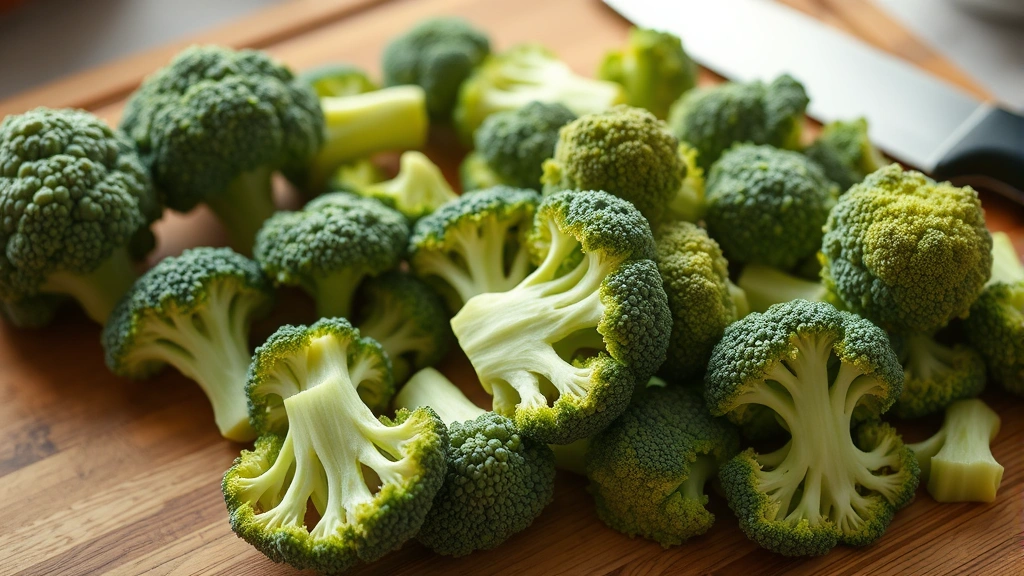
Begin by rinsing your broccoli thoroughly under cool running water to remove any dirt or debris. Cut the broccoli into uniform florets, keeping stems attached when possible. The ideal size is about two to three inches from crown to stem end. If you have very large florets, consider cutting them in half lengthwise to ensure even cooking. Remove any yellowed or damaged outer leaves. Pat the florets dry with a clean kitchen towel or paper towels. Moisture on the surface can cause splattering when the florets enter the hot water.
Step 2: Bring Water to a Rolling Boil
Fill your large pot with water, using approximately one quart of water per two cups of broccoli florets. Add one tablespoon of salt per quart of water. Place the pot over high heat and bring the water to a rolling boil—you should see vigorous, continuous bubbling across the entire surface. This typically takes eight to ten minutes depending on your pot size and stove power. Avoid starting the blanching process if the water is merely simmering; the water must be at a true rolling boil to ensure proper cooking and color retention.
Step 3: Add Broccoli and Set Timer
Carefully add your prepared broccoli florets to the boiling water. Work in batches if necessary to avoid overcrowding, which would lower the water temperature and result in uneven cooking. It’s better to blanch in two or three batches than to overcrowd the pot. Immediately set your kitchen timer. The exact time depends on floret size, but typically ranges from three to four minutes for medium florets. Larger florets may require four to five minutes, while smaller pieces might need only two to three minutes. We’ll discuss specific timing guidelines in the next section.
Step 4: Monitor for Doneness
While the broccoli cooks, don’t wander away from the stove. After about half the cooking time has elapsed, check one floret by removing it with a slotted spoon. The broccoli should be bright green and tender-crisp—it should yield slightly when pressed with a fork but still maintain its firm structure. The floret should not be soft or mushy. If it’s still too firm, return it to the water and check again in thirty seconds. This hands-on approach ensures you achieve your preferred texture.
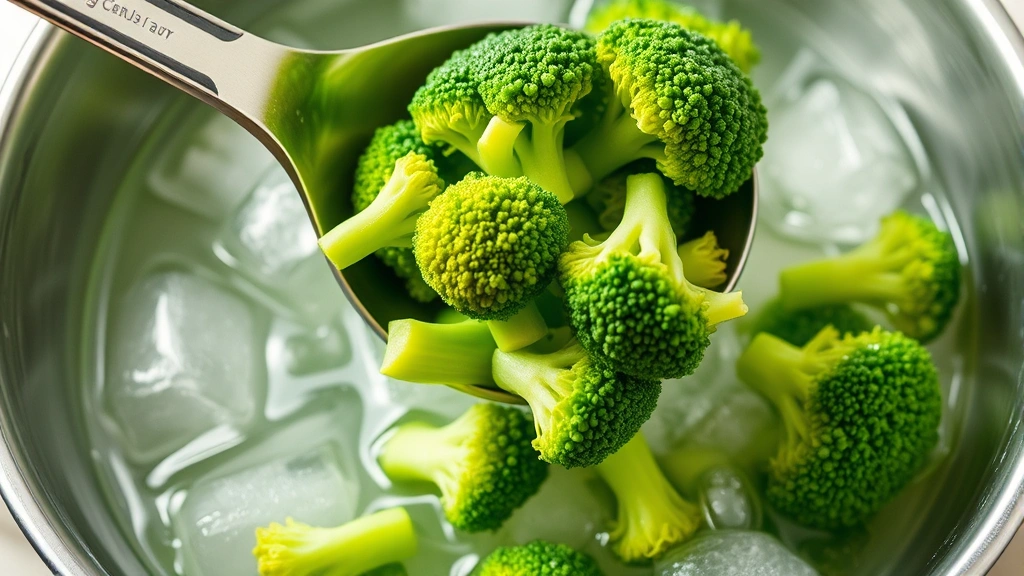
Step 5: Transfer to Ice Bath Immediately
When the broccoli reaches the desired tenderness, use a slotted spoon or spider strainer to quickly transfer all florets to your prepared ice bath. Speed is essential here; every second the broccoli remains in hot water continues the cooking process. Stir the broccoli gently in the ice bath for about thirty seconds to ensure all surfaces are cooled. The ice bath should be cold enough that the broccoli stops steaming within a minute or two.
Step 6: Drain and Dry
Once the broccoli has cooled completely (usually two to three minutes), transfer it to a colander and let it drain thoroughly. You can gently shake the colander to remove excess water or spread the florets on a clean kitchen towel to air dry. Removing excess moisture prevents ice crystal formation if you’re planning to freeze the broccoli, and it prevents the broccoli from becoming waterlogged if you’re serving it immediately.
Timing Guidelines for Perfect Results
Achieving the perfect texture depends entirely on blanching time, which varies based on floret size and your personal preference regarding crunchiness. These guidelines will help you determine the ideal duration for your specific situation.
Small Florets (1 to 2 inches)
Small florets require the shortest blanching time to prevent overcooking. Blanch for two to three minutes. Check doneness at the two-minute mark; the florets should be bright green and tender but still quite crisp. If you prefer slightly softer broccoli, extend to three minutes, but be careful not to exceed this time or the florets will become mushy.
Medium Florets (2 to 3 inches)
This is the most common size and represents the sweet spot for blanching. Blanch for three to four minutes. The three-minute mark produces very crisp broccoli suitable for raw applications or salads after blanching. Four minutes yields a more tender texture ideal for serving as a hot side dish or for incorporating into cooked recipes. Most home cooks find three and a half minutes produces the ideal balance of tenderness and crunch.
Large Florets (3 to 4 inches or Whole Heads)
Large florets and whole broccoli heads require longer cooking to ensure the center is tender. Blanch for four to five minutes. Start checking at four minutes; if the thickest part of the stem still resists a fork, continue cooking. Five minutes is typically the maximum before texture becomes undesirably soft.
Thick Stems
If you’re blanching thick broccoli stems separately from florets, they require additional time. Peel away the tough outer layer with a vegetable peeler, cut the stems into two-inch pieces, and blanch for four to five minutes. Stems are denser than florets and need longer cooking to achieve tenderness.
Adjusting for Altitude
If you live at high altitude (above 3,000 feet), water boils at a lower temperature, requiring slightly longer blanching times. Add approximately thirty seconds to one minute to the recommended times listed above. Use a thermometer to verify water is reaching 200°F or higher before beginning.
Cooling and Storage Methods
The cooling phase is as critical as the cooking phase. Improper cooling results in broccoli that continues cooking from residual heat, negating all the precision you invested in blanching. Here are the best practices for cooling and storing blanched broccoli.
Ice Bath Cooling
The ice bath is the gold standard for cooling blanched vegetables. The extremely cold temperature immediately halts all cooking processes and sets the bright green color. Use a ratio of approximately one part ice to one part water in your bath. If the ice melts too quickly and the water warms up, add more ice. For best results, prepare a fresh ice bath for each batch of broccoli rather than reusing the same water. This ensures consistently cold temperatures throughout the blanching process.
Immediate Drainage
After cooling in the ice bath for two to three minutes, transfer the broccoli to a colander and drain thoroughly. Excess water can dilute flavors and promote bacterial growth during storage. For freezing purposes, removing moisture is especially important because ice crystals form on wet surfaces and can damage cell structure. Spread the cooled broccoli on a clean kitchen towel and allow it to air dry for five to ten minutes, or gently pat it dry with paper towels.
Refrigeration Storage
Blanched broccoli stores in the refrigerator for three to five days. Place the dried florets in an airtight container or resealable plastic bag. Store at 32°F to 35°F, which is the coldest part of your refrigerator, typically the back of the bottom shelf. Blanched broccoli keeps longer than raw broccoli because the blanching process has deactivated the enzymes responsible for deterioration. However, it will gradually lose quality over time, so use it within five days for best results.
Freezing for Long-Term Storage
Blanching is the recommended preparation method before freezing broccoli. Blanched and properly dried florets can be frozen for eight to twelve months with minimal quality loss. Flash freeze by spreading the dried broccoli on a baking sheet and placing it in the freezer for two to three hours until completely frozen. Then transfer to freezer bags or airtight containers, removing as much air as possible. Proper freezing maintains texture and color far better than freezing raw broccoli, which becomes mushy when thawed because ice crystals damage cell walls.
Vacuum Sealing
For the absolute best long-term storage, use a vacuum sealer to remove all air from freezer bags before freezing. Vacuum-sealed blanched broccoli maintains quality for up to fourteen months. This method is particularly worthwhile if you’re preserving large quantities for extended periods.
Common Mistakes to Avoid
Even with clear instructions, several common mistakes can compromise your blanching results. Learning to recognize and avoid these pitfalls ensures consistent success.
Mistake 1: Skipping the Ice Bath
Perhaps the most common error is failing to use an ice bath or using insufficiently cold water. Some cooks simply drain the broccoli in a colander or rinse it under cold tap water. This approach allows residual heat to continue cooking the broccoli, resulting in mushy texture and loss of bright color. The ice bath is not optional; it’s essential to the blanching process. Without it, you’re simply boiling broccoli, not blanching it.
Mistake 2: Overcrowding the Pot
Adding too much broccoli at once lowers the water temperature, resulting in uneven cooking and longer cooking times than anticipated. This causes some florets to overcook while others remain undercooked. Always blanch in batches if necessary, allowing the water to return to a rolling boil between batches. The extra few minutes required for multiple batches is worth the improved results.
Mistake 3: Incorrect Water Temperature
Beginning blanching with water that’s merely simmering rather than at a rolling boil produces inconsistent results. The broccoli cooks more slowly, and the lower temperature doesn’t properly deactivate enzymes, resulting in color loss and faster deterioration. Always wait for vigorous, continuous boiling before adding broccoli.
Mistake 4: Imprecise Timing
Guessing at blanching time rather than using a timer is a recipe for inconsistency. Even thirty seconds makes a noticeable difference in texture. Use a kitchen timer every single time, checking doneness at the recommended time rather than relying on appearance or intuition.
Mistake 5: Uneven Floret Sizes
Blanching florets of vastly different sizes results in some being perfectly cooked while others are either raw or mushy. Spend a few extra minutes cutting florets to uniform sizes before blanching. This single step dramatically improves consistency.
Mistake 6: Storing With Excess Moisture
Failing to thoroughly dry broccoli before storage, especially before freezing, promotes ice crystal formation and deterioration. Take the time to drain and dry the broccoli completely before storing. This step significantly extends shelf life and maintains quality.
Mistake 7: Blanching Without Salt
Some cooks omit salt to reduce sodium intake, but salt serves important purposes beyond flavor. It raises the boiling point, maintains pH for color retention, and seasons the vegetable. Use the recommended amount of salt; the broccoli absorbs only a small portion.
Using Blanched Broccoli in Recipes
Blanched broccoli is incredibly versatile and can be incorporated into countless dishes. The blanching process makes it more tender than raw broccoli while maintaining better texture than fully cooked broccoli in many applications. Here are popular ways to use your perfectly blanched broccoli.
Cold Salads and Sides
Blanched broccoli is excellent in cold salads where you want tender-crisp vegetables. Toss with your favorite vinaigrette, add to grain bowls, or combine with other blanched vegetables like carrots and cauliflower. The bright green color makes salads visually appealing, and the texture is superior to raw broccoli for those who find raw broccoli too tough.
Stir-Fries and Asian Dishes
Blanched broccoli is perfect for quick stir-fries. Since it’s already partially cooked, it requires only brief reheating in the wok or skillet with your sauce and other ingredients. This approach ensures the broccoli doesn’t overcook and become mushy while other ingredients finish cooking. Add blanched broccoli in the final minute of cooking for best results.
Casseroles and Baked Dishes
Many casserole recipes call for partially cooked broccoli to prevent overcooking during the baking process. Blanched broccoli is ideal for this purpose. It will soften further during baking but won’t become mushy. Use blanched broccoli in cheese sauce casseroles, cream-based dishes, and gratins.
Freezer Meals and Meal Prep
Blanched broccoli is perfect for meal prepping. Freeze in portions and add directly to soups, stews, and curries without thawing. The blanching process means the broccoli is safe to eat after just a few minutes of reheating. This saves significant cooking time during busy weeknights.
Soups and Broths
Add blanched broccoli to vegetable soups, chicken broth, and cream soups. Since it’s already cooked, add it near the end of cooking to maintain texture. You can also puree blanched broccoli with cream or broth to create creamy broccoli soup without the long cooking time required for raw broccoli.
Steamed Vegetables
Blanched broccoli can be reheated by steaming for just one to two minutes, making it quick to prepare as a side dish. Serve with melted butter, lemon juice, garlic, or your favorite sauce. The bright color and tender texture make it an elegant addition to any plate.
FAQ
How long does blanched broccoli last in the refrigerator?
Properly blanched and stored broccoli keeps in the refrigerator for three to five days in an airtight container. Store it in the coldest part of your refrigerator, typically the back of the bottom shelf. The blanching process extends shelf life compared to raw broccoli by deactivating enzymes responsible for deterioration.
Can you blanch broccoli without an ice bath?
While technically possible, blanching without an ice bath defeats the purpose of the technique. Without cold water to stop the cooking process, the broccoli will continue cooking from residual heat, resulting in mushy texture and color loss. The ice bath is essential to proper blanching. If you don’t have ice available, you can use ice-cold tap water, though it’s less effective and may require changing the water multiple times.
What’s the difference between blanching and steaming broccoli?
Blanching involves boiling broccoli in salted water followed by immediate cooling in an ice bath. Steaming involves cooking broccoli with steam rather than direct contact with water. Blanching produces more consistent results and better color retention. Steaming is quicker but produces less uniform results depending on floret size and steam distribution. Many cooks prefer blanching for preservation purposes and when preparing large quantities.
Can you blanch frozen broccoli?
Blanching frozen broccoli is unnecessary since commercial frozen broccoli has already been blanched and frozen at the processing facility. Cooking frozen broccoli directly by steaming, boiling, or roasting is the standard approach. Adding an extra blanching step would result in overcooking and mushy texture.
How do you know when blanched broccoli is done?
Properly blanched broccoli should be bright green and tender-crisp. It should yield slightly when pressed with a fork but maintain its firm structure. The thickest part of the floret should not be mushy or falling apart. Start checking at the recommended time for your floret size and adjust future batches based on your texture preference.
Is it necessary to salt the blanching water?
Yes, salt serves multiple important purposes beyond flavor. It raises the water’s boiling point, which slightly accelerates cooking. Salt maintains the pH level, which is crucial for retaining the broccoli’s bright green color. Additionally, salt seasons the broccoli as it cooks. Use approximately one tablespoon of salt per quart of water.
Can you reblanch broccoli?
Reblanching (blanching already-blanched broccoli) is not recommended. The broccoli has already been exposed to heat and will become mushy if blanched again. If you need to reheat blanched broccoli, use gentler methods like steaming for one to two minutes or adding it to hot dishes in the final minutes of cooking.
What should you do if your ice melts during blanching?
If your ice bath water warms significantly, add more ice or replace the water entirely with fresh ice-cold water. The bath must remain very cold to effectively stop the cooking process. If you’re blanching multiple batches, consider preparing a fresh ice bath for each batch rather than reusing the same water.
Can you blanch broccoli stems separately?
Yes, broccoli stems can be blanched separately from florets. Peel away the tough outer layer with a vegetable peeler, cut stems into two-inch pieces, and blanch for four to five minutes—longer than florets because stems are denser. Blanched stems are tender and delicious; don’t discard them.
How does blanching affect broccoli’s nutritional value?
Blanching can cause minor nutrient loss, particularly for water-soluble vitamins like vitamin C. However, the loss is minimal—approximately ten to fifteen percent—when blanching time is kept short (three to four minutes). The benefits of blanching for preservation, texture, and color retention often outweigh the minor nutrient loss. Additionally, properly blanched and frozen broccoli retains nutrients better during long-term storage than raw broccoli, which deteriorates quickly.
Related Posts

Superscript in Google Docs: Expert Tips

Strikethrough in Excel: Easy Steps for Beginners
