
How to Smoke a Turkey: Expert Guide
How to Smoke a Turkey: Expert Guide to Perfectly Smoked Poultry
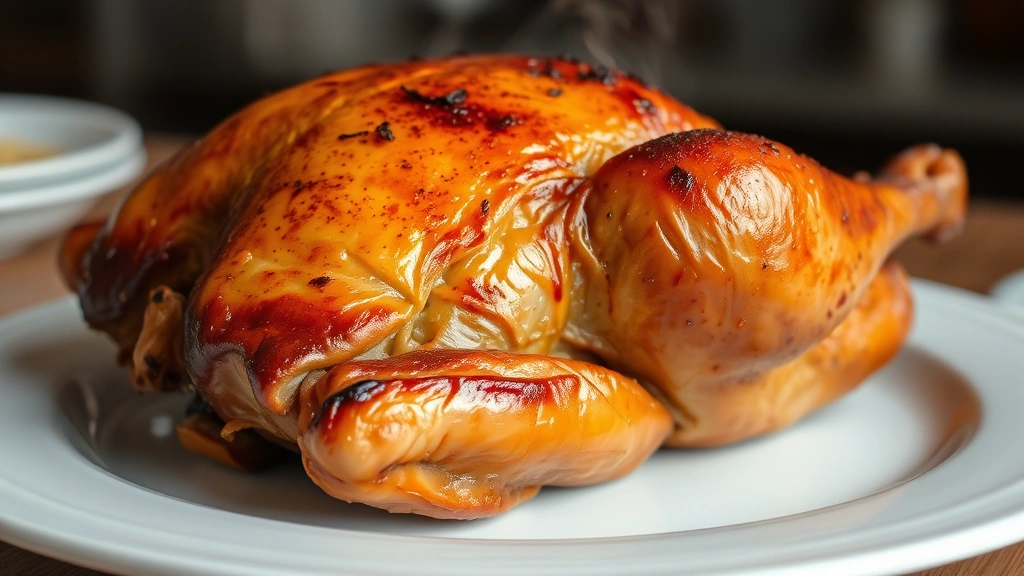
There’s something almost magical about pulling a beautifully smoked turkey off the grill. The mahogany skin crackles under your teeth, the meat inside stays incredibly moist, and that smoky flavor permeates every bite. It’s the kind of dish that makes people ask for your secrets before they’ve even finished their first plate. The truth? Smoking a turkey isn’t some exclusive skill reserved for pitmaster legends. With the right approach, proper planning, and a few key techniques, you can absolutely nail this at home.
Unlike roasting, which relies on dry heat to cook the bird, smoking uses low temperatures and wood smoke to transform your turkey into something genuinely special. The process takes patience—we’re talking 12 to 16 hours depending on your bird’s size—but most of that time is hands-off. You’ll spend far less active time than you might expect, and the results justify every minute of planning.
This guide walks you through everything from selecting the right turkey to carving the finished product. Whether you’re a seasoned grill master or picking up your first smoker, you’ll find actionable steps that actually work.
Choosing and Preparing Your Turkey
The foundation of excellent smoked turkey starts with selecting the right bird. Fresh turkeys are preferable to frozen ones because they smoke more evenly and develop better bark—that desirable crispy, flavorful exterior. If you’re working with a frozen turkey, you’ll need to plan ahead for thawing. Understanding how to defrost chicken applies similarly to turkey; the safest method is refrigerator thawing at about 24 hours for every 4-5 pounds of weight. For a 14-pound turkey, expect 3 to 4 days of thawing time. If you’re in a time crunch, how to defrost chicken fast using cold water can work too—submerge the wrapped turkey in cold water, changing the water every 30 minutes, allowing roughly 30 minutes per pound.
Size matters when smoking. A turkey between 12 and 16 pounds is ideal for most home smokers. Anything significantly larger becomes unwieldy and prone to uneven cooking, while smaller birds can dry out more easily. Look for birds with good plumage coverage—no tears or bald spots—and avoid any with discoloration or off-putting odors.
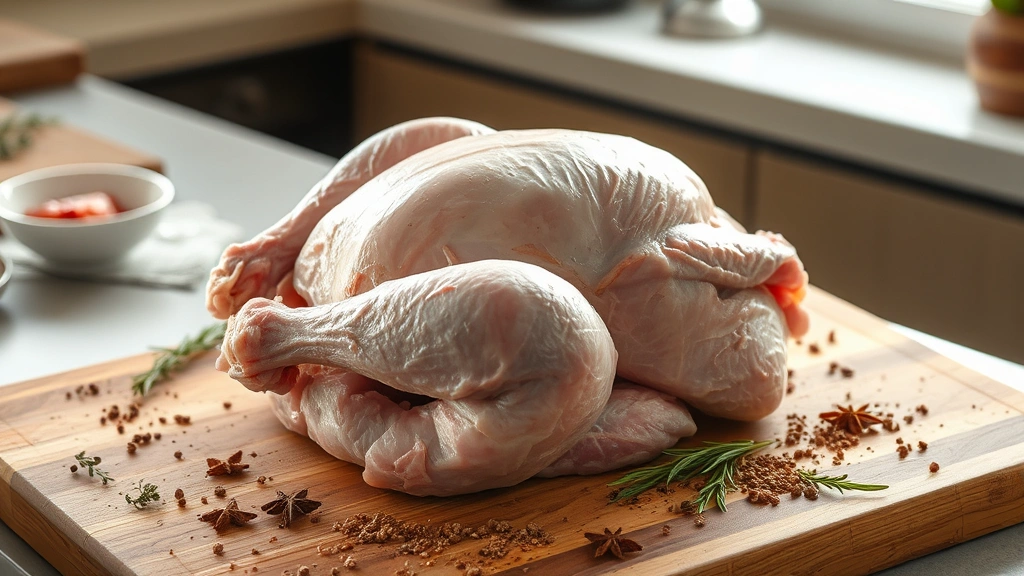
Before smoking, remove the giblets and neck from the cavity. Rinse the entire bird inside and out under cool running water, then pat it completely dry with paper towels. This moisture removal is critical; a wet turkey won’t develop proper bark and will take longer to smoke. Don’t skip this step.

Essential Equipment and Setup
Your smoker is the star of this show, and different types require slightly different approaches. Offset barrel smokers, drum smokers, ceramic kamados, and pellet smokers all work beautifully for turkey—the key is understanding your specific equipment and how it maintains temperature. Before smoking day, run a test burn to ensure your smoker holds steady at 225°F to 250°F.
You’ll need a reliable meat thermometer—ideally an instant-read digital one for quick checks. Place the probe in the thickest part of the thigh without touching bone; this is your temperature guide. Many pitmasters use two thermometers: one for the thigh and one for the breast, since these areas cook at slightly different rates.
Wood selection dramatically influences flavor. Oak, hickory, and pecan are classic choices that produce robust, balanced smoke. Apple and cherry woods offer milder, slightly sweet profiles. Avoid softwoods like pine or fir, which impart bitter, unpleasant flavors. Start with about 4 to 6 chunks of smoking wood; you’ll add more as the process continues.
Have these items ready before you begin: a spray bottle filled with apple juice or butter mixture for maintaining moisture, a turkey lifter or sturdy tongs, heat-resistant gloves, and a reliable timer. Setting up your space beforehand eliminates frustration during the actual smoking process.
Brining and Seasoning Strategies
Brining is optional but highly recommended for smoked turkey. A basic wet brine involves dissolving salt and sugar in water, submerging the turkey, and refrigerating for 12 to 24 hours. This process infuses moisture throughout the meat and seasons it deeply, resulting in incredibly juicy final results. A simple brine uses 1 cup salt and 1 cup brown sugar per gallon of water, plus aromatics like bay leaves, peppercorns, and fresh herbs.
If you’re short on time or prefer dry-brining, that works too. Rub salt inside and outside the turkey, cover loosely, and refrigerate for 8 to 12 hours. Dry-brining creates crisper skin and is less messy than wet-brining.
After brining, rinse the turkey thoroughly and pat it dry again. This is when you apply your seasoning rub. A basic formula combines brown sugar, paprika, garlic powder, onion powder, black pepper, and a touch of cayenne. You can certainly get creative—think about flavor combinations like how to season a blackstone for inspiration on layering flavors, then adapt those principles to your turkey rub. Apply the rub generously inside the cavity and under the skin for maximum impact.
The Smoking Process Step-by-Step
Start your smoker about an hour before you plan to place the turkey on the grates. Get it running at 225°F to 250°F with your wood smoke established. When you’re ready, place the turkey breast-side up on the grates, positioning it away from direct heat if your smoker has hot spots.
Insert your meat thermometer into the thigh without touching bone, position your spray bottle nearby, and set your timer for checking progress. Every 45 minutes to an hour, spritz the turkey with your apple juice mixture to maintain moisture and help develop bark. This step makes a noticeable difference in the final texture.
Monitor your smoker’s temperature religiously. Fluctuations of 25°F are acceptable, but wild swings compromise cooking consistency. If your temperature drops, add charcoal and adjust vents. If it’s climbing too high, partially close vents or move your heat source slightly.
Around the 2-hour mark, check if your turkey is browning too quickly. If the skin is darkening faster than you’d like, tent it loosely with aluminum foil. This protects the exterior while the interior continues cooking. You can remove the foil during the final hour to re-crisp the skin.
Temperature Management and Timing
The golden rule: smoke until the thigh meat reaches 165°F when measured with your thermometer. For a 14-pound turkey at 225°F to 250°F, expect approximately 13 to 15 hours of smoking time. This breaks down to roughly 50 to 60 minutes per pound, though variables like outside temperature, smoker consistency, and turkey size create variation.
Check the thigh temperature starting around hour 12. Once it hits 160°F, you’re in the home stretch—usually 30 to 60 minutes remaining. Don’t rush this final phase by cranking heat; steady, low temperature produces better results than high-heat sprints.
The breast meat cooks faster than thighs, so if your breast reaches 165°F well before the thighs, that’s normal and not a problem. The meat will continue cooking slightly after removal from the smoker through carryover cooking, so consider pulling the turkey when the thigh hits 162°F to 163°F for perfectly cooked, juicy results.
Finishing Touches and Resting
Once your turkey reaches target temperature, transfer it carefully to a cutting board or serving platter. This is where resting becomes absolutely essential. Let the turkey rest for at least 20 to 30 minutes, loosely tented with foil. During this time, the meat’s muscle fibers relax, allowing them to reabsorb juices that were driven toward the surface during cooking. Cutting into the turkey before resting causes those precious juices to pour out onto the board instead of staying in your meat.
While the turkey rests, you can prepare any finishing elements. Brush the skin with melted butter mixed with fresh herbs for added richness, though honestly, a perfectly smoked turkey needs little enhancement. If how to reheat steak principles teach us anything, it’s that respecting resting time dramatically improves texture and flavor in smoked meats.
Carving is straightforward: remove the legs and thighs first by pulling them away from the body, then slice the breast meat parallel to the breastbone. The smoked turkey will have a beautiful pink smoke ring just beneath the surface—this is a sign of successful smoking and is completely safe to eat.
Troubleshooting Common Issues
Dry meat: This usually indicates either overcooking or insufficient brining. Next time, ensure you’re using a meat thermometer rather than guessing, and commit to brining—it’s genuinely transformative.
Uneven cooking: If the breast finishes cooking significantly before the thighs, rotate your turkey 180 degrees halfway through smoking. Also consider your smoker’s hot spots and adjust placement accordingly.
Pale skin without bark: Bark develops through a combination of factors: proper seasoning, adequate smoke, and time. If your skin looks pallid, you’re likely not smoking long enough or your smoke is too thin. Ensure wood is actively smoking, not just smoldering.
Temperature won’t stabilize: Check your smoker’s seals and vents. Air leaks cause temperature swings. Adjust your vents incrementally rather than making dramatic changes; small adjustments take time to register.
Bitter flavor: This indicates either the wrong wood type (softwoods), too much smoke (oversmoking), or creosote buildup. Use hardwoods only, limit smoke to steady, thin wisps, and ensure your smoker is clean before starting.
Frequently Asked Questions
How far in advance can I prepare my turkey for smoking?
If you’re brining, do it 12 to 24 hours before smoking. Apply your rub 2 to 4 hours before placing the turkey on the smoker, or even the night before if you’re dry-brining. Remove the turkey from the refrigerator about 30 to 45 minutes before smoking to allow it to come closer to room temperature, which promotes more even cooking.
Can I smoke a turkey that’s already been thawed in the refrigerator?
Absolutely. Thawed turkey smokes beautifully and often more evenly than fresh turkey. Just ensure it’s completely thawed before smoking. When understanding how to defrost chicken, the same principles apply to turkey—complete thawing ensures consistent cooking throughout.
What’s the difference between a smoke ring and undercooked meat?
The smoke ring is a pink layer just beneath the surface caused by smoke penetration and a chemical reaction between the meat’s myoglobin and smoke compounds. It’s completely safe and actually a sign of successful smoking. Undercooked meat feels soft and yielding when pressed, while smoked turkey feels firm. Always verify with a thermometer; don’t rely on color alone.
Should I stuff the turkey before smoking?
Stuffing complicates smoking because the stuffing needs to reach 165°F internally, which often means the turkey overcooks by the time the stuffing is ready. It’s better to prepare stuffing separately and serve it alongside your smoked turkey.
Can I smoke a turkey breast instead of a whole bird?
Yes, turkey breasts smoke beautifully and cook much faster—typically 4 to 6 hours depending on size. The same brining and seasoning principles apply. Monitor temperature carefully since breasts lack the thigh meat’s insulation and can dry out if overcooked.
How do I store leftover smoked turkey?
Refrigerate leftovers in an airtight container within 2 hours of cooking. Properly stored smoked turkey keeps for 3 to 4 days. You can also freeze it for up to 3 months. When ready to use, how to make shredded chicken techniques apply perfectly to making smoked turkey for sandwiches or salads—just shred your cooled turkey and use it in your favorite recipes.
What’s the best wood combination for smoking turkey?
A combination of oak and apple wood produces excellent results—the oak provides backbone flavor while the apple adds subtle sweetness. Hickory and pecan also work well. Avoid mixing too many woods; two or three is ideal. Start simple and adjust based on your preferences.
How long to boil chicken applies to smoking turkey?
Not really—smoking turkey operates on completely different principles than boiling. However, if you’re curious about how long to boil chicken for reference, boiling is much faster but produces entirely different texture and flavor compared to smoking.
Smoking a turkey transforms a potentially ordinary holiday centerpiece into something genuinely memorable. The process rewards patience and attention to detail with results that impress even the most critical dinner guests. Start with these fundamentals, trust your thermometer, and don’t hesitate to take notes on what works with your specific smoker. Each smoking session teaches you something new, and soon you’ll develop an intuition that makes the process feel effortless. Your next smoked turkey could be the one people talk about for years to come.
For additional guidance, check out This Old House’s detailed turkey smoking guide, Family Handyman’s comprehensive smoking instructions, and Home Depot’s smoking resources for additional perspectives and techniques.
Related Posts

How Long to Boil Lobster Tails: Cooking Guide

How Long to Fly from New York to London? Travel Times
