
Install a Light Switch? DIY Electric Tips
How to Install a Light Switch: Complete DIY Electric Tips
Installing a light switch is one of the most accessible electrical projects for homeowners willing to tackle basic home improvements. Whether you’re replacing an old switch, adding a new one, or upgrading to a modern dimmer, understanding the fundamentals of switch installation can save you hundreds in electrician fees while giving you confidence in your home’s electrical system.
Before diving into any electrical work, it’s crucial to understand that electricity demands respect. This guide walks you through every step of the process, from safety precautions to the final screw-in, ensuring you complete your project correctly and safely. With proper preparation and attention to detail, you’ll have a functioning light switch installed in under an hour.
Safety First: Essential Precautions
Electrical safety is non-negotiable when learning how to put a light switch into your home. The most critical rule is always turning off power at the circuit breaker before touching any wires. Even experienced electricians follow this protocol without exception because electricity can cause serious injury or death if handled improperly.
Start by locating your home’s electrical panel, typically found in the basement, garage, or utility room. Your circuit breaker panel contains switches that control power to different areas of your home. Each breaker is labeled to indicate which rooms or fixtures it controls. If labels are missing or unclear, you’ll need to test circuits systematically to identify the correct one.
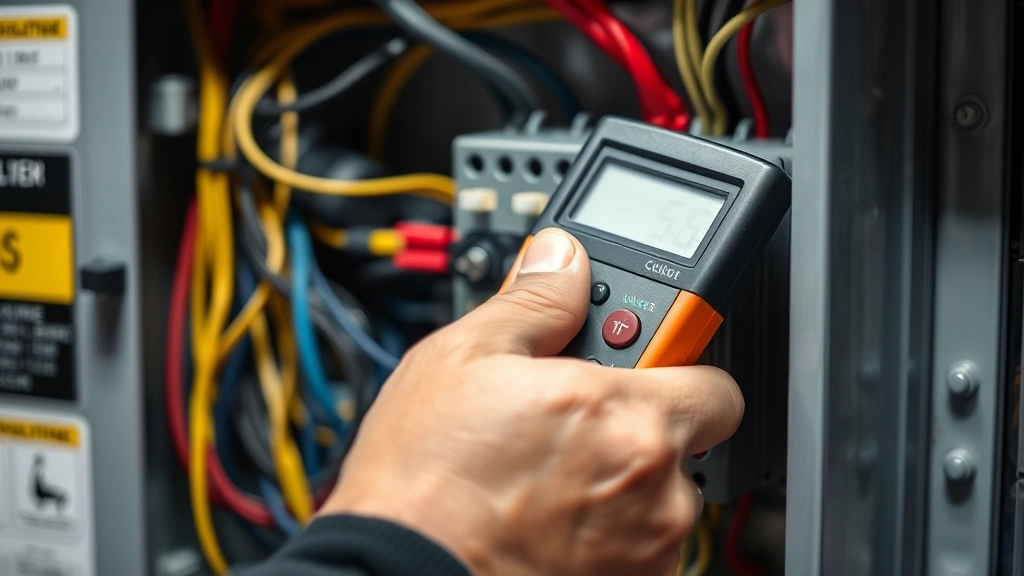
Never assume a switch is off just because you’ve flipped it. Always verify using a voltage tester, an inexpensive device that detects electrical current. A non-contact voltage tester is particularly useful because it allows you to check wires without touching them directly. These devices cost ten to twenty dollars and are essential safety equipment for any electrical project.
Additionally, follow local electrical codes in your area. Requirements vary by region, and your municipality may require permits for electrical work. Checking with your local building department ensures your installation meets safety standards and won’t cause problems during home inspections or insurance claims. Family Handyman provides excellent guidance on code compliance.
Tools and Materials You’ll Need
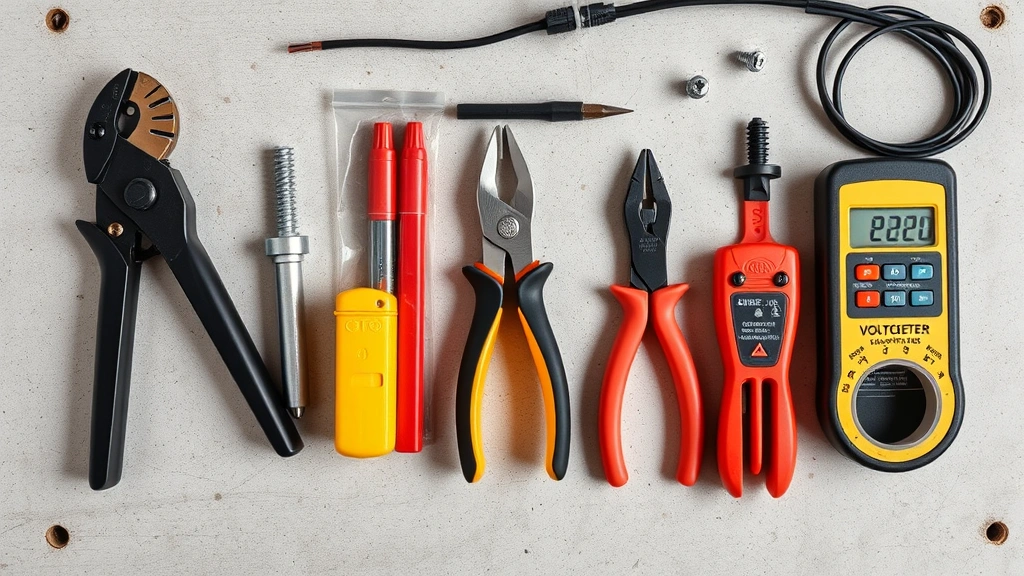
Gathering the right tools before starting makes the installation process smoother and safer. You don’t need expensive equipment—most items cost under fifty dollars total, and many are tools you’ll use repeatedly for future home projects.
Essential Tools:
- Voltage tester or non-contact voltage detector
- Flathead and Phillips head screwdrivers
- Wire stripper (removes insulation from wire ends)
- Needle-nose pliers (for bending wire loops)
- Flashlight or headlamp (electrical panels are often dark)
- Electrical tape (for securing connections)
Materials You’ll Need:
- New light switch (single-pole, three-way, or dimmer depending on your needs)
- Wire nuts if not included with the switch
- Electrical tape
- Optional: electrical grease for better connections
A single-pole switch controls a light from one location, while a three-way switch allows control from two locations. Dimmer switches let you adjust brightness and work with standard bulbs. Understanding which type you need prevents purchasing the wrong switch and wasting time during installation.
Understanding Your Electrical System
Light switches work by completing or breaking an electrical circuit. When you flip a switch on, you’re connecting the circuit, allowing electricity to flow to the light. When you flip it off, you’re breaking the connection, stopping the flow. Understanding this basic principle helps you recognize how wires should be connected.
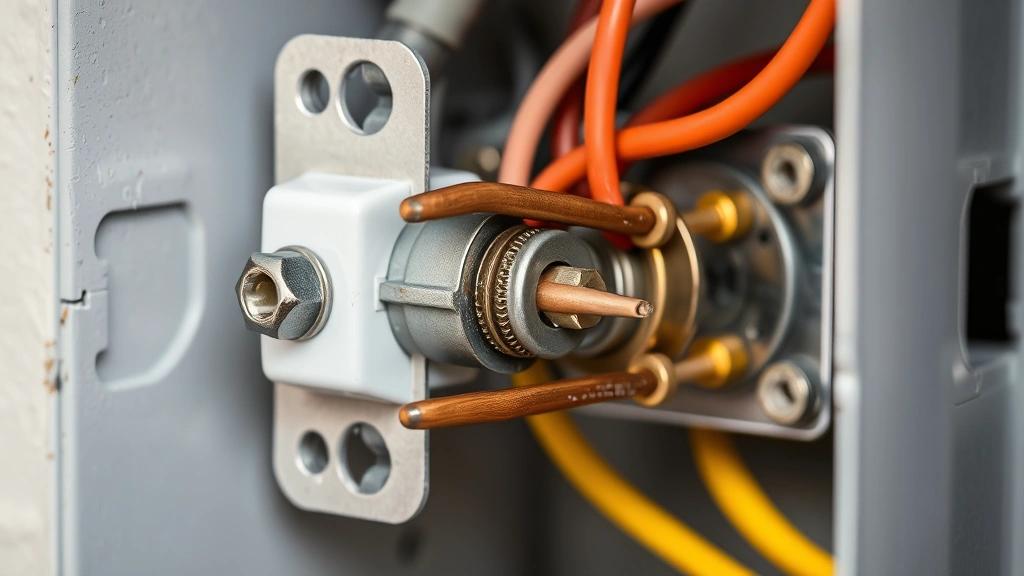
In a standard single-pole switch setup, three wires are involved. The black wire (hot wire) carries power from your circuit breaker. The white wire (neutral wire) completes the circuit back to the breaker panel. The bare copper or green wire (ground wire) provides safety by directing any stray electricity safely into the ground, preventing shocks and fires.
When you flip a switch, you’re controlling whether the hot wire reaches the light fixture. The switch interrupts the hot wire’s path, controlling power delivery. This is why connecting wires correctly is absolutely critical—reversing connections can create dangerous conditions or prevent your light from functioning.
Different switch types have different wire configurations. A standard single-pole switch has two brass screw terminals where you attach wires. Three-way switches have three terminals. Dimmers may have different connection methods. Always check the switch’s instructions or the diagram printed on the back before connecting wires.
Turning Off Power and Testing
This step cannot be overemphasized: turn off power at the circuit breaker before touching any wires. Locate your electrical panel and find the breaker controlling the light you’re working on. If uncertain, turn off the main breaker—it’s safer to work in the dark than to risk electrocution.
Flip the breaker switch to the off position. You should hear a definitive click. Now test the light switch by flipping it up and down several times. The light should not turn on. If it does, you’ve turned off the wrong breaker. Go back and try other breakers until the light stays off.
Once you’ve confirmed the light is off, use your voltage tester on the switch and surrounding wires. Touch the tester probe to the switch terminals and wires—it should show no voltage. Test multiple times to be absolutely certain. This verification step takes thirty seconds and could save your life.
Even after confirming power is off at the breaker, keep testing as you work. Electrical systems can be complex, and unexpected circuits sometimes exist. Your voltage tester is your insurance policy against serious injury.
Removing the Old Switch
With power confirmed off and tested, you can safely remove the old switch. Start by unscrewing and removing the cover plate—usually held by a single screw in the center. Set this screw aside in a safe place where you won’t lose it.
Next, remove the screws holding the switch to the electrical box. These screws are typically located at the top and bottom of the switch. Carefully pull the switch out of the box, being gentle to avoid damaging the wires. The switch should slide out relatively easily once screws are removed.
Now examine how wires are connected to the old switch. You’ll see wires attached to brass or silver colored screws. The black hot wire typically connects to a brass screw, while the white neutral wire connects to a silver screw. The ground wire (copper or green) may be twisted together with other ground wires or connected to a green screw.
Loosen each screw by turning counterclockwise, then gently pull the wire free. If wires are stubborn, wiggle gently while unscrewing. Be careful not to break the wires or strip their insulation. Once all wires are disconnected, the old switch is completely removed and ready for disposal.
Preparing the Wires
Before connecting to your new switch, inspect the wire ends. Insulation should be intact and undamaged. If you see exposed copper or fraying, the wire needs preparation.
Using your wire stripper, remove approximately three-quarters of an inch of insulation from each wire end. Strip both black and white wires, along with any ground wires. The exposed copper should be shiny and clean. If oxidized or corroded, gently scrape with a small tool to expose clean copper underneath.
Once stripped, create a hook shape at the end of each wire using needle-nose pliers. This hook allows you to wrap the wire around the switch screw terminal securely. The hook should be tight enough that you can’t easily pull the wire free by hand. A properly formed hook ensures excellent electrical contact and prevents loose connections that cause flickering lights or fire hazards.
If wires are too short to work with comfortably, you may need to extend them using wire connectors and additional wire. This requires a bit more skill but is manageable for determined DIYers. However, if wires are very short, consider calling a professional electrician to avoid complications.
Installing the New Switch
Now comes the main event—installing your new switch. Before touching anything, verify power is still off using your voltage tester one final time. Better safe than sorry.
Start by connecting the ground wire. If your new switch has a green screw terminal, wrap the bare copper wire around this screw and tighten clockwise. If your switch doesn’t have a ground screw, connect the ground wire to other ground wires in the box using a wire nut (a small plastic connector that twists onto wire ends). Ensure the connection is tight and secure.
Next, connect the white neutral wire to the silver screw terminal on your new switch. Wrap the wire hook clockwise around the screw—this ensures the wire tightens as you turn the screw. Tighten firmly but don’t over-tighten, which can break the wire or screw. The insulation should come close to the screw but not touch it.
Finally, connect the black hot wire to the brass screw terminal using the same technique. Wrap clockwise and tighten firmly. Double-check all connections by gently tugging each wire—they should not move. Loose connections are the leading cause of electrical fires in residential settings.
Carefully push the switch back into the electrical box. It should fit snugly without wires getting pinched or bent sharply. If the switch is difficult to push in, wires may be positioned incorrectly. Gently adjust wire positions and try again. The switch should seat flush against the box.
Screw the switch securely to the electrical box using the provided screws. These screws also help secure the switch against the wall, so tighten them fully. The switch should feel solid and immovable.
Finally, attach the cover plate and tighten its screw. Your switch installation is now mechanically complete.
Testing Your Installation
Before declaring victory, test your work thoroughly. Return to the electrical panel and flip the breaker back on. You should hear a click, and the breaker should move to the on position. If the breaker immediately flips back off, you have a serious problem—do not continue. This indicates a short circuit or other dangerous condition. Turn the breaker off and consult a professional electrician.
If the breaker stays on, return to your light switch. Flip it on and off several times. The light should respond immediately and reliably. The switch should feel smooth and click satisfyingly. If the light flickers, doesn’t respond consistently, or feels loose, you likely have a loose connection.
If problems occur, turn off power at the breaker and check your wire connections. Verify that wires are wrapped tightly around screws and that no bare copper is exposed between the wire and screw. Tighten any loose connections and test again.
Once your light works perfectly, congratulations—you’ve successfully completed your first electrical installation! You now have practical knowledge that will serve you well for future home improvement projects.
Frequently Asked Questions
What if I can’t find the correct breaker for my light?
Turn off the main breaker instead. This cuts power to your entire home, but it’s the safest option when you’re uncertain. Work quickly so you can restore power to the rest of your home once finished. Alternatively, use a non-contact voltage tester to verify power is off before proceeding.
Can I install a dimmer switch using the same process?
Yes, but dimmer switches sometimes have slightly different connection methods. Always read the manufacturer’s instructions included with your dimmer. Most use the same screw terminal connections as standard switches, but some have wire leads instead of screw terminals. If your dimmer has wire leads, you’ll connect wires using wire nuts instead of wrapping around screws.
What does it mean if my switch has three wires but I only see two?
You may have a grounded outlet or switch box. Check inside the electrical box—the third wire (ground) might be connected to other ground wires using a wire nut or connected to a metal tab on the box. Always connect your new switch’s ground wire to this existing ground system.
Is it safe to install a switch myself, or should I hire an electrician?
If you follow safety precautions carefully, installing a simple single-pole switch is safe for most homeowners. However, if you’re uncomfortable working with electricity, uncertain about your electrical system, or dealing with complex wiring, hiring a professional is wise. The cost is worth your peace of mind and safety.
Why is my new switch different from the old one?
Modern switches often have different designs and features than older models. Some have better ergonomics, different finishes, or additional functionality. As long as you match the switch type (single-pole, three-way, etc.) to your wiring setup, the switch will function correctly regardless of aesthetic differences.
Can I use the same switch for both lights and outlets?
No, switches and outlets are different devices designed for different purposes. Switches control the flow of electricity to lights, while outlets allow you to plug in devices. Never attempt to use a switch as an outlet or vice versa. They’re incompatible and dangerous.
What should I do if I damaged a wire during removal?
If insulation is cracked or copper is exposed, that wire section must be repaired. Cut the damaged section away using wire cutters, then strip fresh insulation from the remaining wire. If the remaining wire is too short to work with, you’ll need to extend it by connecting additional wire using wire connectors. This requires more advanced skills, so consider consulting a professional if unsure.
How do I know if my switch is three-way or single-pole?
Look at the switch terminals. Single-pole switches have two brass screws. Three-way switches have three screws—two brass and one dark-colored. If you’re replacing an existing switch, count the wires connected to it. Single-pole switches have two wires (plus ground), while three-way switches have three wires (plus ground).
Related Posts

Superscript in Google Docs: Expert Tips

Strikethrough in Excel: Easy Steps for Beginners
