
Build Floating Shelves: Expert Tips & Tricks
Build Floating Shelves: Expert Tips & Tricks
Floating shelves are one of the most popular home improvement projects for DIY enthusiasts. These sleek, wall-mounted shelves create the illusion of defying gravity while providing practical storage and display space. Whether you’re looking to organize your bedroom, create a modern accent wall in your living room, or add functionality to a kitchen, floating shelves offer a versatile solution that can transform any space. The best part? You don’t need advanced carpentry skills to install them successfully.
In this comprehensive guide, we’ll walk you through everything you need to know about how to make floating shelves, from selecting materials and tools to installation and finishing touches. You’ll learn professional techniques that contractors use, common mistakes to avoid, and creative design ideas to maximize your shelving project. By the end, you’ll have the confidence to tackle this rewarding DIY project and create beautiful, functional shelves that enhance your home’s aesthetic.

Materials and Tools You’ll Need
Before you begin your floating shelf project, gather all necessary materials and tools. Having everything prepared ensures a smooth, efficient installation process and prevents frustrating mid-project trips to the hardware store.
Essential Materials:
- Solid wood boards (1×10, 1×12, or custom dimensions)
- Wood screws (2.5 to 3 inches)
- Floating shelf brackets or hidden support rods
- Wall anchors (heavy-duty toggle bolts or molly bolts)
- Stud finder
- Wood filler and sandpaper
- Wood stain or paint
- Polyurethane or wood sealant
- Wood glue (optional, for reinforcement)
Required Tools:
- Drill with bits
- Saw (miter saw, circular saw, or hand saw)
- Level (24-inch minimum)
- Tape measure
- Pencil and marking gauge
- Screwdriver set
- Clamps for assembly
- Sandpaper or orbital sander
- Safety glasses and work gloves
Visit This Old House for detailed tool reviews and recommendations. They provide excellent guidance on selecting quality tools for your DIY projects.

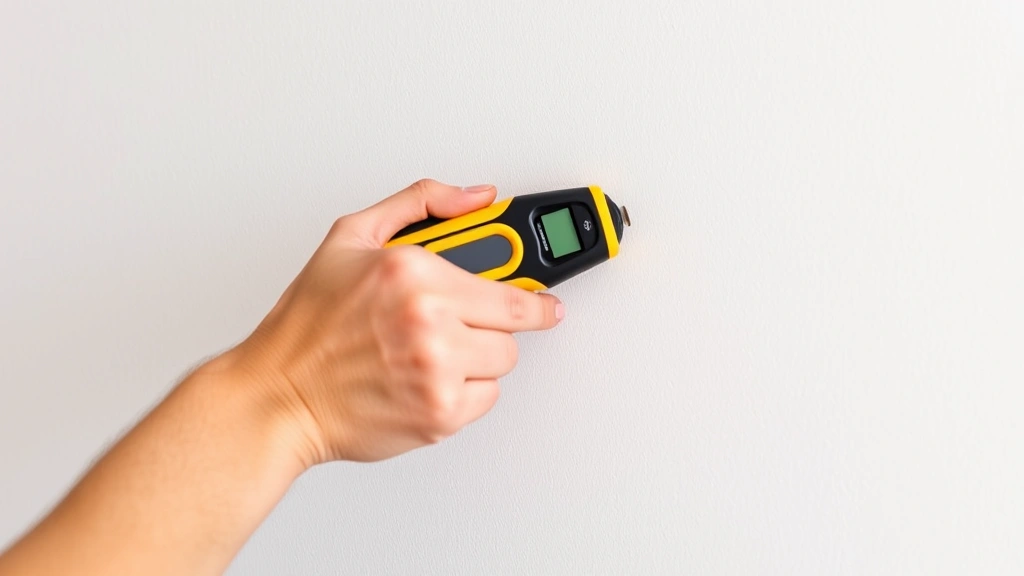
Understanding Wall Structure and Studs
The most critical step in building floating shelves is understanding your wall’s structure. Shelves must be anchored to wall studs for maximum stability and weight capacity. Studs are the vertical wooden framing members behind your drywall, typically spaced 16 or 24 inches apart.
Finding Studs Effectively:
Use an electronic stud finder to locate studs behind your drywall. Mark stud locations with a pencil, creating a horizontal line at your desired shelf height. If you’re mounting shelves between studs, you’ll need heavy-duty wall anchors rated for your shelf’s weight capacity. However, anchoring directly to studs is always the preferred method for heavy-duty floating shelves.
For drywall-only installations, use Family Handyman’s recommended toggle bolts or molly bolts rated for at least 50 pounds per anchor. Most floating shelf projects require multiple anchors spread across the shelf’s width for proper load distribution.
Consider the type of wall material you’re working with. Plaster walls require different anchoring techniques than drywall. Concrete or brick walls need masonry anchors and a specialized drill bit. Understanding your specific wall type ensures your shelves remain secure and level for years to come.
Measuring and Planning Your Layout
Accurate measurements are fundamental to successful shelf installation. Take time during the planning phase to prevent costly mistakes and ensure professional-looking results.
Key Measurement Steps:
- Measure the wall space where you want shelves, accounting for any obstacles like electrical outlets or light switches
- Determine your desired shelf height, keeping in mind ergonomics and visual balance
- Mark the center point of your wall space horizontally
- Use a level to draw a horizontal line at your chosen height
- Measure and mark stud locations along this line
- Plan spacing between multiple shelves (typically 12-18 inches apart)
Professional designers often space shelves closer together for visual interest and closer shelf-to-shelf access. However, ensure adequate space for the items you plan to display. A floating shelf setup works beautifully in kitchens for cookbooks, in bedrooms for decorative items, or in home offices for organizing supplies.
Before drilling any holes, take a step back and visualize your complete design. Consider how shelves will look from different angles and how they’ll complement your room’s existing décor. This planning stage prevents rework and ensures satisfaction with your final result.
Building the Shelf Box
The shelf box is the visible part of your floating shelf system. Most floating shelves use a box construction that hides the support hardware inside, creating that clean, modern floating appearance.
Step-by-Step Construction:
- Cut your wood: Use a miter saw to cut your boards to the desired length. For a professional appearance, cut a front facing board slightly longer than your side pieces, creating an elegant frame effect
- Sand all pieces: Use 120-grit sandpaper initially, then finish with 150-grit or higher for a smooth surface
- Assemble the box: Attach the front facing board to your side pieces using wood screws and wood glue. Ensure corners are square using a carpenter’s square
- Add a back panel: Install a back panel that will be hidden against the wall. This panel will house your support brackets
- Reinforce joints: Use corner brackets on the inside for additional strength, especially for heavier shelves
The quality of your shelf box directly impacts durability and appearance. Choose solid wood rather than plywood for a more substantial feel and better screw-holding capability. If budget is a concern, plywood with a solid wood edge banding provides a cost-effective alternative while maintaining professional appearance.
Allow your wood glue to cure fully before proceeding with installation. Most glues require 24 hours to reach full strength. This patience ensures your shelf box remains intact under load.
Installing Floating Shelf Hardware
Hardware installation is where your floating shelves get their support. The right hardware selection and installation technique ensures your shelves can safely hold their intended load.
Bracket and Rod Options:
Floating shelf systems use either visible brackets or hidden support rods. Hidden support rods, mounted through studs and into your shelf box’s back panel, create the most seamless appearance. Visible brackets offer easier installation and can add to your design aesthetic if chosen carefully.
For hidden rod systems, drill holes in your shelf’s back panel that align perfectly with pre-drilled holes in wall studs. The rods should be at least 3/8 inch in diameter for adequate support. Ensure rods penetrate studs by at least 1.5 inches for secure anchoring.
When using visible brackets, select styles that complement your décor. Modern minimalist brackets work with contemporary design, while decorative iron brackets suit farmhouse or rustic styles. Ensure brackets are rated for your shelf’s weight, plus the items you’ll store on it.
Mounting Your Shelves Securely
Proper mounting technique determines whether your shelves remain level and secure. This step requires precision and patience to achieve professional results.
Installation Process:
- Drill pilot holes: Using your marked stud locations, drill pilot holes at the appropriate height. Use a drill bit slightly smaller than your screws
- Install support hardware: Insert support rods or mount brackets according to manufacturer specifications. Ensure hardware is level before tightening completely
- Test fit the shelf: Carefully place your shelf box on the installed hardware without tightening final fasteners. Use your level to verify the shelf is perfectly horizontal
- Adjust as needed: Make fine adjustments to hardware position until the shelf sits level
- Secure fasteners: Once level is confirmed, tighten all fasteners completely. Use a level again to verify shelf hasn’t shifted during tightening
- Install wall anchors: If not using studs, install heavy-duty wall anchors at additional points along the shelf’s length for proper weight distribution
A level shelf is essential for both appearance and function. Items placed on uneven shelves will slide or appear visually unbalanced. Take time to achieve perfect levelness—it’s worth the extra effort.
Load Testing:
Before decorating your shelves, test their stability by gradually adding weight. Start with lighter items and progress to heavier ones, ensuring the shelf remains level and secure. This practical test confirms your installation can handle your intended use.
Finishing and Styling Your Shelves
The finishing stage transforms your functional shelves into beautiful design elements. Proper finishing protects your wood while enhancing your room’s aesthetic.
Finishing Options:
- Stain: Enhances wood grain and provides rich color depth. Choose stains that complement existing furniture and trim
- Paint: Offers unlimited color options and clean, modern appearance. Use quality cabinet paint for durability
- Natural finish: Highlights wood beauty with clear polyurethane or oil finishes
- Whitewash or cerusing: Creates light, airy appearance while showing wood grain
Apply finish before installing shelves to avoid drips on walls. Use multiple thin coats rather than one thick coat for professional appearance. Sand lightly between coats for smooth results.
Styling Your Shelves:
Once installed and finished, style your shelves thoughtfully. Group items in odd numbers (3 or 5) for visual interest. Mix decorative items with functional ones. Vary heights and textures to create dynamic displays. Leave some negative space to avoid cluttered appearance.
Consider how your styled shelves will look as part of your overall room design. They should enhance, not overwhelm, your space. For kitchen shelves, store cookbooks and beautiful dishware. For bedroom shelves, display plants and personal photos. For offices, check our FixWiseHub blog for organizational tips that work beautifully with floating shelves.
Weight Capacity and Safety Considerations
Understanding weight capacity is crucial for safe floating shelf installation. Exceeding capacity risks shelf failure, wall damage, and potential injury.
Calculating Weight Capacity:
Weight capacity depends on several factors: wall type, stud spacing, bracket quality, and hardware used. Shelves mounted directly to studs with quality brackets can safely hold 25-50 pounds or more. Shelves using wall anchors typically support 15-25 pounds, depending on anchor type and quality.
To be safe, assume lower capacity than hardware specifications suggest, especially for items of sentimental value. A 3-foot shelf using two studs might safely hold 40 pounds distributed across its length, while a 2-foot shelf on wall anchors should be limited to 20 pounds.
Safety Best Practices:
- Always locate studs when possible rather than relying solely on wall anchors
- Use multiple anchors or brackets spread across the shelf’s width
- Install shelves at appropriate heights where items won’t create hazards if they fall
- Periodically check that fasteners remain tight, especially in high-vibration areas
- Avoid placing heavy items near shelf edges
- Keep shelves away from areas where children might pull on them
Building code requirements vary by location. Check your local building codes before installation, particularly for commercial applications or load-bearing requirements. Some jurisdictions have specific regulations for shelf installation in residential properties.
Frequently Asked Questions
Can I install floating shelves without studs?
Yes, but with limitations. Heavy-duty wall anchors rated for appropriate weight can support shelves without studs. However, stud-mounted shelves are always more secure and can hold heavier loads. If studs aren’t available at your desired location, use quality toggle bolts or molly bolts rated for at least 50 pounds each, with multiple anchors spread across the shelf width.
What’s the best wood for floating shelves?
Solid hardwoods like oak, maple, walnut, and cherry provide excellent durability and appearance. Softwoods like pine are more affordable but less durable. Engineered wood or plywood with edge banding offers budget-friendly alternatives. Choose based on your design preference, budget, and the shelf’s intended use and weight requirements.
How far apart should I space multiple shelves?
Standard spacing is 12-18 inches apart, measured from the underside of one shelf to the top of the shelf below. This spacing accommodates most decorative items while maintaining visual balance. Adjust spacing based on items you’ll display—larger items need more vertical space.
How do I ensure my shelves are perfectly level?
Use a quality 24-inch level placed on your shelf during installation. Check levelness both along the shelf’s length and across its width. Make fine adjustments to brackets or support hardware until the level bubble sits centered. Re-check after tightening all fasteners, as tightening sometimes shifts positioning slightly.
Can I paint or stain floating shelves after installation?
You can touch up existing shelves, but finishing before installation provides better results. If you must finish after installation, use careful technique to avoid paint drips on walls. Protect wall areas with painter’s tape and drop cloths. For best appearance, remove shelves from wall, finish them completely, and reinstall once dry.
What if I hit a pipe or electrical wire while drilling?
Stop immediately and locate the obstacle using a wire detector or pipe locator. Avoid the area entirely. Adjust your shelf location if necessary to ensure safe installation. Never drill through pipes or electrical lines—this creates serious safety hazards and potential code violations.
How much weight can floating shelves hold?
This depends on mounting method. Shelves mounted to studs with quality brackets support 25-50+ pounds. Shelves using heavy-duty wall anchors support 15-25 pounds. Always stay below your hardware’s rated capacity and distribute weight evenly. When in doubt, assume lower capacity for safety.
Should I use wood glue when assembling the shelf box?
Yes, wood glue significantly strengthens joints when combined with screws. Apply glue to all joints before screwing, allowing it to cure fully (usually 24 hours) before mounting. This creates a more durable shelf box that resists warping and maintains structural integrity under load.
Related Posts

Superscript in Google Docs: Expert Tips

Strikethrough in Excel: Easy Steps for Beginners
