

How to Make a Paper Crane: Step-by-Step Guide
How to Make a Paper Crane: Step-by-Step Guide
There’s something almost magical about transforming a simple sheet of paper into a graceful paper crane. This centuries-old Japanese art form, known as origami, has captivated people worldwide with its elegant simplicity and meditative quality. Whether you’re looking for a calming creative outlet, a meaningful gift, or just a fun rainy-day project, learning how to make a paper crane is an incredibly rewarding skill that requires nothing more than patience, a flat surface, and a single piece of paper.
The beauty of paper cranes lies in their accessibility. You don’t need fancy materials, expensive tools, or years of artistic training. What you do need is the willingness to follow a few key folds and the understanding that your first attempt might not be perfect—and that’s completely fine. In fact, many people find the imperfections charming, as each crane becomes a unique reflection of the person who folded it.
In this comprehensive guide, we’ll walk you through every step of the process, from selecting the right paper to adding those final finishing touches. By the end, you’ll have created a beautiful paper crane and gained the confidence to make as many as you’d like.
Materials You’ll Need
The wonderful thing about making a paper crane is that you probably already have everything required at home. Here’s what you’ll need to get started:
- Paper: A single square sheet, ideally 6×6 inches for beginners (though any size works)
- Flat work surface: A table, desk, or even a book works perfectly
- Patience: This is genuinely the most important ingredient
- Good lighting: Natural light or a desk lamp helps you see your folds clearly
- Steady hands: Don’t worry if yours shake a little—everyone’s do
That’s it. No scissors, no glue, no special equipment needed. The entire crane is created through folding alone, which is part of what makes origami so beautifully minimalist. If you want to make an envelope to store your finished cranes or create a collection, that’s another fun project entirely, but it’s completely optional.
Choosing the Right Paper
Not all paper is created equal when it comes to origami. The type of paper you choose can significantly impact your folding experience and the final result.
Weight and Texture: Lightweight paper is ideal for beginners because it’s easier to fold and create sharp creases. Standard copy paper works, though it can tear if you’re rough with the folds. Origami paper, which you can find at craft stores or online, is specifically designed for this purpose and comes in beautiful colors and patterns.
Paper thickness matters more than you might think. If the paper is too thick, your folds won’t be crisp, and the crane will look bulky. If it’s too thin, it might tear during the folding process. The sweet spot is something between regular copy paper and cardstock.
Color and Pattern Considerations: While traditional origami cranes are often white or solid colors, there’s no rule against using patterned paper. Metallic paper creates stunning effects, though it can be slightly more difficult to work with. Double-sided colored paper ensures your crane looks beautiful from every angle.
Start with a basic 6×6 inch square of standard origami paper if you can find it. If not, regular copy paper cut into a square works just fine for your first attempt. You can always graduate to fancier materials once you’ve mastered the technique.
Understanding Basic Folds
Before diving into the full crane, it’s helpful to understand the fundamental folds used in origami. Think of these as your foundational vocabulary.
The Valley Fold: This is the most basic fold, where you fold the paper toward you, creating a valley or trough. The crease should be sharp and precise.
The Mountain Fold: The opposite of a valley fold, this fold goes away from you, creating a peak. Mountain folds are essential for shaping the crane’s body.
The Diagonal Fold: Exactly what it sounds like—folding along a diagonal line. These are crucial in the first steps of crane-making.
Like learning to fold a pocket square with precision, mastering paper cranes requires understanding how these basic techniques work together. The difference is that pocket squares have a practical purpose, while cranes are purely about the art of the fold itself.
Pro tip: Take your time with each fold. Press down firmly along the crease with your fingernail or the edge of a ruler to create sharp, clean lines. These precise creases make subsequent folds much easier and result in a more polished final product.
Step-by-Step Instructions
Step 1: Start with a Square
Begin with your paper square placed in front of you in a diamond orientation (one corner pointing toward you). If your paper isn’t already square, you can fold one corner to the opposite edge and trim away the excess rectangle.
Step 2: Create the First Diagonal Fold
Fold the paper diagonally from the top-left corner to the bottom-right corner, creating a triangle. Crease firmly, then unfold. This crease will serve as a guide for subsequent folds.
Step 3: Fold the Other Diagonal
Now fold from the top-right corner to the bottom-left corner, creating another triangle. Crease and unfold. You should now have an X-shaped crease pattern on your paper.
Step 4: Fold All Corners to the Center
This is where things start to take shape. Fold all four corners of your square to meet at the center point. Make sure each corner reaches the exact center—precision matters here. Crease each fold firmly.
Step 5: Flip and Repeat
Flip your paper over and fold all four corners to the center again. You’re essentially creating a smaller square. Crease everything firmly.
Step 6: Flip Again and Fold Once More
Flip your paper over one more time and repeat the process—all four corners to the center. Your paper is now quite small and thick.
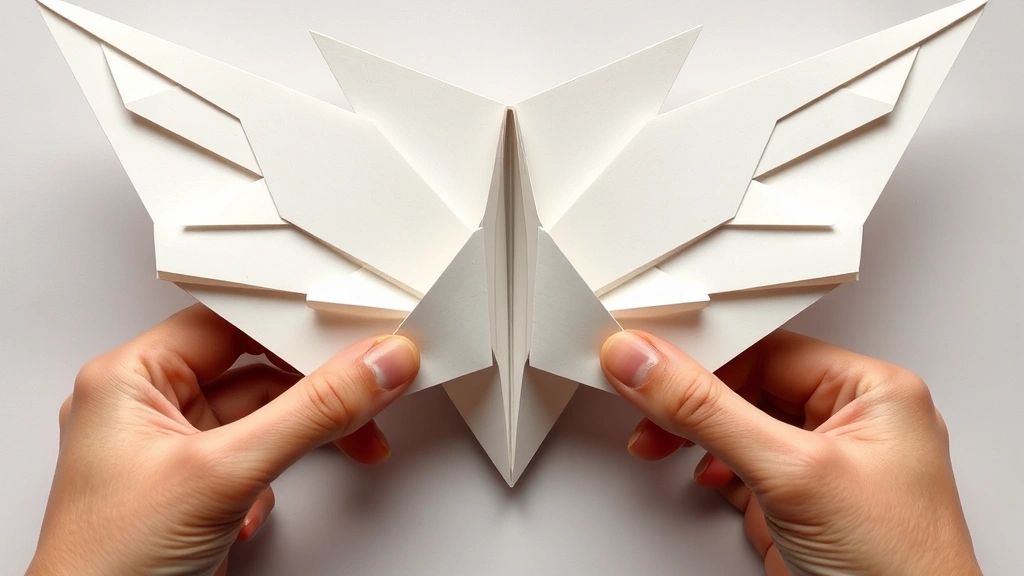
Step 7: Create the Petal Folds
This step is different from the previous ones. Instead of folding all corners to the center, you’re going to carefully pull out the flaps from underneath. Gently insert your fingers under each triangular flap and pull them outward and slightly upward. These will eventually become the crane’s wings and tail.
Step 8: Shape the Body
Fold the remaining pointed triangle in half. This creates the crane’s head. Carefully bend this smaller point back on itself at about a 90-degree angle—this becomes the beak. The angle you create here determines how prominent the crane’s head appears.
Step 9: Create the Wings
Now for the moment of truth. Gently hold the crane’s body in one hand and carefully pull the two largest flaps outward and downward. These are your wings. Pull them slowly and deliberately until they’re roughly horizontal or slightly angled downward. Don’t yank them—a gradual pull prevents tearing.
Step 10: Final Adjustments
Adjust the wings so they’re symmetrical and balanced. If the crane doesn’t stand properly, you can adjust the angle of the wings or the balance of the body. Some people like to gently curve the wings slightly upward for a more dynamic look.
Congratulations—you’ve just created your first paper crane! The entire process typically takes 5-10 minutes once you’re familiar with the steps.
Common Mistakes and How to Avoid Them
Problem: Your Folds Aren’t Sharp
Solution: Use your fingernail or the edge of a ruler to really press down on each crease. Sharp creases are essential for clean, crisp folds that make subsequent steps easier.
Problem: You’re Tearing the Paper
Solution: You’re likely pulling too hard or using paper that’s too thin. Switch to origami paper or slightly thicker copy paper, and remember that patient, gentle movements work better than forceful ones.
Problem: The Proportions Look Off
Solution: Make sure you’re folding corners exactly to the center in the early steps. Even small deviations compound as you continue folding. If the body seems too large or the wings too small, it’s usually because the initial corner-to-center folds weren’t precise.
Problem: The Wings Won’t Stay in Place
Solution: This is actually normal! Paper cranes are surprisingly flexible. If you want them to hold a specific wing position, you can lightly crease the wings in the desired angle. Some people even use a tiny bit of clear tape on the underside where the wings meet the body, though traditional origami purists would say this defeats the purpose.
Problem: You Lost Track of Which Step You’re On
Solution: This happens to everyone. The best approach is to watch a video tutorial alongside written instructions. You can also take photos of each step as you complete it, creating your own reference guide for future cranes.
Remember, your first crane probably won’t look like the perfect examples you see online. That’s completely normal. Each crane you make will be slightly better than the last, and within a few attempts, you’ll develop muscle memory that makes the process feel almost automatic.
Creative Display Ideas
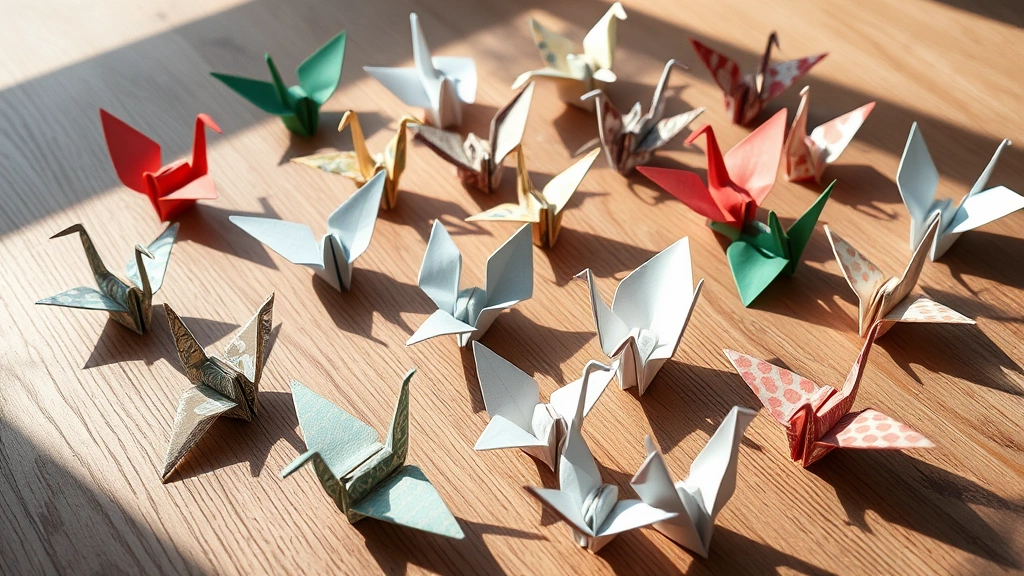
Once you’ve mastered the basic crane, you might find yourself making dozens of them. Here are some beautiful ways to display your creations:
- Hanging Mobile: Attach cranes to fishing line and hang them from a wooden dowel or branch. This creates a stunning three-dimensional display that catches light beautifully.
- String Garland: Connect multiple cranes with twine or ribbon to create a decorative garland for parties, weddings, or year-round home décor.
- Shadow Box Display: Arrange cranes in a shadow box frame against colored paper or fabric for a gallery-quality presentation.
- Gift Wrapping Accent: Use a single crane as an elegant alternative to a bow on wrapped gifts. This is especially meaningful if you’ve made the crane yourself.
- Table Centerpiece: Create a minimalist centerpiece by placing several cranes on a shallow dish filled with pebbles or sand.
If you enjoy gift-giving, you might also appreciate learning how to make a bow for packaging, though a handmade paper crane often makes a more memorable and personal gift than any store-bought decoration.
In Japanese culture, a chain of 1,000 paper cranes, called a senbazuru, is said to grant a wish. While that’s more folklore than fact, there’s something genuinely powerful about the meditative practice of folding crane after crane, and many people find the repetitive nature deeply calming.
Frequently Asked Questions
How long does it take to make a paper crane?
Once you’re comfortable with the steps, a paper crane typically takes 5-15 minutes to complete. Your first attempt might take 20-30 minutes as you reference instructions, but speed comes with practice. Many people find the time flies by because the process is so meditative and engaging.
Can I make paper cranes from newspaper or magazine pages?
Absolutely! In fact, using newspaper or magazine pages is a wonderful way to upcycle materials. The main challenge is that these papers are often thinner and more fragile than origami paper, so you’ll need to be extra gentle. Colorful magazine pages can create surprisingly beautiful cranes with interesting patterns.
What if my paper crane won’t stand up?
This usually means the body is unbalanced or the wings aren’t positioned correctly. Try adjusting the wing angle—they should be roughly horizontal or slightly angled downward. You can also gently adjust the position of the tail to shift the center of gravity. If all else fails, the crane still looks beautiful displayed lying on its side or hanging from a string.
Is there a specific type of paper I should use?
Traditional origami paper is ideal, but any thin, crisp paper works. Avoid thick cardstock or very thin tissue paper. Regular copy paper is a perfectly acceptable starting point, and as you progress, you might explore specialty papers like washi paper or metallic origami paper for more advanced projects.
Can children make paper cranes?
Absolutely! Paper cranes are suitable for children as young as 7 or 8, depending on their fine motor skills and patience level. Younger children might need guidance through the first few steps, but the process is safe and requires no dangerous tools. It’s actually an excellent activity for developing hand-eye coordination and spatial reasoning.
What’s the significance of paper cranes in Japanese culture?
In Japan, cranes are considered sacred birds symbolizing longevity, peace, and good fortune. The art of folding paper cranes, or origami, has been practiced for centuries. Cranes appear frequently in Japanese art, literature, and mythology, making them deeply meaningful symbols. This cultural significance is why many people give paper cranes as gifts representing wishes for health, happiness, and prosperity.
Can I use my paper cranes as gift toppers?
Yes! A handmade paper crane makes an elegant and meaningful gift topper. You can attach it directly to wrapped packages with a small piece of tape, or place it on top of a gift box. This personal touch often means more to recipients than expensive commercial gift wrap or bows. If you want to learn additional techniques, you could explore how to tie a bow with a tie for more elaborate gift presentations, though a simple crane is often more striking.
What should I do with cranes once I’ve made them?
The options are endless. Display them as décor, give them as gifts, donate them to hospitals or care facilities where they brighten patients’ days, or use them in art projects. Some people frame them, others incorporate them into scrapbooks. The beauty of paper cranes is that they’re lightweight and versatile, making them perfect for almost any creative application.
Can I make larger or smaller cranes?
Definitely! The same folding technique works with any square paper size. Smaller cranes (made from 3×3 inch paper) are delicate and intricate, while larger cranes (made from 12×12 inch paper or bigger) make impressive statement pieces. Just remember that smaller paper requires more precision, while larger paper is more forgiving of slight imperfections.
Related Posts

How Long to Boil Lobster Tails: Cooking Guide

How Long to Fly from New York to London? Travel Times
