
Pillow Humping: Safe Techniques Discussed
Pillow Humping: Safe Techniques Discussed
Pillow humping is a fundamental technique used in home construction, renovation, and structural work. This method involves applying pressure and friction to materials—typically concrete, stone, or wood—using a pillow or cushioned tool to achieve specific finishing results. Whether you’re working on concrete flatwork, polishing stone surfaces, or preparing materials for final installation, understanding proper pillow humping techniques ensures professional results while protecting both your materials and your body from injury.
This comprehensive guide covers everything you need to know about safe pillow humping methods, from preparation and equipment selection to execution and finishing touches. By mastering these techniques, you’ll improve your craftsmanship, reduce project timelines, and minimize the risk of material damage or personal strain.
Understanding Pillow Humping Basics
Pillow humping is a surface preparation and finishing technique that uses controlled pressure and movement to smooth, flatten, or condition various materials. The term refers to the cushioned tool—resembling a pillow—that applies even pressure across a work surface. This method is particularly valuable in concrete finishing, stone work, and material preparation where uniform results are essential.
The fundamental principle behind pillow humping involves distributing force evenly across a surface to eliminate inconsistencies, fill minor voids, and create a uniform finish. Unlike abrasive methods that remove material, pillow humping redistributes and settles existing material, making it ideal for delicate surfaces or when material preservation is important. This technique has been used for decades in professional construction and is now increasingly adopted by DIY enthusiasts tackling home improvement projects.
When working on concrete, pillow humping helps achieve a dense, smooth surface by closing small air pockets and creating a more uniform appearance. For stone surfaces, this method can enhance natural features while maintaining structural integrity. The versatility of pillow humping makes it applicable across numerous home improvement scenarios, from finishing basement floors to preparing surfaces before sealing or staining.
Essential Tools and Materials
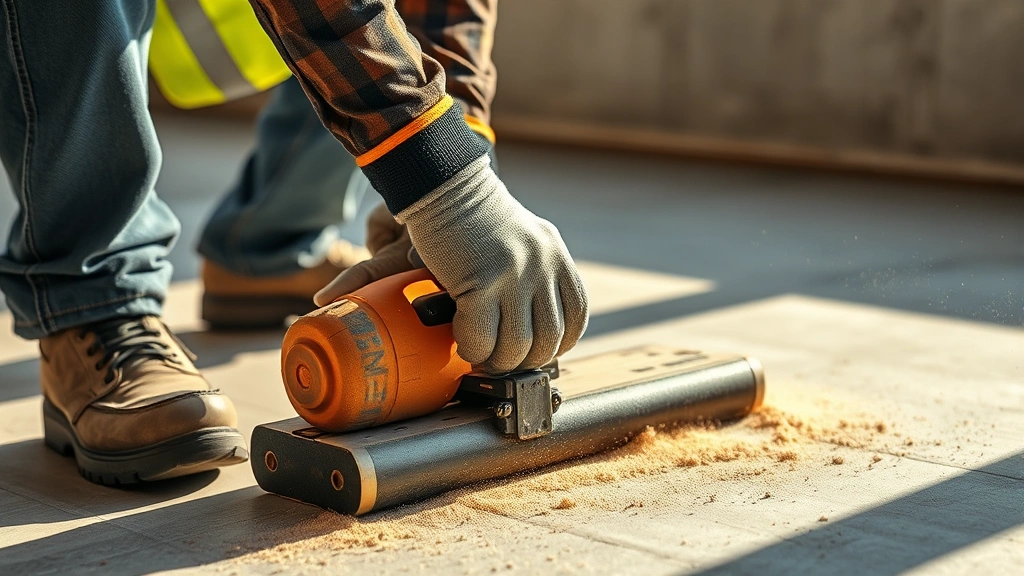
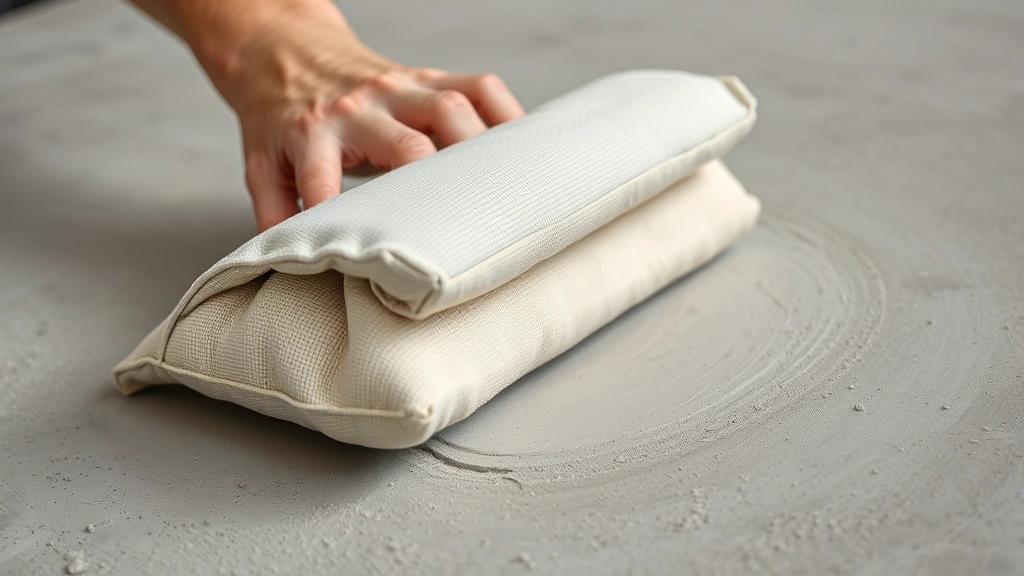
Success with pillow humping begins with selecting appropriate tools. The pillow itself is the primary tool—typically a canvas or rubber-covered cushion filled with sand, sawdust, or specialized material that provides controlled flexibility. Quality pillows maintain consistent pressure distribution while conforming to surface irregularities.
Core Equipment:
- Pillow: 12-18 inch diameter cushioned tool with appropriate fill material
- Handle or Frame: Wooden or metal attachment allowing controlled application of force
- Work Gloves: Protective hand covering for grip and safety
- Safety Glasses: Essential eye protection from dust and debris
- Dust Mask or Respirator: Critical when working with materials that generate fine particles
- Knee Pads: Protection for extended floor-level work
- Broom or Brush: For surface preparation and cleanup
- Water Spray Bottle: Used to lightly dampen surfaces before treatment
You can purchase pre-made pillow humping tools from Home Depot or construct your own using a heavy canvas bag filled with materials like sand or pea gravel. Homemade versions often work equally well for smaller projects while saving significant expense. The key is ensuring consistent fill and appropriate weight for your specific application.
Preparation and Safety Measures
Proper preparation dramatically impacts both safety and results. Before beginning any pillow humping work, thoroughly inspect your work surface for hazards, debris, or damage that might interfere with the process. Remove loose materials, nails, or protruding objects that could catch the pillow or cause injury.
Pre-Work Inspection Checklist:
- Clear the work area of tools, equipment, and obstacles
- Inspect the surface for cracks, holes, or structural issues
- Remove dust, dirt, and loose debris with a stiff brush
- Check for moisture or standing water; allow adequate drying time
- Identify areas requiring special attention or different techniques
- Verify adequate lighting for safe operation
- Ensure proper ventilation if working indoors
Safety is paramount when performing pillow humping work. Always wear appropriate personal protective equipment, including heavy-duty work gloves to maintain grip and prevent blisters during repetitive motions. Safety glasses protect against dust particles and unexpected debris. A quality dust mask or respirator becomes essential when working with concrete, stone, or other materials that generate fine particles—these can cause respiratory issues with prolonged exposure.
Proper body mechanics prevent strain injuries during extended pillow humping sessions. Maintain a balanced stance with knees slightly bent, allowing your legs to bear most of the effort rather than your back. This reduces fatigue and minimizes injury risk. Take regular breaks, especially during your first few sessions, to allow your muscles to adjust to the repetitive motion.
Step-by-Step Pillow Humping Technique
Executing proper pillow humping technique requires patience, consistent pressure, and methodical coverage. The following steps outline the professional approach used across the construction industry.
Step 1: Surface Assessment and Dampening
Begin by carefully examining your work surface to identify problem areas—low spots, high points, or inconsistencies that need attention. Lightly dampen the surface using a spray bottle with clean water. This moisture helps material settle and allows the pillow to glide smoothly without creating friction that might damage the finish. Avoid oversaturating, which can create muddy conditions that interfere with the process.
Step 2: Initial Pillow Application
Position yourself at one end of the work area with the pillow held at a comfortable working height. Apply steady, controlled downward pressure while beginning your rhythmic motion. The pillow should make firm contact with the surface without aggressive force that might cause bouncing or uneven pressure distribution. Start with gentle passes to assess how the material responds.
Step 3: Systematic Coverage Pattern
Work methodically across the entire surface using overlapping passes, similar to mowing a lawn in parallel lines. Each pass should overlap the previous one by approximately 6-12 inches to ensure complete, even coverage. Maintain consistent pressure throughout each pass—varying pressure creates inconsistent results. For larger areas, work in manageable sections rather than attempting the entire space at once, which leads to fatigue and quality degradation.
Step 4: Pressure Adjustment and Refinement
As you progress, adjust pillow pressure based on surface response. Areas with visible low spots may require slightly increased pressure to encourage material settling. High spots should receive lighter pressure to avoid creating depressions. This refinement phase typically requires 2-3 complete passes over the work area with careful attention to problem zones.
Step 5: Final Finishing Passes
Complete your work with light finishing passes using minimal pressure. These final passes smooth the surface and eliminate marks from heavier working pressure. The pillow should glide across the surface almost gently, creating a uniform, refined appearance. Quality finishing passes significantly impact the final result’s professional appearance.
Common Mistakes to Avoid
Understanding common pitfalls helps you achieve superior results while avoiding wasted effort. Many DIY enthusiasts and even some professionals make predictable mistakes that compromise their work.
Excessive Pressure Application
Applying too much force is the most common error in pillow humping work. Excessive pressure can create undesirable surface depressions, damage delicate finishes, or cause material displacement rather than settling. The technique works through consistent, moderate pressure—not aggressive force. If you find yourself straining significantly, reduce pressure and increase the number of passes instead.
Inadequate Surface Preparation
Skipping thorough surface cleaning and inspection leads to poor results and potential tool damage. Debris caught under the pillow creates irregular marks and prevents uniform pressure distribution. Taking extra time for proper preparation consistently yields better outcomes than rushing through this critical phase. For guidance on similar surface preparation, review our article on how to fix a hole in the wall, which emphasizes surface preparation importance.
Inconsistent Pressure and Movement
Varying your pressure or movement speed during work creates visible inconsistencies in the finished surface. Maintain steady, rhythmic motion with constant pressure throughout each pass. This consistency is what separates professional results from amateur work.
Insufficient Overlapping Coverage
Failing to overlap passes adequately leaves unmilled areas where the pillow hasn’t made contact. These gaps become visible in the finished surface. Ensure each pass overlaps the previous one sufficiently to eliminate any gaps in coverage.
Working on Inappropriate Materials
Pillow humping works best on specific materials—concrete, stone, and certain composite surfaces. Attempting this technique on unsuitable materials wastes time and may cause damage. Understand your material composition before beginning work.
Advanced Applications
Once you’ve mastered basic pillow humping techniques, you can apply them to more specialized projects and challenging surfaces. Advanced applications require refined technique and deeper material knowledge but expand the range of projects you can successfully complete.
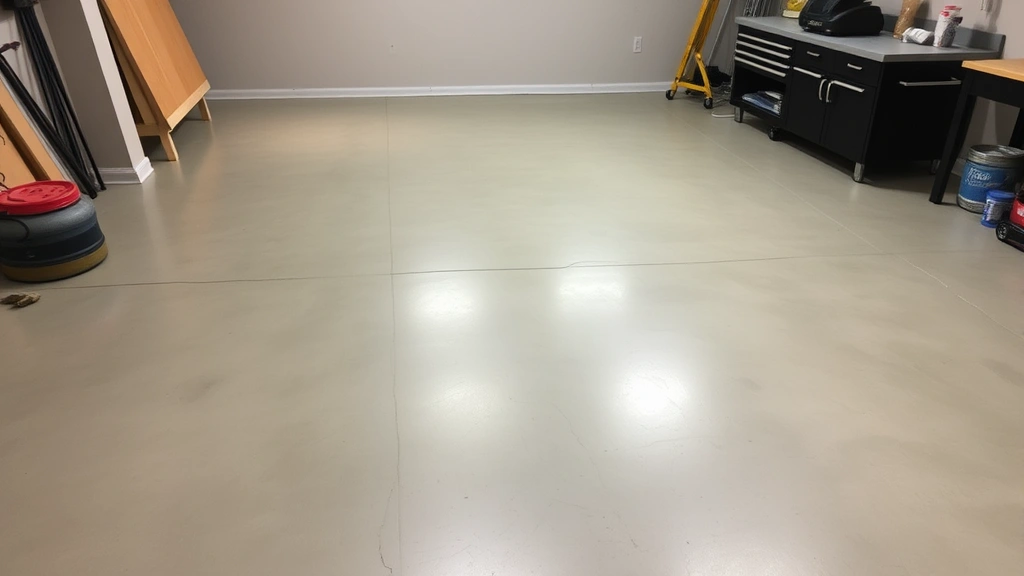
Concrete Floor Finishing
Professional concrete contractors use pillow humping as a final finishing step after initial screeding and troweling. This technique closes air pockets, densifies the surface, and creates a uniform appearance ideal for subsequent sealing, staining, or painting. For concrete work involving multiple systems, understanding basic home systems helps—similar to how understanding how to fix a toilet that keeps running requires understanding water system basics, concrete finishing requires understanding material behavior.
Stone and Marble Surface Treatment
Natural stone surfaces benefit significantly from careful pillow humping, which enhances the stone’s natural appearance while maintaining structural integrity. This application requires lighter pressure and more refined technique than concrete work, as stone is more delicate and shows marks more readily.
Composite Material Preparation
Many modern composite materials and engineered surfaces respond well to pillow humping preparation before final finishing or sealing. Research your specific material’s requirements, as different composites may require slightly different approaches.
Textured Surface Creation
Advanced practitioners use varied pillow humping techniques to create intentional texture patterns. By adjusting pressure, speed, and tool position, you can create subtle surface variations that enhance visual interest while maintaining structural performance.
FAQ
How long does a typical pillow humping session last?
Duration depends on area size and surface condition. Small areas (100-200 square feet) typically require 2-4 hours, while larger projects may span multiple days. Work in manageable sessions to maintain consistent quality and prevent fatigue.
Can I use pillow humping on vertical surfaces?
Traditional pillow humping works best on horizontal surfaces where gravity aids the settling process. Vertical applications are possible but require modified techniques and specialized equipment. Consult This Old House for guidance on specialized vertical applications.
What’s the ideal pillow weight for residential projects?
For most residential applications, a pillow weighing 15-25 pounds provides appropriate pressure without requiring excessive physical effort. Heavier pillows suit larger commercial projects, while lighter options work better for delicate surfaces.
How do I know when pillow humping is complete?
The surface should appear uniform in color and texture with no visible tool marks or inconsistencies. Run your hand across the surface—it should feel smooth and consistent. Multiple passes over the same area without visible improvement indicates completion.
Is pillow humping necessary for all concrete projects?
While not absolutely necessary for all applications, pillow humping significantly improves appearance and surface quality. For visible surfaces or areas requiring subsequent finishing (sealing, staining), pillow humping is highly recommended. For utilitarian areas where appearance matters less, you might skip this step.
Can I rent pillow humping equipment?
Yes, many equipment rental companies carry pillow humping tools. This option works well for one-time projects. For frequent use, purchasing your own equipment becomes more economical. Check with Family Handyman for rental location recommendations in your area.
What safety precautions are most important?
Respiratory protection tops the priority list when working with dust-generating materials. Eye protection, proper footwear, and body mechanics training prevent most common injuries. Never skip personal protective equipment, regardless of project size.
How does pillow humping compare to machine finishing?
Machine finishing works faster for large areas but offers less control and may damage delicate surfaces. Pillow humping provides superior control and works on surfaces unsuitable for machinery. Many professionals combine both approaches—machines for bulk work, pillow humping for finishing.
Related Posts

Superscript in Google Docs: Expert Tips

Strikethrough in Excel: Easy Steps for Beginners
