
How to Get High-Quality Paint Finishes? Pro Tips
How to Get High-Quality Paint Finishes: Pro Tips for Professional Results
Achieving a high-quality paint finish is one of the most rewarding DIY home improvement projects you can tackle. Whether you’re refreshing a single room or giving your entire home a makeover, the difference between an amateur paint job and a professional one often comes down to technique, preparation, and using the right materials. A flawless paint finish can transform any space, adding value to your home and creating an atmosphere that reflects your personal style.
The secret to getting high-quality paint finishes isn’t complicated, but it does require attention to detail and patience. Many homeowners rush through the preparation phase or skip crucial steps, only to end up with streaky, uneven results. This comprehensive guide will walk you through every step of the process, from selecting the right paint to applying the final coat, ensuring your next painting project delivers professional-grade results.
Selecting the Right Paint and Finish Type
Before you even open a paint can, understanding the different types of paint and finishes available is crucial for achieving high-quality results. Paint quality varies significantly between brands and price points, and investing in premium paint often means better coverage, durability, and a more professional appearance. Higher-quality paints contain more pigment and binder, which results in richer colors and better adhesion to surfaces.
When selecting paint, you’ll encounter several finish types, each serving different purposes. Flat or matte finishes provide a sophisticated, velvety appearance and are excellent for hiding wall imperfections, making them ideal for bedrooms and living areas. However, they’re less durable and harder to clean, so they’re not recommended for high-traffic areas or kitchens. Eggshell finishes offer a subtle sheen that’s more washable than flat finishes while still being forgiving of minor surface imperfections. This versatile option works well in most rooms throughout your home.
Satin finishes provide a smooth, pearl-like sheen that’s both durable and elegant. They’re excellent for bathrooms, kitchens, and trim work because they resist moisture and are easy to clean. Semi-gloss and gloss finishes offer maximum durability and shine, making them perfect for doors, cabinets, and trim where you want a polished, professional look. These finishes also work well in high-humidity areas like bathrooms because they resist moisture and mildew.
Quality matters tremendously when choosing paint. Premium paints from reputable manufacturers typically cost 20-30% more than budget options, but they provide superior coverage, requiring fewer coats to achieve the desired color depth. Look for paint with high pigment concentration and quality binders, which you can usually identify by reading the product specifications on the manufacturer’s website.
Surface Preparation: The Foundation of Success
Professional painters know that surface preparation accounts for roughly 80% of the work required to achieve a high-quality paint finish. Skipping or rushing this phase is the primary reason DIY paint jobs look amateur. Proper preparation ensures that paint adheres correctly, dries evenly, and maintains its finish for years to come.
Start by thoroughly cleaning all surfaces you plan to paint. Use a degreaser or TSP (trisodium phosphate) solution to remove dirt, dust, grease, and grime that can prevent paint adhesion. Pay special attention to kitchen walls and areas near light fixtures where dust accumulates. For bathroom walls, ensure you remove any mildew or mold using an appropriate cleaner before painting.
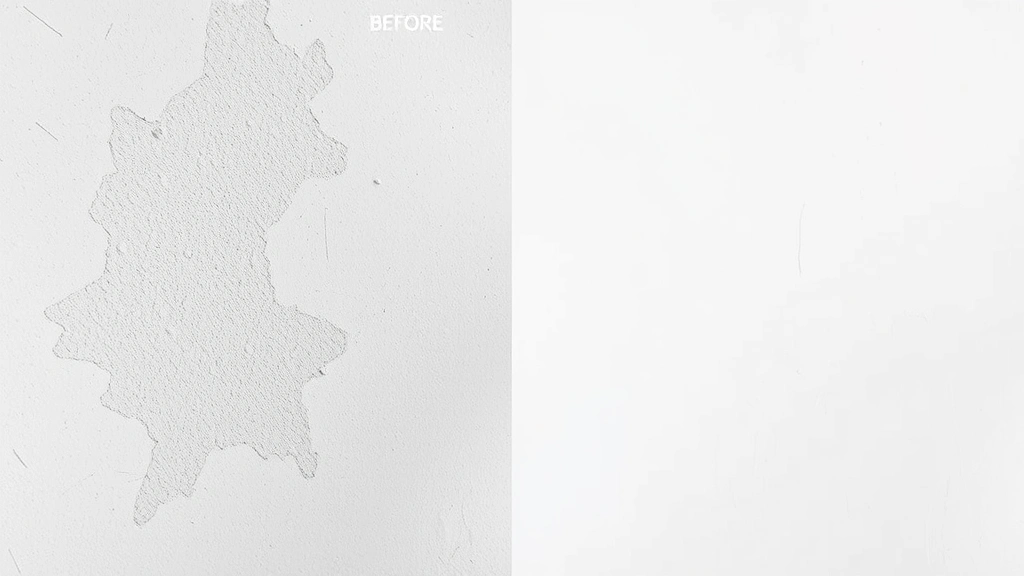
Once surfaces are clean and dry, inspect for damage. Fill all holes, cracks, and gouges with spackling compound or joint compound appropriate for the size of the damage. For larger holes, use a patching compound and follow the manufacturer’s instructions for drying time. After the filler dries completely, sand these areas smooth using 120-150 grit sandpaper, then wipe away all dust with a damp cloth.
Sanding existing painted surfaces is essential for helping new paint adhere properly. Use 150-220 grit sandpaper to lightly scuff glossy or semi-gloss surfaces, which helps the new paint bond effectively. For flat or eggshell finishes, sanding is less critical but still beneficial, especially if the existing paint is shiny or shows signs of wear. Always sand in the direction of the wood grain when working on wooden surfaces, and use a sanding block to maintain consistent pressure and avoid creating gouges.
After sanding, remove all dust using a tack cloth or damp cloth. This step is often overlooked but absolutely critical—dust particles left on the surface will create small bumps and imperfections in the dried paint film, ruining the quality of your finish. Let the surface dry completely before moving forward with priming.
Essential Tools and Equipment
Investing in quality painting tools makes an enormous difference in the final result. Professional painters understand that cheap brushes and rollers shed bristles, create streaks, and make the entire job more difficult. Quality tools cost more upfront but deliver superior results and last through multiple projects.
Brushes should be selected based on the type of paint you’re using. Natural bristle brushes work best with oil-based paints, while synthetic (nylon or polyester) brushes are ideal for latex or water-based paints. For most DIY projects, purchase 2-3 quality brushes in different sizes: a 1-inch angled brush for trim and detailed work, a 2-inch flat brush for general painting, and a 3-inch brush for larger flat surfaces. Quality brushes have bristles that maintain their shape and don’t shed.
Rollers are essential for covering large wall areas quickly and efficiently. The roller frame, roller sleeve, and extension pole all matter. Choose a roller frame with a ball bearing or sealed bearing for smooth operation. Roller sleeves come in different nap lengths—short nap (1/4 inch) for smooth surfaces, medium nap (3/8 inch) for slightly textured surfaces, and longer nap (1/2 to 3/4 inch) for heavily textured surfaces. Using the wrong nap length results in poor coverage and an uneven appearance.
Additional essential tools include a paint tray with a liner for easy cleanup, painter’s tape for creating clean edges, a drop cloth to protect floors and furniture, a paint stirrer, a paint roller extension pole, and a ladder or step stool. Don’t forget safety equipment including gloves, safety glasses, and a dust mask if you’re sanding.
Priming for Perfect Coverage
Primer is not optional when pursuing high-quality paint finishes—it’s absolutely essential. Primer serves multiple critical functions: it improves paint adhesion, provides uniform coverage, blocks stains and odors, and ensures consistent color appearance. Skipping primer almost always results in an inferior finish that requires additional paint coats to achieve proper coverage.
Choose your primer based on the surface you’re painting and the challenges you’re addressing. All-purpose primer works for most interior wall painting projects over existing painted surfaces. Bonding primer is formulated to adhere to slick surfaces like tile, laminate, or high-gloss finishes. Stain-blocking primer is essential when painting over water stains, smoke damage, or previous dark colors, preventing these stains from bleeding through the topcoat.
Apply primer with the same techniques you’ll use for paint, using quality brushes and rollers. One coat of quality primer is usually sufficient for most projects, though heavily damaged surfaces or dramatic color changes might require two coats. Allow primer to dry completely according to the manufacturer’s instructions before applying paint. Rushing this step compromises the final result.
Painting Techniques That Deliver Results
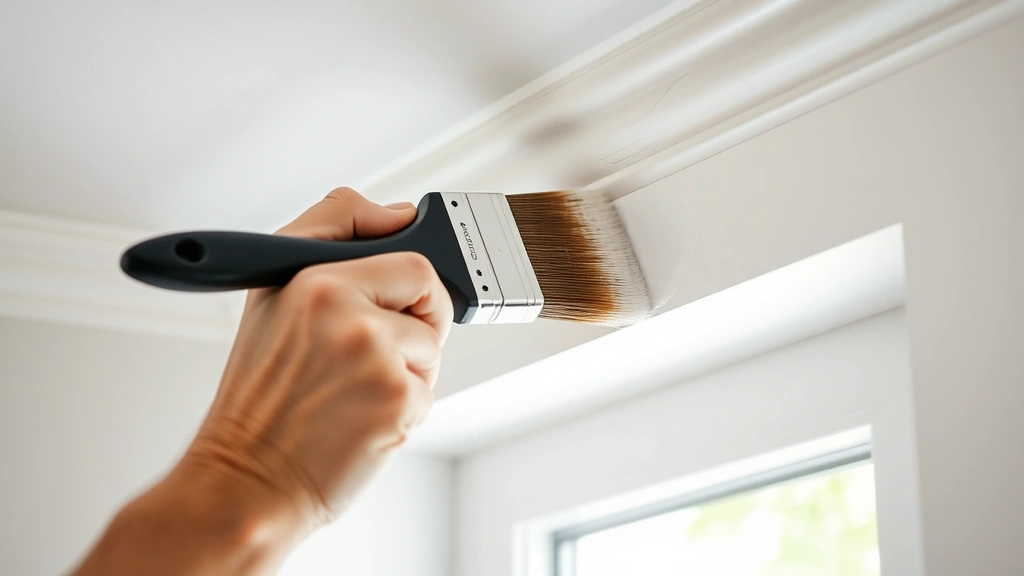
The actual application of paint is where many DIYers fall short of professional results. Proper technique ensures even coverage, smooth finishes, and professional appearance. Begin by cutting in—using a brush to paint a 2-3 inch border around the edges of walls, around windows, doors, and along the ceiling line. This creates a frame that you’ll fill in with the roller.
When cutting in, dip your brush about one-third of the way into the paint, and tap it against the inside of the bucket to remove excess. Don’t wipe the brush against the bucket edge, as this removes too much paint and causes drips. Use long, smooth strokes with slight pressure, maintaining a wet edge to avoid visible lap marks. The key to seamless cutting in is working with wet paint and blending the edges smoothly.
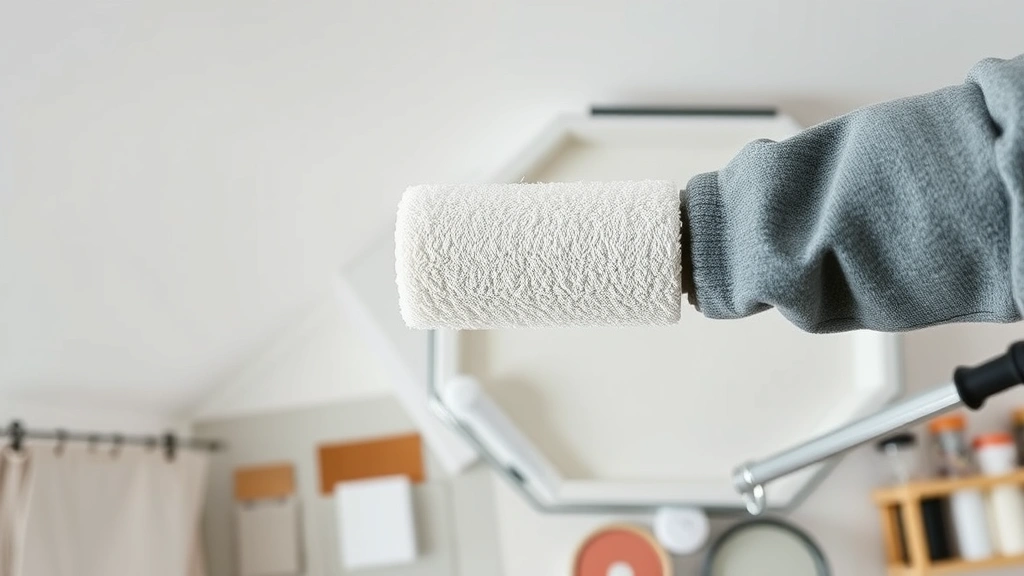
After cutting in, use your roller to fill in the large wall areas. Pour paint into the tray’s deep end and roll the sleeve back and forth in the paint until it’s evenly saturated. Roll excess paint onto the tray’s textured slope to remove drips, then apply paint to the wall using a W or M pattern. Start at the top and work downward, using moderate pressure to avoid splattering. After creating the W or M, fill in the pattern with vertical strokes, maintaining a wet edge.
Maintaining a wet edge is critical for achieving seamless results. Work in manageable sections (approximately 3×3 feet) and always overlap your strokes slightly into the previously painted area before it dries. This prevents lap marks and ensures even color coverage throughout the wall. If your paint begins to dry before you can blend the edges, it’s too late—the mark will be visible in the finished result.
Apply paint in thin, even coats rather than one thick coat. Two thin coats always look better than one thick coat, which may sag, drip, or create an uneven appearance. Between coats, allow paint to dry completely according to the manufacturer’s specifications, typically 2-4 hours for latex paint. Most latex paints benefit from a second coat for optimal coverage and color depth.
Avoiding Common Mistakes
Understanding common painting mistakes helps you avoid them and achieve professional-quality results. One of the most frequent errors is inadequate surface preparation. Many DIYers underestimate how much time preparation requires, rushing through cleaning and sanding. This results in paint that doesn’t adhere properly, peels prematurely, or appears uneven.
Another common mistake is using low-quality tools. Cheap brushes shed bristles throughout the paint job, creating visible imperfections. Budget rollers don’t distribute paint evenly and often shed fibers that become embedded in the paint film. Investing in quality tools from the start eliminates these frustrations and produces noticeably better results.
Painting in poor conditions is another avoidable error. Temperature and humidity significantly affect how paint dries and cures. Paint in temperatures between 50-85°F and humidity below 85% for best results. Painting in cold, humid conditions or direct sunlight causes uneven drying, lap marks, and poor adhesion. Choose a calm day without strong drafts, and avoid painting in direct sunlight, which causes paint to dry too quickly and creates lap marks.
Failing to stir paint adequately results in color inconsistency and poor coverage. Even though many modern paints are pre-mixed, they should still be stirred thoroughly before use. Pigments can settle during storage, and stirring ensures uniform color and consistency throughout the can. Use a paint stirrer or drill mixer attachment, stirring for at least 2-3 minutes for thorough blending.
Overloading brushes and rollers causes drips, splatters, and uneven coverage. Paint should saturate the brush or roller adequately but shouldn’t be dripping. Remove excess paint before applying it to walls, and use proper technique to maintain control and achieve smooth, professional results.
Maintenance and Touch-Ups
Achieving a high-quality paint finish is only the beginning. Proper maintenance extends the life of your paint job and keeps it looking fresh and vibrant. Dust painted surfaces regularly using a soft cloth or microfiber duster to prevent dust accumulation, which can dull the finish.
For washable finishes like satin, semi-gloss, and gloss, occasional gentle cleaning with a soft cloth and mild soap solution removes dirt and maintains appearance. Avoid abrasive scrubbing, which can damage the paint film. For flat and matte finishes, use a dry cloth or very lightly dampened cloth, as excessive moisture can damage these delicate finishes.
Keep leftover paint for future touch-ups and maintenance. Store paint in a cool, dry place with the lid sealed tightly. Before using stored paint, stir it thoroughly to ensure uniform color and consistency. Touch up minor scuffs and marks promptly to prevent them from becoming more noticeable over time. Using the same paint and technique for touch-ups ensures the repair blends seamlessly with the surrounding area.
For exterior paint, additional maintenance is necessary due to exposure to weather and UV rays. Inspect exterior paint annually for signs of peeling, cracking, or fading. Address any damage promptly to prevent moisture infiltration and further deterioration. This Old House’s painting guides offer excellent maintenance tips for both interior and exterior paint finishes.
FAQ
What’s the best paint finish for high-traffic areas?
Satin and semi-gloss finishes are ideal for high-traffic areas because they’re durable and easy to clean. These finishes resist scuffing and marks better than flat or matte finishes, making them perfect for hallways, kitchens, and children’s rooms. They’re also more washable, allowing you to clean marks without damaging the paint.
How many coats of paint do I need for complete coverage?
Most painting projects require two coats of quality paint for complete, even coverage. The first coat provides initial color and coverage, while the second coat ensures uniform depth and hides any minor imperfections from the first coat. Some projects with dramatic color changes or heavy stains might require three coats, but two coats are standard for most interior painting.
Can I paint over glossy surfaces without sanding?
While it’s technically possible to paint over glossy surfaces without sanding, it’s not recommended for achieving high-quality results. Sanding creates a slightly rough surface that helps new paint adhere properly. Without sanding, paint may peel or flake in the future. Light sanding with 150-220 grit paper takes minimal time and significantly improves adhesion and longevity.
What’s the ideal temperature for painting?
Paint between 50-85°F for optimal results. Most latex paints perform best between 60-75°F. Cold temperatures slow drying and can affect paint consistency, while heat causes paint to dry too quickly, creating lap marks and uneven coverage. Avoid painting in direct sunlight or when humidity exceeds 85%.
Should I use primer on previously painted surfaces?
Using primer on previously painted surfaces depends on several factors. If the existing paint is in good condition and you’re painting a similar or lighter color, primer may not be necessary. However, primer is essential when painting over dark colors with light colors, when addressing stains or water damage, or when painting over glossy finishes. When in doubt, using primer ensures the best results.
How can I prevent brush marks in my paint finish?
Brush marks occur when paint dries before you can blend the edges. Prevent them by maintaining a wet edge, working in manageable sections, using quality brushes appropriate for your paint type, and applying thin coats rather than heavy coats. Using paint additives designed to improve flow can also help minimize brush marks, especially with flat finishes.
What’s the difference between latex and oil-based paint?
Latex (water-based) paint is easier to clean up, dries faster, has lower VOC emissions, and is suitable for most interior projects. Oil-based paint offers superior durability, better adhesion to certain surfaces, and a more professional finish, but requires mineral spirits for cleanup and has higher VOC content. For most DIY interior projects, latex paint is the better choice.
Related Posts

Superscript in Google Docs: Expert Tips

Strikethrough in Excel: Easy Steps for Beginners
