Drain a Hot Water Heater? Expert Instructions
How to Drain a Hot Water Heater: Expert Instructions
Draining your hot water heater is an essential maintenance task that every homeowner should know how to perform. Whether you’re preparing for a move, performing routine maintenance, or replacing a faulty unit, understanding how to drain a hot water heater can save you money on professional service calls and extend the lifespan of your appliance. This comprehensive guide walks you through each step of the process with clear instructions and safety considerations.
Regular draining removes sediment buildup that accumulates at the bottom of your tank over time. This sediment reduces heating efficiency, increases energy costs, and can eventually damage your water heater. By draining your tank annually or every two years, you maintain optimal performance and prevent costly repairs down the road.
Why You Need to Drain Your Hot Water Heater
Your hot water heater accumulates mineral deposits and sediment over months and years of operation. Hard water contains dissolved minerals like calcium and magnesium that settle to the bottom of the tank. This buildup creates several problems: reduced heating efficiency, strange noises during operation, rust formation on internal surfaces, and eventually complete tank failure.
Draining your tank removes this sediment and restores your heater’s efficiency. Many manufacturers recommend annual draining as part of routine maintenance. If you live in an area with particularly hard water, you may need to drain more frequently. Regular hot water heater maintenance is far cheaper than replacing an entire unit, which can cost $800 to $2,500 or more.
Beyond sediment removal, draining your hot water heater is necessary when replacing the anode rod, flushing the system to improve water quality, or preparing the unit for relocation. It’s also required before winterization in climates with freezing temperatures.
Tools and Materials You’ll Need
Before beginning, gather all necessary tools and materials to ensure a smooth process without interruptions:
- Garden hose (long enough to reach a floor drain or exterior)
- Adjustable wrench or socket set for valve connections
- Flathead screwdriver for relief valve testing
- Bucket (5-gallon capacity) for catching water
- Work gloves and safety glasses
- Towels or rags for cleanup
- Flashlight to see connections clearly
- Teflon tape for resealing connections
- Drain pan (optional but recommended)
Having these items ready before you start prevents delays and makes the entire process more efficient. If you don’t have a garden hose, you can purchase an inexpensive one at any home improvement retailer.
Safety Precautions Before Starting
Safety is paramount when working with hot water heaters. These appliances contain pressurized, extremely hot water that can cause severe burns. Always follow these precautions:
- Turn off the power supply: For electric units, switch off the circuit breaker. For gas units, turn the thermostat to the pilot setting.
- Allow water to cool: Wait at least 30 minutes to an hour after shutting down so the water temperature drops to a safe level.
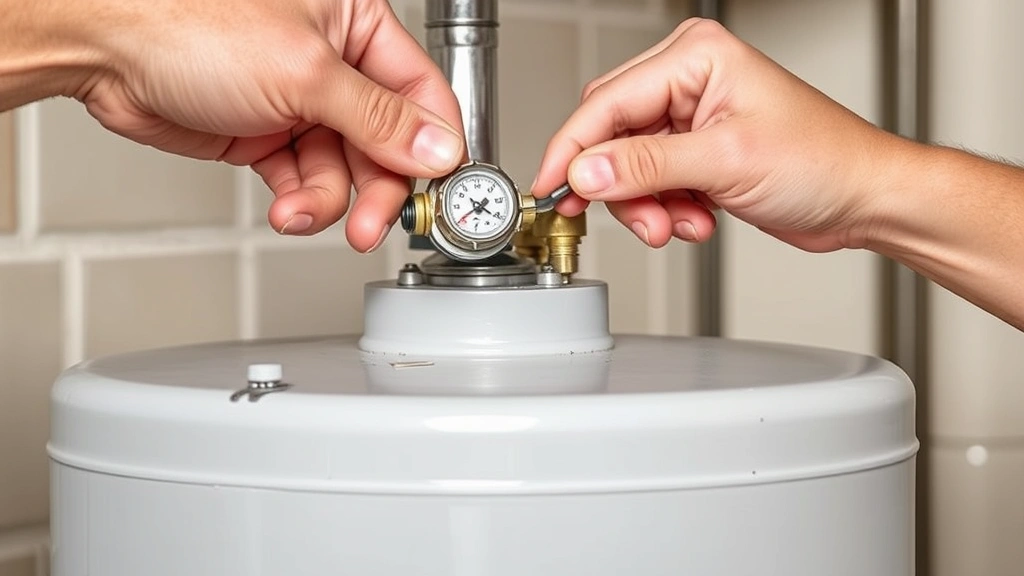
- Test the relief valve: Before draining, test the temperature and pressure relief valve by lifting its lever slightly. This ensures it’s functioning properly and won’t trap pressure in the tank.
- Wear protective gear: Always wear work gloves and safety glasses when draining your heater.
- Ensure proper drainage: Direct the hose to a floor drain, sump pump, or exterior location where large quantities of water can safely flow away.
- Never seal the tank: Never cap or seal the tank opening during or immediately after draining, as this can trap pressure and create a dangerous situation.
If you’re uncomfortable with any aspect of this process, consult a professional plumber. According to This Old House’s plumbing guides, improper handling of water heaters can lead to serious injury.
Step-by-Step Draining Instructions
Step 1: Turn Off the Water Supply
Locate the cold water inlet valve at the top of your hot water heater. This valve controls water flow into the tank. Turn it clockwise to shut off the water supply completely. If the valve is difficult to turn or leaks after closing, it may need replacement. You can find valve replacement guides on most manufacturer websites.
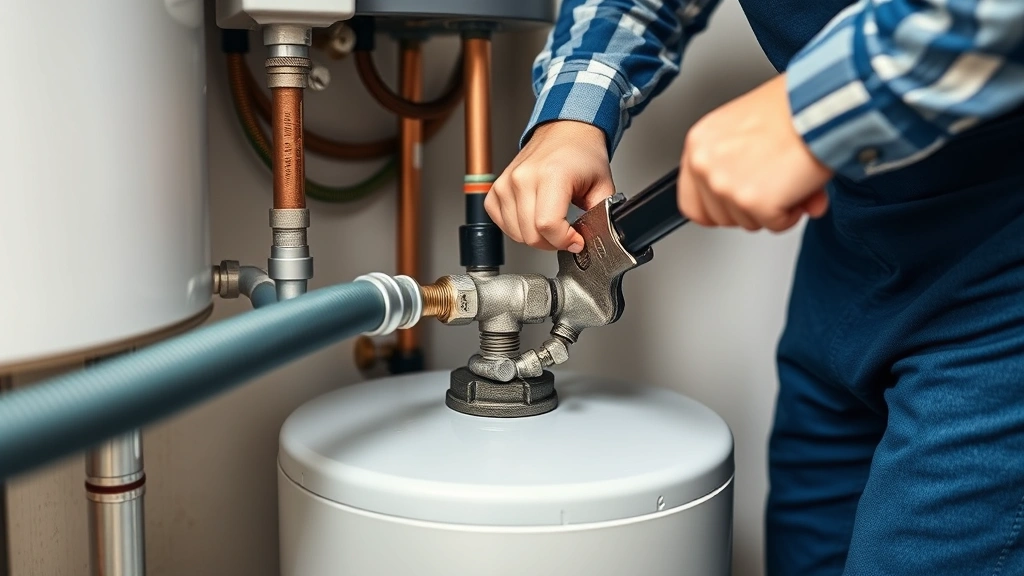
Step 2: Connect the Garden Hose
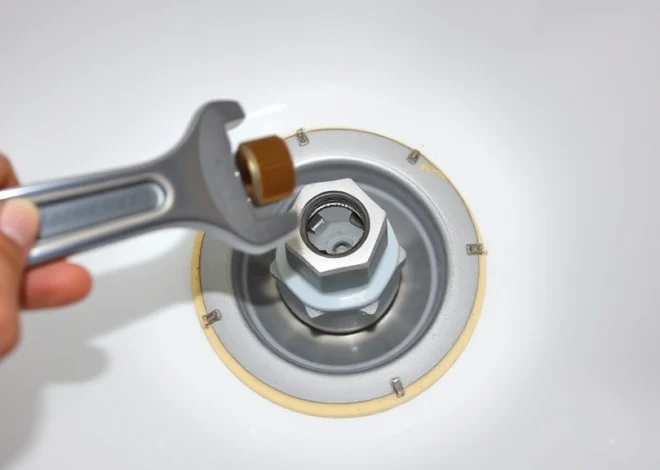
Locate the drain valve at the bottom of your water heater tank. This brass or plastic valve has a hose connection outlet. Attach your garden hose securely to this outlet. Ensure the connection is tight by hand-tightening first, then using an adjustable wrench if needed. Position the other end of the hose toward your floor drain or exterior area where water can safely drain away.
Step 3: Open the Relief Valve
The temperature and pressure relief valve is typically located on the side of the tank near the top. Open this valve by lifting its lever or turning its handle counterclockwise. This releases pressure from inside the tank and allows air to enter as water drains, which speeds up the draining process significantly.
Step 4: Open the Drain Valve
Slowly turn the drain valve at the bottom of the tank counterclockwise. Water will begin flowing through the hose. Start slowly to check that the hose is properly positioned and water is flowing in the desired direction. Once you confirm proper drainage, you can open the valve fully. The draining process typically takes 30 to 60 minutes depending on your tank size.
Step 5: Monitor the Draining Process
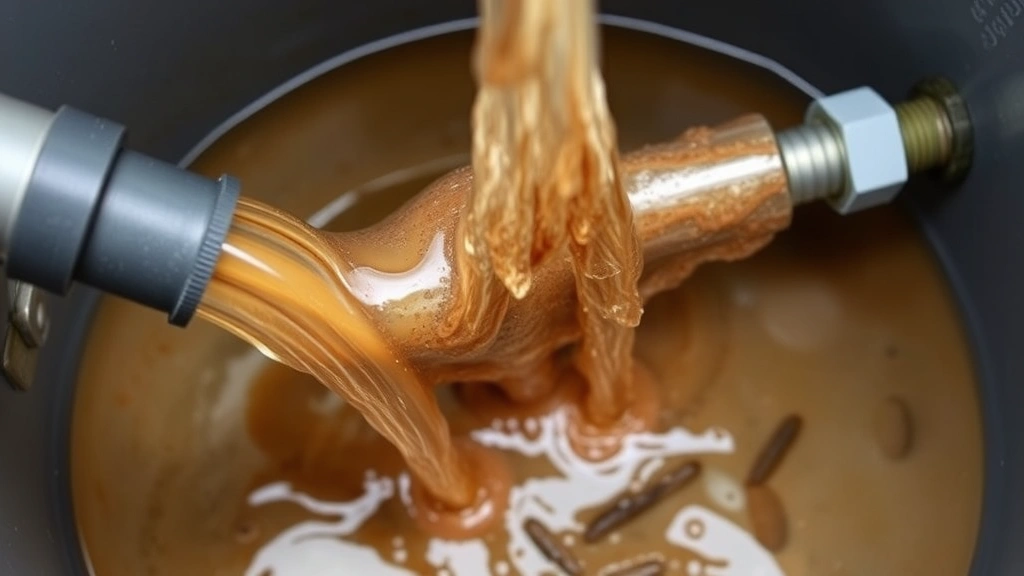
While your tank drains, check periodically to ensure the hose hasn’t shifted or become disconnected. The water coming out will appear increasingly murky and brown as sediment is flushed from the tank. This is completely normal. Continue monitoring until the water runs relatively clear. Don’t expect perfectly clear water; some sediment will remain at the very bottom.
Step 6: Flush Remaining Sediment
Once most water has drained, close the drain valve. Leave the cold water inlet valve off. Now open the cold water valve briefly to allow fresh water to enter the tank and stir up remaining sediment at the bottom. Immediately open the drain valve again to flush out this sediment. Repeat this flushing process 2-3 times until the water runs relatively clear. This step is crucial for complete sediment removal.
Step 7: Close All Valves
Close the drain valve by turning it clockwise. Close the relief valve by lowering its lever or turning it clockwise. Disconnect the garden hose from the drain valve outlet. Your tank is now drained and ready for refilling.
Troubleshooting Common Problems
The Drain Valve Won’t Open
If your drain valve is stuck, don’t force it as this can break the valve or damage the tank. Try spraying penetrating oil like WD-40 around the valve stem and wait 15 minutes. Gently tap the valve stem with a hammer to loosen mineral deposits. If it still won’t budge, you may need to replace the valve. Many hardware stores sell replacement drain valves compatible with standard water heaters.
Water Is Draining Very Slowly
Slow draining usually indicates a clogged drain valve. Mineral deposits can block the small opening. Try opening and closing the valve several times to dislodge debris. If this doesn’t help, you may need to remove and clean the valve. Alternatively, increase air flow into the tank by opening the relief valve wider or checking that it’s fully open.
Water Is Leaking from the Drain Valve Connection
A leaking connection usually means the hose isn’t secured tightly enough. Turn off the drain valve and tighten the hose connection using an adjustable wrench. If tightening doesn’t solve the problem, disconnect the hose and inspect the valve threads. If threads appear damaged, you’ll need to replace the drain valve. Apply Teflon tape to new valve threads before installation to ensure a watertight seal.
The Relief Valve Is Leaking
If the relief valve drips water after you close it, this is often temporary and normal. However, if it continues leaking significantly after draining is complete, the valve may be faulty and require replacement. A leaking relief valve indicates it’s functioning (which is good for safety) but may need adjustment or replacement.
Refilling and Restarting Your Heater
After draining and flushing your tank, you’ll need to refill it before restarting:
- Turn the cold water inlet valve clockwise to open it fully.
- Listen for water flowing into the tank. You’ll hear gurgling sounds as air exits and water fills the tank.
- Once water begins flowing from your hot water faucets, close those faucets. This indicates the tank is full.
- For electric heaters, ensure the tank is completely full before turning the power back on. Turning on power to an empty tank can damage heating elements.
- Close the relief valve completely by turning it clockwise.
- For electric units, switch the circuit breaker back on. For gas units, turn the thermostat from pilot to your desired temperature setting.
- Wait 30-60 minutes for the water to heat up to operating temperature.
- Test hot water at a faucet to confirm proper operation.
If you notice no hot water after 90 minutes, the heating element may not have activated. Check that the thermostat is set to at least 120 degrees Fahrenheit. If problems persist, consult the manufacturer’s manual or call a professional plumber.
For comprehensive information on water heater maintenance, Family Handyman provides detailed maintenance guidelines. You can also find manufacturer-specific instructions by searching your heater’s model number on the company’s website.
Regular draining keeps your water heater running efficiently and extends its service life significantly. Many homeowners find that annual draining prevents the need for costly repairs and emergency replacement.
FAQ
How often should I drain my hot water heater?
Most manufacturers recommend draining your hot water heater annually or every two years. In areas with hard water, you may need to drain every 6-12 months. Check your unit’s manual for specific recommendations based on your water quality and local conditions.
Can I drain my hot water heater myself, or do I need a professional?
You can absolutely drain your hot water heater yourself if you follow proper safety procedures. This is one of the more straightforward maintenance tasks. However, if you’re uncomfortable working with pressurized water systems or your heater has unusual connections, hiring a professional is always an option. The cost of professional draining typically ranges from $150-$300.
Why is the water coming out brown or discolored?
Brown or rusty-colored water is normal when draining your heater. This indicates sediment and mineral deposits being flushed from the tank. Continue the flushing process until water runs clearer. If water remains discolored after multiple flushes, your tank may have internal rust that requires professional inspection.
Is it safe to drain a hot water heater that’s still hot?
No, never drain a hot water heater while the water is still hot. Always turn off the power or gas supply and wait at least 30 minutes for the water to cool. Extremely hot water can cause severe burns. If you accidentally open the drain valve on a hot tank, close it immediately and wait longer before trying again.
What should I do if I can’t locate the drain valve?
The drain valve is always at the very bottom of the tank. If you can’t find it immediately, look for a brass or plastic valve with a hose connection outlet. Consult your water heater’s manual, which includes a diagram showing the exact location. You can also search online using your heater’s brand and model number to find instructional videos.
Can I reuse the water I drain from my hot water heater?
The water drained from your heater contains sediment and mineral deposits, so it’s not suitable for drinking or cooking. However, you can use it for watering outdoor plants, washing vehicles, or cleaning outdoor areas. The sediment won’t harm plants or landscapes.
What if my drain valve is completely stuck and won’t open?
If penetrating oil and gentle tapping don’t work, you may need to replace the drain valve. This is a relatively inexpensive repair (valve costs $20-$50) that any plumber can perform quickly. Attempting to force a stuck valve can damage your tank, so replacement is often the better option.
How long does the entire draining process take?
The complete process typically takes 1-2 hours from start to finish. Actual draining time depends on your tank size (usually 40-80 gallons for residential units) and ranges from 30-60 minutes. Add time for cooling the water before you start and refilling afterward.
Related Posts
Remove Security Tags at Home? Expert Tips Inside
Remove a Bathtub Drain? Expert Tips Inside