DIY Piñata Craft: Step-by-Step Guide for Beginners
DIY Piñata Craft: Step-by-Step Guide for Beginners
Creating a homemade piñata is one of the most rewarding craft projects you can tackle, whether you’re preparing for a child’s birthday party, a festive celebration, or simply exploring creative DIY activities. Unlike store-bought alternatives that often come with hefty price tags, a handmade piñata allows you to customize colors, shapes, and designs while keeping costs minimal. This comprehensive guide walks you through every stage of the process, from gathering materials to hanging your finished creation.
The beauty of piñata-making lies in its simplicity and accessibility. You likely have most supplies already at home, and the techniques require no special skills or experience. Whether you’re crafting a traditional round piñata or attempting an animal-shaped design, the fundamental principles remain consistent. By following this step-by-step approach, even complete beginners can produce impressive results that will delight guests and create lasting memories.
What You’ll Need: Essential Materials and Tools
Before starting your piñata project, gather all necessary materials to ensure a smooth workflow. The foundation of any piñata begins with a base structure, typically a balloon, cardboard box, or paper mache bowl. For beginners, balloons offer the easiest route since they’re inexpensive and readily available in various sizes. A standard round piñata works well for first-time crafters, though you can explore more complex shapes once you’ve mastered the basics.
The papier-mâché paste forms the outer shell that holds everything together. You can purchase pre-made paste from craft stores, but making your own is economical and effective. Mix one part flour with two parts water to create a smooth consistency, or combine equal parts white glue and water for a stronger adhesive. Newspaper strips, torn or cut into manageable pieces, serve as the primary building material. Colorful tissue paper or construction paper provides the decorative outer layer.
Essential tools include scissors for cutting materials, a paintbrush for applying paste, and a craft knife for carefully cutting the opening where treats will be inserted. Have paper towels nearby for cleanup, and consider wearing an apron to protect your clothing from paste and paint splatters. If you’re planning to paint your piñata, gather acrylic paints and brushes in various sizes. For hanging, you’ll need strong twine or rope capable of supporting the piñata’s weight when filled with candy.
When exploring craft techniques, you might also find our guide on how to make a paper crane helpful for understanding basic papier-mâché principles. Additionally, check out our FixWiseHub Blog for additional how-to guides covering various creative projects that complement piñata-making skills.
Preparing Your Piñata Base Structure
The base structure determines your piñata’s shape and durability. For a traditional round piñata, inflate a large balloon to your desired size—typically 12 to 18 inches in diameter works well for most gatherings. Tie the balloon securely and place it in a bowl to keep it stable while you work. This prevents the balloon from rolling around and makes the application process significantly easier.
If you prefer a non-round shape, consider using a cardboard box as your foundation. Tape the box securely closed, then shape it using additional cardboard tubes or paper rolls to create appendages for animal-shaped piñatas. For example, to create a donkey piñata, attach four paper towel tubes as legs and a longer tube as a neck. This modular approach allows tremendous creative flexibility while maintaining structural integrity.
Another excellent option involves creating a frame using rolled newspaper. Roll several sheets of newspaper tightly and tape them into circular or oval shapes, then connect these rolls using more tape to form a three-dimensional structure. This method works exceptionally well for creating custom shapes without relying on balloons or boxes. Ensure all connections are secure before proceeding to the papier-mâché stage, as a loose base will compromise your entire project.
Whichever base you choose, ensure it’s completely stable and won’t shift during the papier-mâché application. A wobbly foundation leads to uneven coating and potential structural failures. Test the stability by gently pushing on different sections—the base should barely move if properly prepared.
Creating the Papier-Mâché Coating
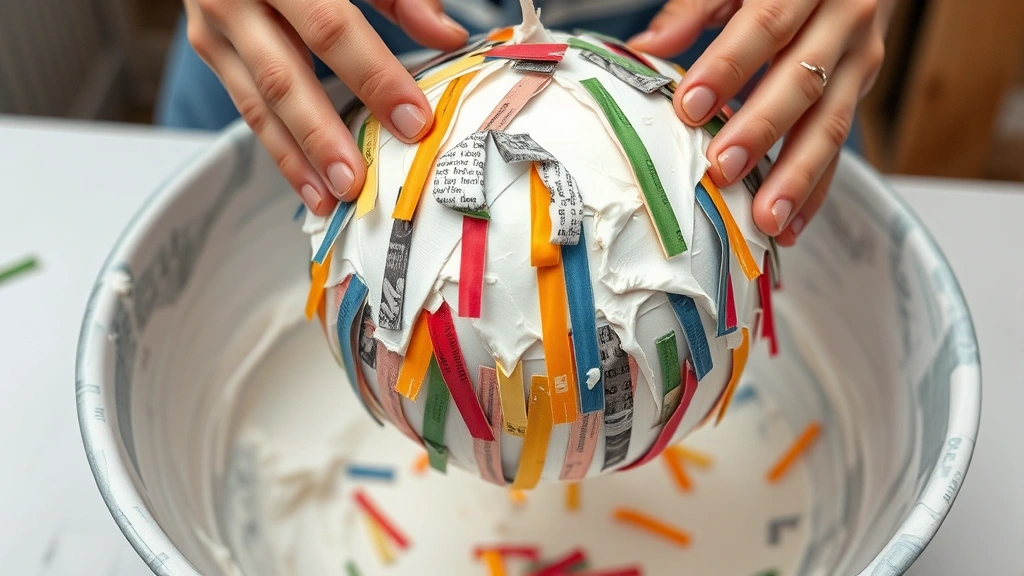
Papier-mâché represents the most time-consuming but rewarding aspect of piñata creation. Begin by preparing your paste according to your chosen recipe. If using flour-based paste, mix thoroughly to eliminate lumps, ensuring a smooth consistency that clings well to newspaper strips without being overly runny. The ideal paste should coat the strips generously but not drip excessively when applied.
Tear newspaper into strips approximately one to two inches wide and three to four inches long. Consistency in size helps create an even coating. Dip each strip into the paste, ensuring complete saturation, then apply it to your base structure. Smooth out air bubbles and wrinkles using your fingers or a paintbrush, overlapping strips by about half an inch to create a strong, cohesive shell.
Apply multiple layers for maximum strength—typically four to six layers suffice for most piñatas. Allow each layer to dry slightly before applying the next, though you need not wait for complete drying between coats. This staged approach prevents the structure from becoming waterlogged while ensuring adequate adhesion. For faster drying, place the piñata near a fan or in a warm, dry location between layers.
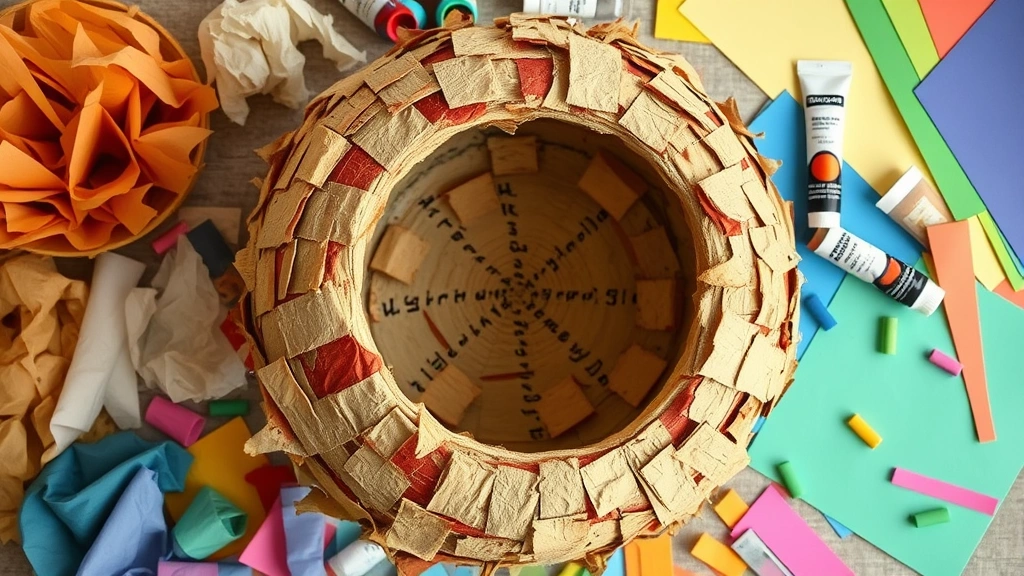
Once your final newspaper layer is complete, add a layer or two using white tissue paper or construction paper. This provides a cleaner base for your decorative coating and makes subsequent painting and decoration significantly easier. The tissue paper layer should be applied using the same paste technique as the newspaper, ensuring smooth coverage without wrinkles.
Allow the completed papier-mâché structure to dry completely—typically 24 to 48 hours depending on humidity and thickness. You’ll know it’s ready when the surface feels hard and rigid, with no soft or spongy areas. If using a balloon base, you can carefully pop the balloon once the coating is fully dry, creating an empty chamber for treats.
Decorating Your Finished Piñata
Once your papier-mâché foundation is complete and dry, the creative decoration phase begins. This is where your piñata transforms from a plain white structure into a vibrant, eye-catching creation. Paint your piñata with acrylic paints in your chosen colors and designs. Light colors typically require fewer coats, while darker shades may need multiple applications for full coverage.
Consider your design before beginning to paint. Sketch out patterns using pencil, then paint over them with acrylic paints. Popular designs include traditional multicolored stripes, animal features for shaped piñatas, or festive patterns matching your party theme. Allow each paint color to dry before applying adjacent colors to prevent unwanted mixing.
Beyond paint, incorporate tissue paper, crepe paper, and construction paper for added texture and dimension. Cut strips or shapes from colored paper and glue them to your piñata using craft glue or paste. Fringe-cut tissue paper creates beautiful flowing manes for animal piñatas or decorative skirts around the base. Glitter, sequins, and other embellishments add sparkle and visual interest, though ensure these materials are securely glued to prevent them from coming loose during play.
For animal-shaped piñatas, use painted details or paper cutouts to create eyes, noses, and mouths. Cotton balls can form fluffy tails, while yarn creates manes or hair. Let your imagination guide your decoration choices—the more personalized your piñata, the more special it becomes for the recipient. If you need inspiration for decorative techniques, our guide on how to tie a bow with a tie offers creative finishing touches applicable to piñata decoration.

Adding Treats and Sealing the Opening
Before sealing your piñata, you must create an opening through which to insert treats. For balloon-based piñatas, carefully cut a hole approximately four to six inches in diameter on the top or bottom. Use a craft knife and cut slowly to avoid damaging the structure more than necessary. If you popped the balloon during construction, this opening may already exist—simply enlarge it as needed.
For box-based piñatas, you may have already created an opening during assembly. Ensure it’s large enough to insert candy and small toys comfortably. For newspaper-frame piñatas, cut an opening in a less visible location—typically the bottom or back—to minimize impact on your decoration scheme.
Fill your piñata with an assortment of wrapped candies, small toys, and treats. Aim for a balanced distribution of items, avoiding excessive weight in one area. Traditional fillings include hard candies, chocolate pieces, small action figures, bouncy balls, and miniature puzzles. Ensure all items are individually wrapped or small enough to prevent choking hazards, especially if children under eight years old will be playing.
Once filled, seal the opening using papier-mâché strips and paste, or use colored tape and decorative paper to conceal the seam. If using papier-mâché, apply several layers to ensure the seal is strong enough to withstand the force of a stick. Decorate the sealed area to match the rest of your piñata so the opening is invisible.
Alternatively, create a hinged door using cardboard and tape, allowing you to refill your piñata for multiple events. This approach requires more careful construction but provides tremendous reusability and flexibility for different party themes.
Hanging and Safety Considerations
Proper hanging is crucial for both successful piñata play and participant safety. Attach a sturdy rope or twine to the top of your piñata before filling it. Create a loop by threading the rope through or around the piñata’s structure, then secure it with multiple knots. Test the rope’s strength by gently lifting the filled piñata—it should support the weight without stretching or showing signs of weakness.
Hang your piñata from a sturdy tree branch, ceiling beam, or specially installed hook. The piñata should hang at approximately head height for the shortest participant, allowing everyone adequate reach while maintaining control. Ensure the hanging location is in an open area free from obstacles, sharp edges, or breakable items that could be damaged during play.
Establish clear safety rules before piñata play begins. Participants should wear blindfolds only if supervised by a responsible adult, and should maintain adequate distance from the piñata and other players. Use a soft stick or bat—never allow hard implements that could cause injury. Rotate players regularly to prevent fatigue-related accidents, and consider limiting play sessions to 10-15 minutes per participant.
For additional guidance on home safety and project planning, consult resources like This Old House for comprehensive home improvement and safety information. Their expertise extends to various DIY projects and safety considerations applicable to craft activities.
Weather considerations apply if you’re hanging your piñata outdoors. Protect it from rain, which can damage the papier-mâché and cause structural failure. If rain threatens, move the piñata indoors or cover it with a waterproof tarp. Wind can also affect hanging stability, so secure your rope firmly and monitor conditions throughout your event.
FAQ
How long does it take to make a piñata from start to finish?
The timeline varies depending on your design complexity and drying conditions. Expect 3-5 days total, including drying time between papier-mâché layers. Active work time typically spans 4-6 hours spread across multiple sessions. Simpler designs may be completed in 2-3 days, while elaborate animal-shaped piñatas might require a week or more.
Can I use flour paste instead of glue for papier-mâché?
Yes, flour paste works excellently for piñata construction. Mix one part flour with two parts water, heating the mixture while stirring until it thickens slightly. This creates a strong, economical adhesive that holds newspaper strips securely. Some crafters prefer glue-based paste for greater strength, but flour paste is perfectly adequate for most piñatas.
What’s the best shape for a beginner piñata?
Round piñatas are ideal for beginners since balloons provide a ready-made base requiring no additional construction. Once you’ve mastered this basic shape, progress to oval piñatas or simple animal designs using cardboard boxes or newspaper frames. Star and heart shapes also work well for beginners seeking variety without excessive complexity.
How much candy should I put in my piñata?
Fill your piñata until it’s comfortably full but not excessively heavy—typically 3-5 pounds of candy works well for most piñatas. Consider the age of participants and the number of people who’ll be playing. Larger piñatas accommodate more candy, while smaller ones should be filled more sparingly to maintain balance and prevent excessive weight.
Can I make a piñata without a balloon?
Absolutely. Cardboard boxes, newspaper frames, and paper mache bowls all serve as excellent bases. Box-based piñatas are particularly sturdy and work well for non-round shapes. Newspaper frames offer maximum customization for unique designs. Choose the method that best suits your intended shape and available materials.
How do I make my piñata weatherproof?
Apply a waterproof sealant or varnish over your completed decoration. Polyurethane or polycrylic sealants work well and dry clear, preserving your design while protecting against moisture. Allow the sealant to dry completely before filling or hanging your piñata. For outdoor events, consider covering your piñata with a protective tarp when not in active use.
What if my piñata breaks before the party?
Minor cracks can be patched using papier-mâché strips and paste, or covered with decorative tape and paper. Allow patches to dry completely before continuing. Larger breaks may require reinforcement from inside using additional newspaper or cardboard strips. If structural integrity is compromised, consider starting fresh rather than risking collapse during play.
For additional creative project inspiration and detailed how-to guidance, explore our collection of DIY tutorials and crafting guides. Whether you’re perfecting your piñata skills or exploring other creative endeavors, our comprehensive resources support your artistic journey. For craft supplies and materials, visit established retailers like Joann Fabric and Craft Stores for competitive pricing on papier-mâché supplies and decorative materials.
Related Posts
Remove Security Tags at Home? Expert Tips Inside
Remove a Bathtub Drain? Expert Tips Inside