
How to Make a Bow? Easy DIY Tutorial
How to Make a Bow: Easy DIY Tutorial for Beginners
Learning how to tie a perfect bow is a fundamental skill that transforms gift wrapping, decorating, and crafting projects from ordinary to polished. Whether you’re preparing presents for the holidays, adding finishing touches to home décor, or simply want to master this classic technique, understanding the mechanics of bow-tying opens up endless creative possibilities. This comprehensive guide breaks down the process into manageable steps, making it accessible for everyone from children to adults.
A well-executed bow demonstrates attention to detail and adds an elegant touch to any project. The beauty of mastering this skill is that once you understand the basic principles, you can adapt the technique to different ribbon widths, materials, and styles. From simple two-loop bows to more elaborate multi-loop variations, the foundation remains consistent. Let’s explore everything you need to know about creating beautiful bows that impress.
Materials and Ribbon Selection
Before you begin learning how to tie a bow, gathering the right materials ensures success. The most essential component is ribbon, which comes in various types, widths, and textures. Satin ribbon remains the most popular choice for traditional bows because it holds its shape beautifully and creates elegant loops. However, grosgrain ribbon offers excellent durability and works wonderfully for everyday applications, while velvet ribbon adds luxury and texture to special occasion gifts.
Ribbon width significantly impacts your bow’s appearance and difficulty level. Beginners should start with medium-width ribbon (1.5 to 2 inches) as it’s forgiving and creates visually balanced results. Narrow ribbons (under 1 inch) work best for delicate projects and smaller packages, while wide ribbons (3 inches or more) create dramatic, statement-making bows but require more practice to execute cleanly.
Beyond ribbon selection, consider having scissors with clean, sharp blades to ensure precise cuts without fraying. Some crafters prefer fabric scissors specifically, as they prevent ribbon damage. You may also want to gather double-sided tape or hot glue for securing bows to packages or decorative surfaces. Understanding proper proportions and measurements helps when calculating ribbon length needed for various bow sizes.
The Classic Two-Loop Bow Method
The classic two-loop bow represents the foundation of bow-tying mastery. This timeless technique works on packages, gift bags, wreaths, and decorative projects. The beauty of this method lies in its simplicity and reliability—once you practice a few times, your hands will remember the motions automatically, allowing you to create bows without conscious thought.
This method involves creating two loops from ribbon, crossing them strategically, and tightening them to form symmetrical ears. The resulting bow appears polished and professional, making it ideal for gift-giving occasions. Understanding the mechanics helps you troubleshoot when things don’t go perfectly, and it provides the foundation for advancing to more complex bow styles.
The technique works because of how ribbon naturally responds to tension and manipulation. When you cross the loops at the correct angle and pull the center knot securely, the loops maintain their shape and create visual balance. This method adapts beautifully to different ribbon materials, from delicate silk to sturdy burlap.

Step-by-Step Instructions
Step 1: Prepare Your Ribbon
Begin by cutting a length of ribbon approximately 24 to 36 inches, depending on your desired bow size and ribbon width. Lay the ribbon flat on your work surface. This preparation stage matters because working with properly measured ribbon prevents frustration and waste. If you’re practicing, use an affordable ribbon so mistakes don’t discourage you from continuing.
Step 2: Create the First Loop
Hold the ribbon’s center point between your thumb and index finger with your left hand. With your right hand, fold the right end of the ribbon upward to create a loop approximately 3 to 4 inches tall (adjust size based on desired bow). This loop represents one ear of your finished bow. Pinch this loop at its base where it meets your center point, maintaining firm pressure.
Step 3: Form the Second Loop
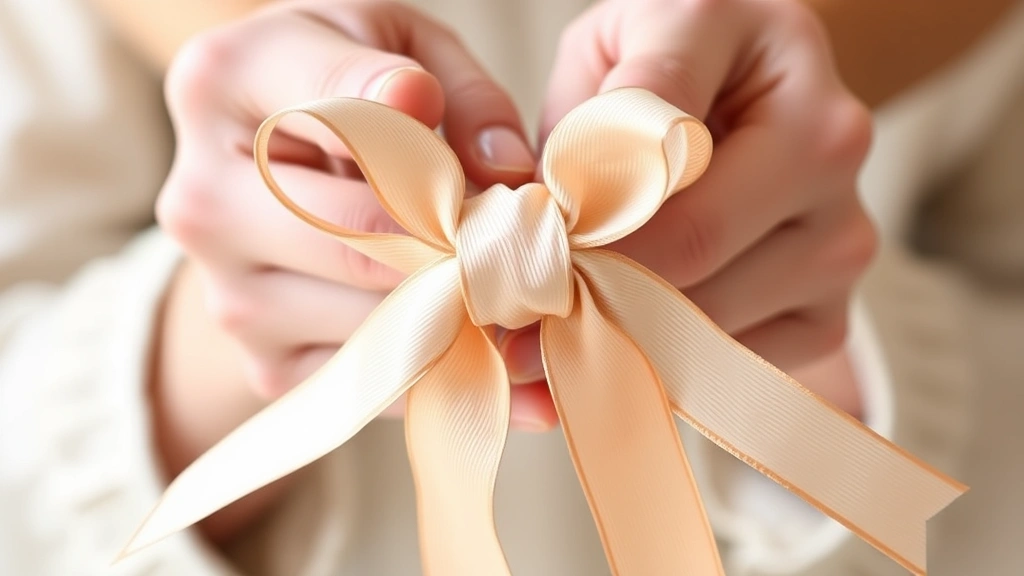
Now take the left end of the ribbon and fold it upward, creating a matching loop on the left side. This second loop should be approximately the same size as the first. Pinch both loops firmly at the center point where they intersect. At this stage, you’re holding both loops in place with one hand while the ribbon ends hang down.
Step 4: Cross the Ribbon Ends
Release your grip slightly and take one of the hanging ribbon ends (it doesn’t matter which one). Wrap it around the center where both loops meet, crossing over the intersection point. This wrapping motion creates the knot that holds your bow together. Bring the ribbon end back toward you and push it through the center loop you’ve created.
Step 5: Tighten the Bow
Pull both ribbon ends firmly to tighten the center knot. This tightening action locks your loops in place and creates definition. Don’t pull too hard, as excessive force can distort the loops or tear delicate ribbon. A firm, confident pull works better than yanking. You should feel the bow suddenly become rigid and secure.
Step 6: Adjust and Fluff
Once tightened, gently adjust each loop to ensure they’re symmetrical and face forward. If one loop appears larger than the other, carefully manipulate it to match its partner. Fluff the loops by gently pulling them outward and upward, creating fullness and dimension. This adjustment transforms a flat bow into one with visual presence.
Step 7: Trim the Tails
The two ribbon ends hanging below your bow are called tails. Trim them to your desired length—typically 3 to 6 inches depending on the overall bow size. For a polished look, cut the tails at an angle (diagonal cut) rather than straight across. This angled cut prevents fraying and looks intentional and professional. You can also cut V-shaped notches in the tail ends for a decorative finish.

Advanced Bow Variations
The Multi-Loop Bow
Once you’ve mastered the basic two-loop bow, challenge yourself with multi-loop variations. The multi-loop bow features four, six, or even eight loops radiating from the center, creating a fuller, more dramatic appearance. Begin by creating two loops as described previously, then repeat the process, adding loops on alternating sides. Each new loop should be slightly smaller than the previous one, creating a cascading effect. This style works beautifully on large packages or as standalone decorative elements.
The Spiral Bow
The spiral bow creates visual interest through rotation and layering. Instead of creating loops that face forward, you’ll create loops at different angles, rotating them around the center point. This technique produces a three-dimensional effect that catches light beautifully. It requires more ribbon and practice but delivers stunning results for special occasions.
The Layered Bow
Combine ribbons of different widths, colors, or textures to create layered bows. Start with a wider ribbon and tie your basic bow, then tie a second bow using narrower ribbon around the center of the first. This approach allows unlimited creativity and works particularly well for themed decorations. You can also layer ribbons with different finishes—matte and shiny combinations look especially elegant.
Troubleshooting Common Issues
Uneven Loops
If your loops appear mismatched in size, don’t panic. This common issue occurs when you don’t fold the ribbon at equal distances from the center point. When creating your loops, measure carefully to ensure both sides are symmetrical. Practice making loops of identical size before pulling tight. If loops are already uneven, you can sometimes adjust them by gently manipulating and pulling the loops to balance them.
Bow Won’t Stay Tight
A loose bow usually results from insufficient tension when tightening the center knot. Pull the ribbon ends firmly and deliberately rather than gently. If using slippery ribbon like satin, consider tying a second knot around the center for added security. Some crafters wrap a piece of tape around the center to maintain tension on extra-slippery materials.
Ribbon Fraying or Tearing
Fraying edges indicate you’re cutting ribbon with dull scissors. Invest in sharp scissors and cut decisively—hesitant, sawing motions cause more damage than clean, confident cuts. If ribbon tears during the bow-making process, this suggests you’re pulling too hard during tightening. Use firm, controlled pressure rather than yanking.
Loops Falling Flat
Ribbon that won’t hold loop shape often results from material choice. Satin and grosgrain hold shape better than cotton or linen ribbons. If working with naturally flat ribbon, try curling the loops by running them across scissor blades or a ribbon curler. Alternatively, use hot glue or floral wire to maintain loop structure for permanent installations.
Professional Tips and Tricks
Pre-measuring Ribbon Length
Professional gift wrappers often pre-measure ribbon before starting. For a standard two-loop bow on a medium package, approximately 24 to 30 inches works well. Develop a sense of appropriate ribbon length through practice. Too little ribbon creates tiny, insignificant bows, while too much creates bulky, overwhelming results.
Creating Perfect Symmetry
Symmetrical bows look intentional and polished. To achieve perfect symmetry, make both loops the same size by measuring with your fingers. When you create the first loop, note how many inches it spans on your hand. Create the second loop to match this exact measurement. This deliberate approach produces consistently beautiful results.
Handling Different Ribbon Materials
Each ribbon type requires slightly different handling. Satin ribbon responds well to the standard technique but can slip if pulled too gently. Grosgrain ribbon holds knots securely but resists curling. Velvet ribbon creates gorgeous bows but shows fingerprints and requires careful handling. Burlap and linen ribbons work well for rustic applications but may fray more readily. Experiment with different materials to understand their unique properties and how to work with them effectively.
Adding Decorative Elements
Enhance your bows by incorporating bells, beads, or small decorative picks into the center knot area. These additions catch light and add personality to gift presentations. You can also layer contrasting ribbons or add a small tag with a gift message. These professional touches transform a simple bow into a memorable presentation element.
Practicing Muscle Memory
The key to rapid improvement is consistent practice. Tie bows during commercial breaks, while watching television, or during quiet moments. Your hands will gradually remember the motions without conscious direction. Many professionals can now tie bows without looking, having developed strong muscle memory through thousands of repetitions.
Visit FixWise Hub Blog for more DIY tutorials and home improvement guides. For additional home improvement resources, check established authorities in the field. You might also explore Family Handyman for comprehensive project guidance and specialty ribbon and wrapping supplies at major retailers.
FAQ
What length ribbon do I need for a bow?
For a standard two-loop bow, use 24 to 36 inches of ribbon. Adjust based on ribbon width and desired bow size—wider ribbons need more length to create proportional loops.
Can I use any type of ribbon?
Most ribbon types work, but satin and grosgrain hold shape best. Avoid overly stiff or extremely slippery materials until you’ve mastered the basic technique. Learning proper measurement techniques helps with ribbon calculation.
Why won’t my bow stay tight?
Insufficient tension during tightening causes loose bows. Pull the ribbon ends firmly and deliberately. With slippery materials, tie a second knot or use tape for security.
How do I prevent ribbon fraying?
Use sharp scissors and cut decisively. Cut at an angle for tails to create a finished look. Some people seal cut edges with clear nail polish or fray check for delicate ribbons.
Can children learn to tie bows?
Absolutely! Children as young as five or six can learn with practice and patience. Start with wider, less slippery ribbon. Supervise initially and celebrate progress, as mastery develops gradually.
What’s the difference between a bow and a knot?
A knot is a simple tie, while a bow features decorative loops. Bows are typically used for presentation and decoration, creating visual appeal beyond simple fastening.
How do I make a bow look fuller?
Create larger loops, use wider ribbon, or try the multi-loop variation. Fluff the loops after tightening to add dimension. Layering ribbons of different widths also creates fullness.
Related Posts

Superscript in Google Docs: Expert Tips

Strikethrough in Excel: Easy Steps for Beginners
