

How to Build a Shed? Expert Tips Inside
How to Build a Shed: Expert Tips Inside
Building a shed is one of the most rewarding DIY projects you can undertake. Whether you need extra storage, a workshop, or a peaceful retreat, constructing your own shed gives you complete control over the design, size, and functionality. This comprehensive guide will walk you through every step of the process, from planning and preparation to finishing touches, ensuring you create a sturdy structure that lasts for decades.
A well-built shed adds value to your property while providing practical storage solutions. Unlike purchasing a pre-made shed, building your own allows for customization and often costs significantly less. With proper planning, the right tools, and patience, even beginners can successfully complete this project.
Planning and Preparation
Before you pick up a single nail, proper planning is essential. Start by determining what size shed you need and what local building codes apply in your area. Most municipalities require permits for structures over 100-120 square feet, so check with your local building department first. Visit This Old House for comprehensive building code resources.
Create detailed sketches or use online design tools to visualize your shed. Consider the roof style—gable roofs are popular for drainage and attic space, while shed roofs are simpler for beginners. Think about door placement, window needs, and whether you’ll need electrical outlets. Document everything, as you’ll need these plans for your permit application.
Calculate your material list carefully. Account for the foundation, framing lumber, roofing materials, siding, hardware, and finishing supplies. Order 10-15% extra materials to account for mistakes and waste. Check with Family Handyman for detailed material calculators specific to your shed dimensions.
Site Selection and Foundation
Choosing the right location is crucial for your shed’s longevity. Select a spot with good drainage—avoid low areas where water collects. Ensure the ground is relatively level and receives adequate sunlight if you’ll be working inside. Check for underground utilities by calling your local utility locating service before digging.
The foundation prevents rot, pest damage, and structural issues. Most DIYers choose between concrete pads, gravel beds, or concrete blocks. For small sheds, a gravel foundation with pressure-treated skids works well. For larger structures, consider a concrete slab or frost-protected foundation if you live in cold climates.
To prepare a gravel foundation: level the ground, add landscape fabric to prevent weeds, and spread 4-6 inches of gravel. For concrete pads, dig holes below the frost line (check local requirements), set concrete piers, and level them. Allow concrete to cure for at least 48 hours before building on top.
Materials and Tools You’ll Need
Gather these essential materials before starting: pressure-treated lumber for the foundation and frame, exterior-grade plywood for walls and roof sheathing, roofing material (shingles, metal, or corrugated panels), exterior siding (wood, vinyl, or metal), hardware (nails, screws, hinges, brackets), and finishing supplies (paint, stain, caulk).
Essential tools include a circular saw or miter saw, power drill, level, tape measure, square, hammer, nail gun (optional but helpful), and safety equipment (gloves, safety glasses, dust mask). For roofing work, you’ll need a roofing nailer and a ladder. Consider renting specialty tools like a power auger if you need to dig post holes.
Shop at reputable home improvement retailers like Lowe’s or Home Depot for competitive pricing on materials and tool rentals. Compare prices and look for sales on bulk lumber purchases.
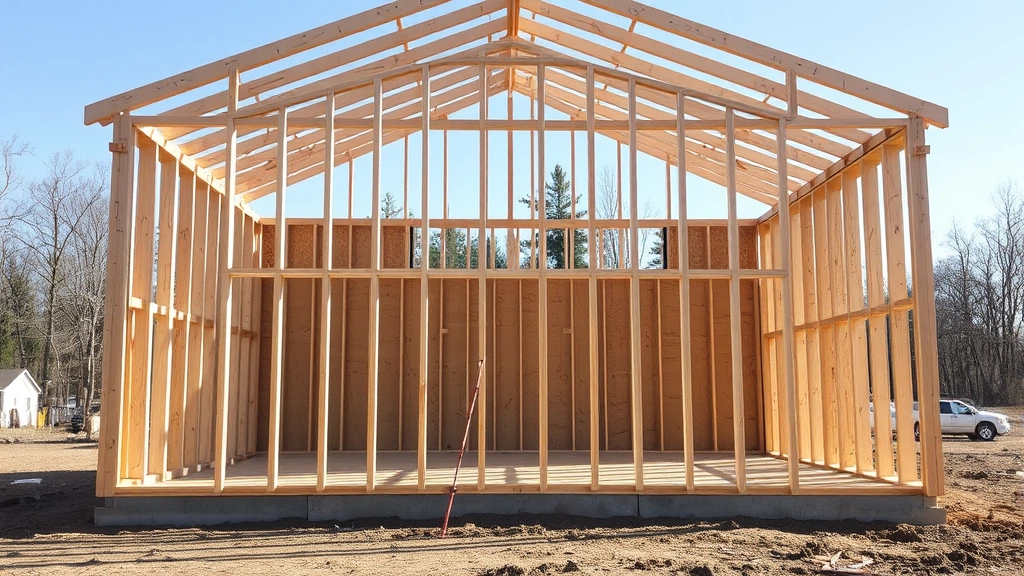
Building the Frame
The frame is your shed’s skeleton. Start by building the floor frame using pressure-treated 2×8 or 2×10 lumber, depending on your shed size. Lay out the perimeter, check for square using the 3-4-5 triangle method, and secure corners with bolts or brackets. Install floor joists every 16 inches on center for adequate support.
Once the floor is solid, construct the wall frames. Build frames flat on the ground before standing them up. Use 2×4 lumber for studs spaced 16 inches apart. Include openings for doors and windows, and add headers above openings for structural support. A standard door header requires doubled 2×8 lumber for 3-foot openings.
Stand wall frames one at a time, checking for plumb with a level before securing to the floor frame. Brace walls temporarily with 2x4s until all walls are connected. Install diagonal bracing or plywood sheathing to prevent racking (the frame twisting out of square). This bracing is critical for structural integrity.
Build the roof frame next. Common rafter designs use either rafters cut at angles or trusses. Trusses are easier for beginners—you can purchase pre-made trusses or build simple designs yourself. Space rafters 24 inches apart for most applications. Install collar ties and ridge boards to maintain proper spacing and prevent spreading.
Walls and Roofing
With the frame complete, install wall sheathing. Exterior-grade plywood or oriented strand board (OSB) provides structural bracing and a base for siding. Install sheathing with 8-inch nail spacing around edges and 12-inch spacing in the field. Don’t forget to leave openings for windows and doors.
Choose your siding material based on budget and maintenance preferences. Wood siding offers classic appearance but requires regular maintenance. Vinyl siding is low-maintenance and affordable. Metal siding is durable and weather-resistant. Install siding according to manufacturer instructions, typically overlapping boards from bottom to top.
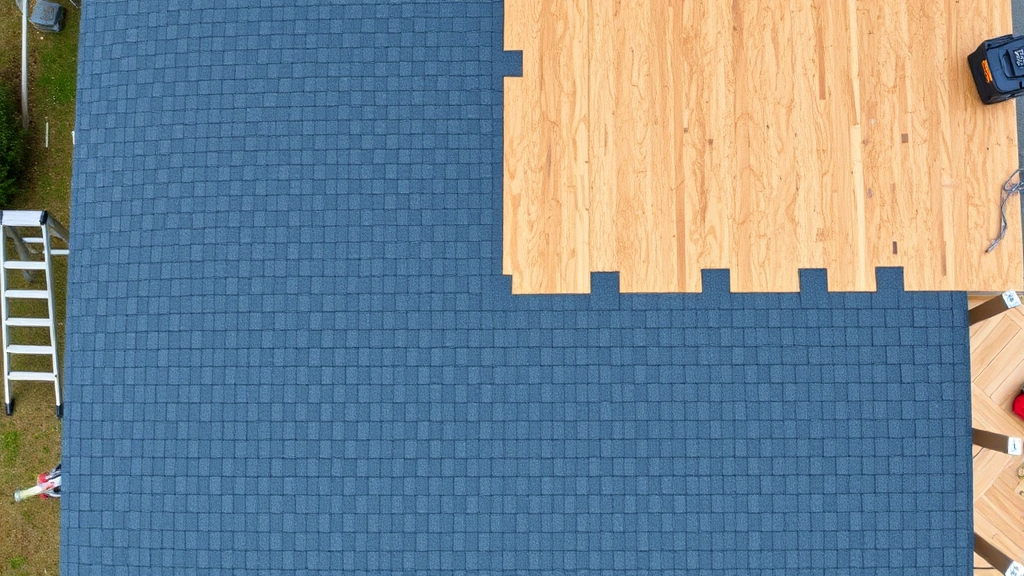
Roofing is critical for weather protection. First, install roof sheathing (plywood or OSB) perpendicular to rafters, leaving 1/8-inch gaps for expansion. Add a roofing underlayment for additional weather protection. Asphalt shingles are popular and affordable—install them starting at the bottom edge, overlapping each course and nailing according to manufacturer specifications.
Ensure proper water drainage by installing gutters and downspouts. This prevents water from running down walls and pooling around the foundation. Roof overhangs of at least 12-18 inches help protect walls from rain.
Finishing Touches
Paint or stain all exterior surfaces for protection and aesthetics. Use exterior-grade paint or stain designed for the materials you’ve chosen. Allow proper drying time between coats. Consider how your shed appearance complements your home—many homeowners who become expert at repairs take pride in matching their property’s style.
Install doors and windows. Pre-hung doors make installation easier—simply fit them into the opening and secure with shims and nails. Add weatherstripping around doors and windows to prevent drafts and water infiltration. Consider adding a threshold to direct water away from the interior.
Interior finishing depends on your shed’s purpose. For storage, simple shelving and hooks maximize space. For a workshop, add a workbench and tool storage. Install electrical wiring if needed—hire a licensed electrician for safety compliance. Add ventilation through soffit and ridge vents or windows to prevent moisture buildup.
The final step is adding a ramp if needed for equipment access, painting interior walls, and organizing storage systems. Stand back and admire your work—you’ve just built a structure that will serve your property for years to come. If you’ve developed an interest in construction, you might explore related career paths or continue learning through FixWise Hub’s comprehensive DIY blog.
FAQ
Do I need a permit to build a shed?
Most areas require permits for sheds over 100-120 square feet or those with electrical systems. Check your local building department’s requirements. Permits ensure your structure meets safety codes and won’t cause zoning violations.
What’s the best foundation for a shed?
For small sheds (under 100 sq ft), a gravel base with treated lumber skids works well. Larger sheds benefit from concrete pads or a full slab. In cold climates, use frost-protected foundations below the frost line to prevent heaving.
How long does it take to build a shed?
A basic 8×10 shed typically takes 40-60 hours for one person or 20-30 hours for two people. This includes planning, foundation preparation, framing, roofing, siding, and finishing. Complex designs with electrical work take longer.
What’s the most common mistake beginners make?
Skipping proper foundation preparation is the most frequent error. Poor drainage and uneven foundations lead to structural problems and rot. Also, many beginners underestimate the importance of checking for square and plumb throughout construction.
Can I build a shed without power tools?
Yes, but it’s significantly more labor-intensive. Hand tools work fine for smaller projects, though power tools dramatically speed up cutting and fastening. Consider renting tools to reduce costs while maintaining efficiency.
What maintenance does a shed require?
Inspect roofing annually for damage, clean gutters regularly, check siding for rot or damage, and repaint every 5-7 years. Keep the foundation clear of debris and ensure proper drainage around the base. Treat any wood damage promptly to prevent spreading.
Related Posts

Superscript in Google Docs: Expert Tips

Strikethrough in Excel: Easy Steps for Beginners
