
Preserve Beauty: Step-by-Step Guide to Drying Flowers
Flowers bring joy and beauty to our lives, but their natural splendor is often fleeting. Learning how to dry flowers allows you to preserve these precious moments and create lasting decorative pieces that capture nature’s essence. Whether you’ve received a meaningful bouquet, grown beautiful blooms in your garden, or simply want to extend the life of fresh flowers, proper drying techniques can transform fragile petals into enduring keepsakes.
The art of flower drying has been practiced for centuries, serving both practical and aesthetic purposes. From creating potpourri and herbal remedies to crafting stunning dried flower arrangements, this time-honored technique offers endless possibilities for creativity and preservation. Understanding the various methods and best practices will help you achieve professional-quality results while maintaining the natural beauty and color of your flowers.
Choosing the Right Flowers for Drying
Success in flower drying begins with selecting the right blooms at the optimal time. The best candidates for drying are flowers with naturally low moisture content and sturdy petals. Roses, lavender, baby’s breath, statice, and globe amaranth are excellent choices for beginners due to their robust structure and ability to retain color during the drying process.
Timing is crucial when harvesting flowers for drying. Pick flowers in the morning after the dew has evaporated but before the heat of the day sets in. Choose blooms that are just beginning to open rather than fully mature flowers, as they will continue to open slightly during the drying process. Avoid flowers that show signs of wilting, disease, or insect damage, as these imperfections will only become more pronounced after drying.
Consider the natural characteristics of different flower types when making your selection. Flowers with papery textures, such as strawflowers and globe thistle, dry exceptionally well and maintain their shape. Delicate flowers like poppies and hibiscus require more careful handling and specialized techniques. Just as you might research how to grow garlic for optimal harvest timing, understanding each flower’s unique properties will improve your drying results.
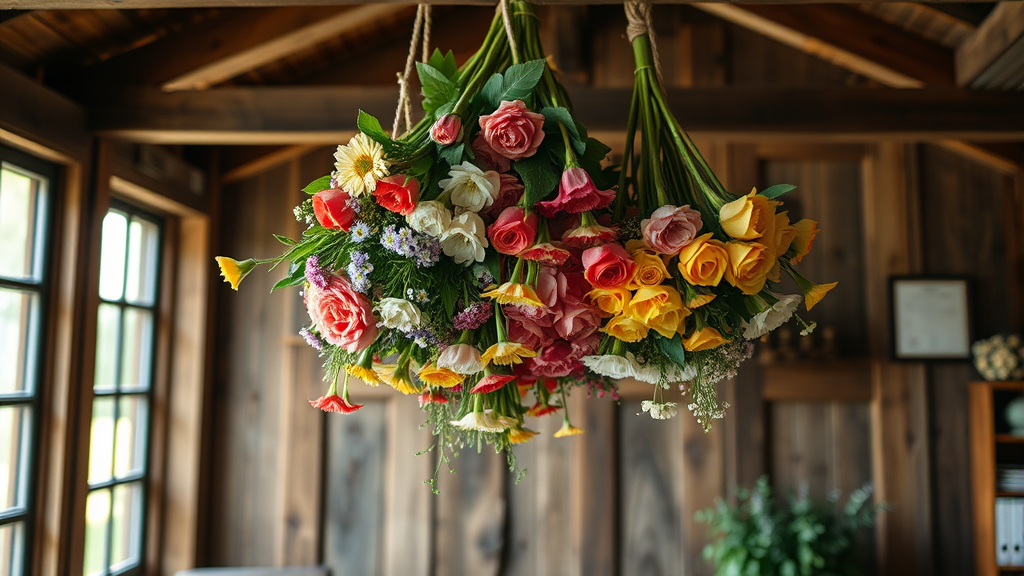
Air Drying Method: The Traditional Approach
Air drying remains the most popular and accessible method for preserving flowers. This technique requires minimal equipment and works well for most flower types. Begin by removing excess foliage from the stems, leaving only a few leaves near the flower head if desired. Strip away any damaged or wilted leaves that could introduce moisture and cause mold during the drying process.
Create small bundles of 5-10 stems, securing them with rubber bands or string about one inch from the cut ends. Rubber bands are preferable as they contract as the stems shrink during drying, maintaining a tight grip. Hang the bundles upside down in a warm, dry, well-ventilated area away from direct sunlight. Attics, spare rooms, or covered porches often provide ideal conditions.
The drying process typically takes 1-3 weeks, depending on the flower type, humidity levels, and air circulation. Check the progress weekly by gently touching the petals. Properly dried flowers will feel papery and crisp to the touch. Maintain good air circulation to prevent mold growth, and ensure the drying area remains consistently dry. According to the Purdue University Extension, proper air circulation is essential for preventing fungal issues during the drying process.
Pressing Flowers for Flat Preservation
Flower pressing creates beautiful flat specimens perfect for crafts, artwork, and botanical displays. This method works best with flowers that have naturally flat profiles or can be easily flattened, such as pansies, violets, ferns, and individual rose petals. The key to successful pressing lies in removing moisture while maintaining the flower’s natural color and shape.
Traditional flower pressing uses a flower press or heavy books with absorbent paper. Place flowers between sheets of porous paper such as blotting paper, newspaper, or specialized pressing paper. Ensure flowers don’t overlap and arrange them with their most attractive side facing down. Layer the papers with flowers between the pages of heavy books or in a flower press, applying consistent pressure.
The pressing process requires patience, typically taking 2-6 weeks for complete drying. Change the absorbent papers after the first week if they become very damp, then leave undisturbed for the remaining time. Modern alternatives include using an iron on low heat with protective paper layers for quick pressing, though this method requires careful temperature control to avoid scorching delicate petals.
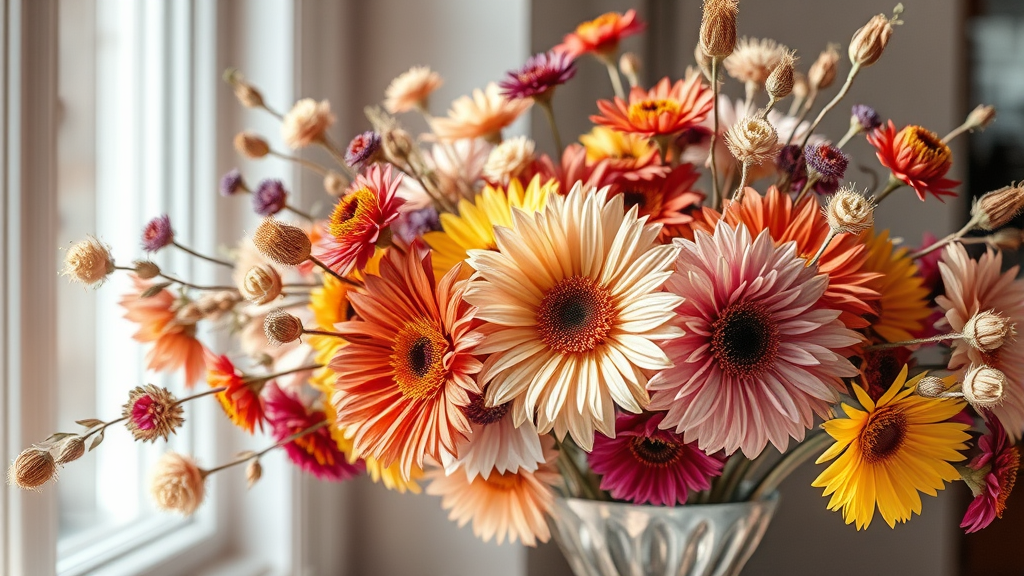
Silica Gel Method for Three-Dimensional Results
Silica gel drying produces the most natural-looking results, maintaining the three-dimensional shape and vibrant colors of fresh flowers. This method works exceptionally well for complex blooms like roses, peonies, and orchids. Silica gel crystals absorb moisture rapidly while supporting the flower’s structure during the dehydration process.
Use a container with a tight-fitting lid and pour a layer of silica gel crystals about one inch deep. Place flowers face-up in the gel, ensuring they don’t touch each other or the container walls. Carefully pour more gel around and over the flowers, using a soft brush to work the crystals between petals without damaging them. The flowers should be completely buried but not compressed.
Seal the container and leave undisturbed for 2-7 days, depending on the flower size and moisture content. Delicate flowers may dry in 2-3 days, while thick, fleshy blooms require longer. Check progress by carefully excavating one flower to test dryness. Once dried, gently brush away excess gel with a soft artist’s brush. Silica gel can be reused multiple times after heating in the oven to remove absorbed moisture.

Quick Microwave Drying Technique
Microwave drying offers a rapid alternative for those seeking quick results, combining silica gel with controlled heat application. This method is particularly useful for urgent projects or when working with limited quantities of flowers. The controlled environment prevents over-drying while significantly reducing processing time from weeks to minutes.
Place flowers in a microwave-safe container with silica gel, following the same burial technique described previously. Microwave on 50% power for 2-3 minutes for delicate flowers or 4-5 minutes for sturdier blooms. Allow the container to cool completely before removing the lid, as the gel and flowers will be extremely hot. The rapid moisture removal can cause some color fading, but the speed often compensates for slight color loss.
Exercise caution with this method, as overheating can scorch flowers beyond repair. Start with shorter intervals and increase time gradually based on results. Different microwave wattages require timing adjustments, so keep detailed notes of successful combinations for future reference. The Smithsonian Institution has documented various rapid preservation techniques used in botanical collections.
Oven Drying for Bulk Processing
Oven drying proves efficient for processing large quantities of flowers or when consistent low heat is needed. This method works well for herbs and flowers intended for culinary or potpourri use. The controlled temperature environment ensures even drying while preventing the development of mold or bacteria that can occur in humid air-drying conditions.
Preheat your oven to its lowest temperature setting, ideally between 100-150°F. If your oven doesn’t go this low, crack the door slightly to reduce temperature. Arrange flowers on baking sheets lined with parchment paper, ensuring good spacing for air circulation. Single-layer arrangements work best to prevent uneven drying and potential scorching of overlapped materials.
Drying time varies from 2-6 hours depending on flower type and moisture content. Check progress every hour, rotating trays for even heat distribution. The goal is gradual moisture removal without cooking the plant material. This method is particularly effective for creating dried materials for culinary applications, similar to how you might process herbs when learning how to make garlic butter with fresh ingredients.
Glycerin Preservation for Flexible Stems
Glycerin preservation creates dried flowers that maintain flexibility and a more natural feel compared to other drying methods. This technique works exceptionally well for foliage and flowers with woody stems, such as eucalyptus, magnolia leaves, and branches. The glycerin replaces water in the plant cells, preventing brittleness while maintaining pliability.
Create a glycerin solution using one part glycerin to two parts warm water. Mix thoroughly until the glycerin is completely dissolved. Cut flower stems at an angle and place them in the solution immediately, ensuring stems are submerged at least 2-3 inches deep. The absorption process typically takes 3-7 days for leaves and 1-2 weeks for thicker stems.
Monitor the progress by observing color changes in the foliage. Leaves will gradually darken and develop a slightly glossy appearance as they absorb the glycerin solution. Some color change is normal and expected. Once the preservation is complete, remove stems from the solution and gently pat dry. Glycerin-preserved materials can last for years with proper care and storage.
Storage and Care of Dried Flowers
Proper storage significantly extends the life and beauty of dried flowers. Store dried specimens in a cool, dry environment away from direct sunlight, which can cause rapid color fading. Humidity is the enemy of dried flowers, causing them to reabsorb moisture and potentially develop mold or lose their crisp texture.
Use airtight containers with silica gel packets for long-term storage of individual specimens. For larger arrangements, display them in areas with stable temperature and humidity levels. Avoid bathrooms, kitchens, and other high-humidity environments. Dust dried flowers gently using a soft brush or compressed air, as traditional cleaning methods can damage fragile petals.
Handle dried flowers with care, as they become increasingly brittle over time. Store flat-pressed flowers between acid-free paper in portfolio boxes or albums designed for botanical specimens. The National Archives provides excellent guidelines for preserving organic materials that apply to flower preservation as well.
Creative Uses for Dried Flowers
Dried flowers offer countless creative possibilities beyond simple display arrangements. Create custom potpourri blends by combining fragrant dried flowers with essential oils and fixatives. Pressed flowers can be incorporated into handmade paper, bookmarks, greeting cards, and framed botanical art. The preserved specimens serve as natural decorations that bring organic beauty to any space.
Consider seasonal applications for your dried flower collection. Autumn arrangements can incorporate preserved fall foliage and seed pods, while spring collections might feature delicate pressed violets and early blooms. Wedding applications include bouquet preservation, centerpiece elements, and favor decorations that provide lasting memories of special occasions.
Educational uses include botanical study aids, nature journals, and children’s craft projects. Just as you might preserve seasonal produce by learning techniques like how to clean strawberries properly, dried flowers can capture and preserve the beauty of each growing season. Create themed collections based on color, season, or flower type to enhance their educational and decorative value.
Frequently Asked Questions
How long do dried flowers typically last?
With proper care and storage, dried flowers can maintain their beauty for 1-3 years. Air-dried flowers typically last 6-12 months, while silica gel-dried flowers may retain their appearance for 2-3 years. Glycerin-preserved materials often last the longest, maintaining flexibility and color for several years. Storage conditions, humidity levels, and handling frequency all impact longevity.
Can I dry flowers that are already starting to wilt?
While slightly wilted flowers can sometimes be successfully dried, the results are generally poor compared to fresh, healthy blooms. Wilted flowers often lose petals during the drying process and may develop brown spots or discoloration. For best results, choose flowers at their peak freshness, similar to selecting optimal produce like knowing how to tell if a pineapple is ripe for best flavor and texture.
What’s the best method for preserving rose petals?
Rose petals can be successfully dried using several methods. For three-dimensional preservation, silica gel drying produces excellent results, maintaining shape and color. For flat applications like potpourri or crafts, air drying or pressing works well. Remove petals from stems before drying to ensure even moisture removal and prevent mold development.
Do dried flowers retain their fragrance?
Some flowers retain natural fragrance after drying, particularly lavender, roses, and herbs. However, most dried flowers lose significant scent during the dehydration process. To enhance fragrance in dried arrangements, add a few drops of complementary essential oils or create custom potpourri blends with fragrant fixatives and spices.
Can I speed up the air drying process?
While air drying naturally takes 1-3 weeks, you can accelerate the process by improving ventilation, reducing humidity, and maintaining consistent temperatures around 70-80°F. Using fans to increase air circulation helps, but avoid direct heat sources that might cause uneven drying or scorching. The USDA recommends maintaining proper environmental conditions for optimal preservation results.
Why did my dried flowers turn brown?
Brown discoloration typically results from too much moisture, insufficient air circulation, or exposure to direct sunlight during drying. High humidity can cause flowers to mold rather than dry properly. To prevent browning, ensure adequate ventilation, avoid damp environments, and process flowers quickly after harvesting when they’re at peak freshness.
Is it safe to use dried flowers around pets?
While many dried flowers are safe, some can be toxic to pets if ingested. Research specific flower varieties before displaying them in homes with curious cats or dogs. Common toxic flowers include lilies, azaleas, and oleander. When in doubt, place dried flower arrangements in areas inaccessible to pets or choose pet-safe varieties like roses, sunflowers, and zinnias.
Related Posts

How Long to Boil Lobster Tails: Cooking Guide

How Long to Fly from New York to London? Travel Times
