
Master Homemade Sour Cream: Elevate Your Culinary Skills
Sour cream is a versatile dairy staple that enhances countless dishes, from baked potatoes and tacos to desserts and sauces. While store-bought varieties are convenient, learning how to make sour cream at home opens up a world of culinary possibilities and ensures you always have this essential ingredient on hand.
Making homemade sour cream is surprisingly simple and requires just two basic ingredients: heavy cream and an acidic component. The process involves allowing beneficial bacteria to ferment the cream, creating that signature tangy flavor and thick, creamy texture we all love. By mastering this fundamental technique, you’ll not only save money but also gain complete control over the quality and freshness of your sour cream.
Understanding Sour Cream and Its Benefits
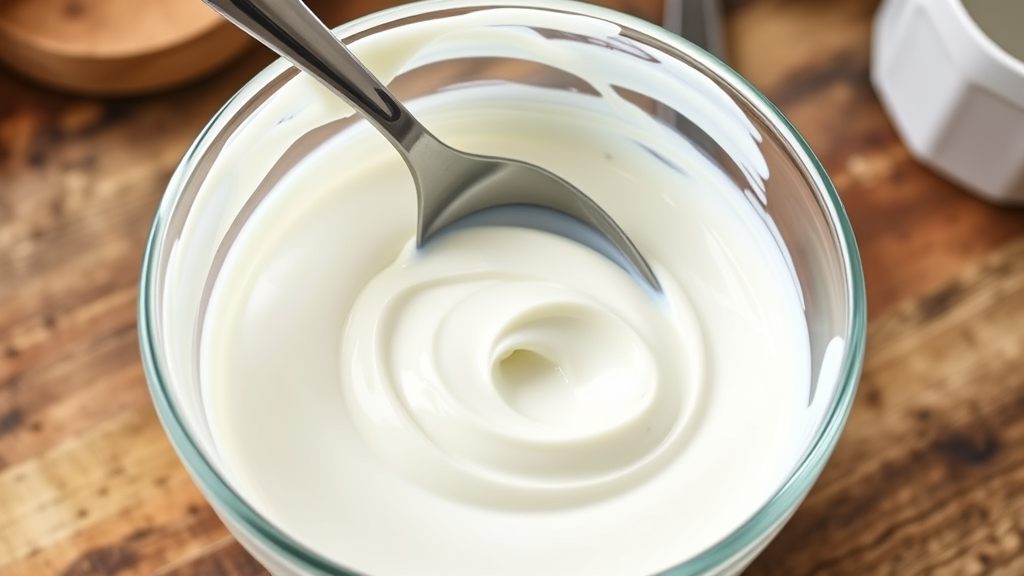
Sour cream is a fermented dairy product created when lactic acid bacteria convert the natural sugars in cream into lactic acid. This fermentation process not only creates the characteristic tangy flavor but also thickens the cream and extends its shelf life. The result is a rich, creamy condiment with a pleasant acidic bite that complements both savory and sweet dishes.
Homemade sour cream offers several advantages over commercial varieties. First, you have complete control over the ingredients, avoiding unnecessary additives, stabilizers, and preservatives commonly found in store-bought versions. Second, fresh homemade sour cream typically has a cleaner, more vibrant flavor that can significantly enhance your cooking. Additionally, making your own sour cream is cost-effective, especially if you frequently use this ingredient in your culinary endeavors.
The nutritional profile of sour cream includes beneficial probiotics from the fermentation process, which can support digestive health. It’s also a good source of calcium, vitamin A, and riboflavin. When you make it at home, you can choose organic or grass-fed heavy cream for even greater nutritional benefits.
Essential Ingredients and Equipment
The beauty of making sour cream lies in its simplicity. You need only two primary ingredients: heavy cream with at least 35% fat content and an acidic starter. The heavy cream provides the rich base, while the acid initiates the fermentation process that creates sour cream’s signature characteristics.
For the acidic component, you have several options. Fresh lemon juice is the most accessible choice, providing a clean, bright acidity. White vinegar works equally well and is often preferred for its neutral flavor profile. Cultured buttermilk serves as both an acid and a source of beneficial bacteria, often producing the most authentic results. Some advanced home cooks use specialized starter cultures available from cheesemaking supply companies.
Equipment requirements are minimal and likely already available in your kitchen. You’ll need a clean glass jar or bowl for mixing and culturing, a whisk or spoon for stirring, and a clean kitchen towel or cheesecloth for covering. A thermometer can be helpful for monitoring temperature, though it’s not strictly necessary. The FDA recommends maintaining proper sanitation when working with dairy products to ensure food safety.
Basic Method for Making Sour Cream
The traditional method for making sour cream is remarkably straightforward. Begin by bringing one cup of heavy cream to room temperature, which typically takes about 30 minutes. Room temperature cream cultures more evenly and efficiently than cold cream straight from the refrigerator.
Once your cream reaches room temperature, add one tablespoon of fresh lemon juice or white vinegar. Stir gently but thoroughly to ensure even distribution of the acid throughout the cream. The acid will begin working immediately, but the full transformation takes time and proper conditions.
Cover the mixture with a clean kitchen towel or cheesecloth, securing it with a rubber band or string. This covering allows the cream to breathe while protecting it from dust and contaminants. Place the covered container in a warm location, ideally between 70-75°F (21-24°C). Good locations include the top of your refrigerator, near a warm stove, or in a slightly warmed oven with just the pilot light on.
Allow the cream to culture for 12-24 hours, checking periodically for the desired consistency and tang. The mixture will gradually thicken and develop its characteristic sour flavor. Once it reaches your preferred taste and texture, refrigerate immediately to halt the fermentation process. The sour cream will continue to thicken slightly in the refrigerator.
Alternative Methods and Variations
While the basic method produces excellent results, several alternative approaches can yield different flavors and textures. The buttermilk method uses cultured buttermilk instead of acid, creating a more complex flavor profile. Combine one cup of heavy cream with two tablespoons of cultured buttermilk, then follow the same culturing process as the basic method.
For those interested in exploring different flavor profiles, consider the yogurt starter method. Mix one cup of heavy cream with two tablespoons of plain yogurt containing live cultures. This approach often produces a milder, less tangy result that some prefer for dessert applications or when making powdered sugar frostings.
Temperature variations can also affect the final product. Culturing at slightly higher temperatures (up to 80°F) accelerates the process but may result in a more aggressive tang. Cooler temperatures slow fermentation but often produce a smoother, more balanced flavor. Experiment with different temperature ranges to find your preferred taste profile.

Some culinary enthusiasts enjoy adding herbs or spices during the culturing process. Fresh chives, dill, or garlic can infuse subtle flavors throughout the sour cream. However, ensure any additions are clean and dry to prevent unwanted bacterial growth. This flavored approach works particularly well when planning to use the sour cream for specific dishes or as a condiment.
Storage and Shelf Life
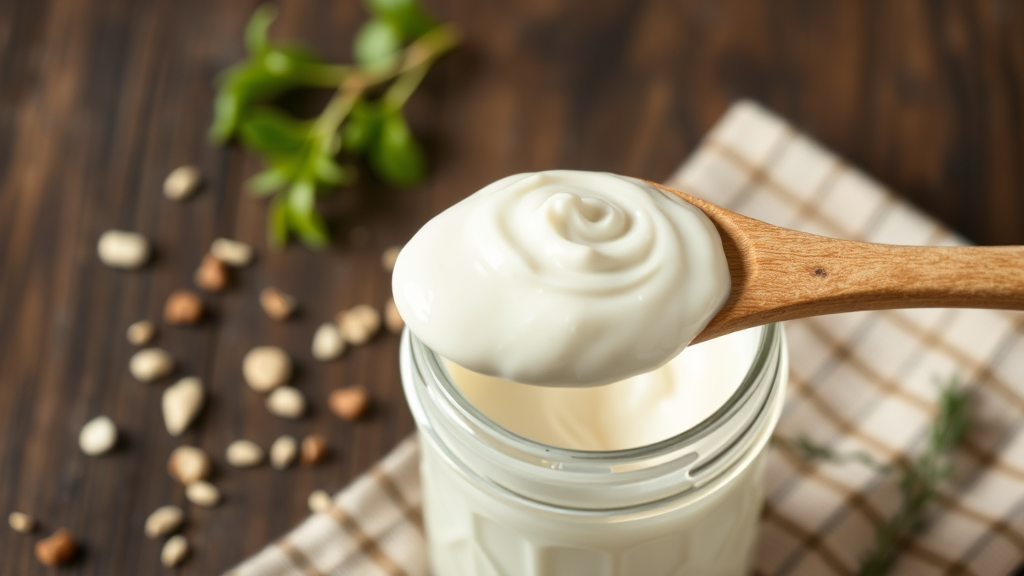
Proper storage is crucial for maintaining the quality and safety of homemade sour cream. Once your sour cream reaches the desired consistency and flavor, transfer it to a clean, airtight container and refrigerate immediately. Glass jars work exceptionally well for storage, as they don’t absorb flavors or odors and are easy to sterilize.
Homemade sour cream typically maintains peak quality for 7-10 days when stored properly in the refrigerator at 40°F (4°C) or below. Unlike commercial varieties with preservatives, homemade sour cream has a shorter shelf life but compensates with superior freshness and flavor. Always use clean utensils when serving to prevent contamination and extend storage life.
Signs of spoilage include off odors, unusual colors (particularly pink or green tints), excessive liquid separation, or mold growth. According to the USDA Food Safety guidelines, dairy products showing any signs of spoilage should be discarded immediately. Trust your senses – fresh sour cream should smell pleasantly tangy and maintain a uniform, creamy appearance.
For longer storage, homemade sour cream can be frozen for up to three months, though the texture may become slightly grainy upon thawing. Frozen sour cream works best in cooked applications rather than as a fresh condiment. When thawing, allow it to defrost slowly in the refrigerator and stir well before using.
Culinary Applications and Recipe Ideas
Homemade sour cream elevates numerous dishes with its fresh, tangy flavor and creamy texture. In savory applications, it serves as an excellent base for dips, salad dressings, and sauces. Mix it with fresh herbs and spices to create custom dips for vegetables or chips. It also makes an ideal topping for baked potatoes, tacos, chili, and soups, adding richness and balancing spicy or heavy flavors.
Baking applications showcase sour cream’s versatility and moisture-enhancing properties. It creates incredibly tender cakes, muffins, and quick breads while adding a subtle tang that complements sweet flavors. When combined with self rising flour, sour cream produces exceptionally light and fluffy baked goods. Coffee cakes, pound cakes, and scones benefit tremendously from sour cream’s unique properties.
In sauce-making, sour cream serves as both a thickening agent and flavor enhancer. Stroganoff, cream-based pasta sauces, and salad dressings achieve perfect consistency and taste with quality sour cream. When making garlic butter sauces, a dollop of sour cream can add complexity and prevent the sauce from breaking.
Professional chefs often use sour cream in marinades for meat, as the acidity helps tenderize proteins while infusing flavor. It’s particularly effective with chicken and pork, creating succulent, flavorful results. The key is ensuring your other ingredients, like eggs, are fresh – knowing how to tell if eggs are good becomes important when combining multiple perishable ingredients.
Troubleshooting Common Issues
Even with careful preparation, occasionally issues may arise during the sour cream-making process. Understanding common problems and their solutions helps ensure consistent success. The most frequent issue is cream that won’t thicken properly, usually caused by insufficient acid, incorrect temperature, or poor-quality cream.
If your sour cream isn’t thickening after 24 hours, try adding another teaspoon of lemon juice or vinegar and allowing additional culturing time. Ensure your culturing environment maintains consistent warmth – temperature fluctuations can significantly impact fermentation. Using cream with lower fat content may also prevent proper thickening, as the fat is essential for achieving the desired consistency.
Overly sour or bitter flavors typically result from over-fermentation or excessive acid. If this occurs, you can dilute the mixture with fresh cream to balance the flavor, though this will thin the consistency. Prevention involves monitoring the culturing process more closely and refrigerating as soon as the desired tang develops.
Liquid separation, while normal to some extent, can become excessive if the cream is cultured too long or at too high a temperature. Gentle stirring often reincorporates separated whey, but persistent separation may indicate over-fermentation. CDC food safety recommendations suggest discarding dairy products that show signs of excessive separation or unusual appearance.
Frequently Asked Questions
Can I use regular milk instead of heavy cream to make sour cream?
No, regular milk doesn’t contain enough fat to create the thick, creamy texture characteristic of sour cream. Heavy cream with at least 35% fat content is essential for proper consistency. Using milk will result in a thin, yogurt-like product rather than true sour cream.
How long does it take for homemade sour cream to thicken?
Homemade sour cream typically thickens within 12-24 hours at room temperature. The exact timing depends on ambient temperature, cream quality, and desired thickness. Warmer environments accelerate the process, while cooler conditions may require up to 48 hours for full development.
Is it safe to make sour cream at home?
Yes, making sour cream at home is safe when proper sanitation and temperature controls are followed. The acidic environment created during fermentation inhibits harmful bacteria growth. Always use clean equipment, fresh ingredients, and monitor the culturing process for signs of proper development versus spoilage.
Can I use pasteurized cream for making sour cream?
Absolutely, and it’s actually recommended for food safety. Pasteurized heavy cream works perfectly for homemade sour cream and eliminates potential harmful bacteria while allowing beneficial fermentation to occur. Ultra-pasteurized cream may be more challenging to culture but can still work with patience.
Why did my sour cream turn out grainy or lumpy?
Grainy texture usually results from temperature shock, over-mixing, or using cream that was too cold. Ensure cream reaches room temperature before adding acid, stir gently, and maintain consistent culturing temperatures. Sometimes gentle whisking can smooth out minor graininess.
Can I speed up the sour cream making process?
While you can culture at slightly higher temperatures (up to 80°F) to accelerate fermentation, rushing the process often compromises flavor development and texture. The natural fermentation timeline allows for proper acid development and optimal consistency. Patience yields the best results.
What’s the difference between homemade and store-bought sour cream?
Homemade sour cream typically has a fresher, cleaner flavor without stabilizers, thickeners, or preservatives found in commercial varieties. It may be slightly thinner than store-bought versions but offers superior taste and the satisfaction of knowing exactly what ingredients were used. The fermentation process also provides beneficial probiotics often absent in heavily processed commercial products.
Related Posts

How Long to Boil Lobster Tails: Cooking Guide

How Long to Fly from New York to London? Travel Times
