
Craft Perfect Envelopes: A Step-by-Step Guide for Bloggers
In today’s digital age, the art of crafting handmade envelopes has become a cherished skill for bloggers seeking to add a personal touch to their correspondence, giveaways, and branded materials. Whether you’re sending thank-you notes to loyal readers, packaging small promotional items, or creating unique content for DIY tutorials, knowing how to make an envelope from scratch can elevate your blogging brand and create memorable experiences for your audience.
Creating custom envelopes offers bloggers unlimited creative possibilities while being both cost-effective and environmentally conscious. From repurposing old book pages and magazines to using decorative scrapbook paper, the materials for envelope making are readily available and often already in your craft supplies. This comprehensive guide will walk you through multiple methods of envelope creation, ensuring you have the skills to craft perfect envelopes for any blogging occasion.
Basic Envelope Folding Techniques
The foundation of envelope making lies in mastering the basic folding technique. Start with a rectangular piece of paper that’s approximately 1.5 times longer than it is wide. For a standard letter-sized envelope, an 8.5 x 11 inch sheet works perfectly. Begin by placing your paper horizontally with the decorative side facing down.
Fold the bottom edge up to create a pocket, leaving about 1/4 inch of space at the top. This creates the main body of your envelope. Next, fold both side edges inward, ensuring they overlap slightly in the center. The overlapping creates a secure seal when glued or taped together. Finally, fold down the top flap to create the closure mechanism.
For bloggers who frequently create content about crafting techniques, similar to tutorials on how to make a bow, mastering these basic folds provides a foundation for more complex envelope designs. Practice this technique with scrap paper before moving on to your final materials.
Essential Materials and Tools
Success in envelope making depends heavily on having the right materials and tools at your disposal. Start with quality paper that’s sturdy enough to hold contents but flexible enough to fold cleanly. Options include cardstock, scrapbook paper, wrapping paper, old book pages, or even repurposed materials like magazine pages.
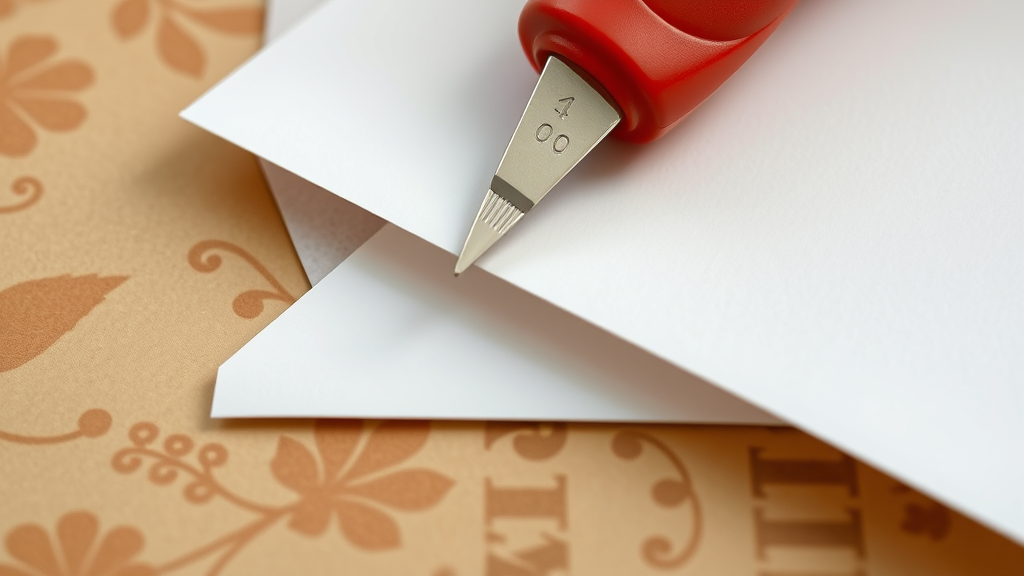
Your tool kit should include a bone folder or similar smoothing tool for crisp creases, a ruler for accurate measurements, a pencil for light marking, scissors or a craft knife for precise cutting, and adhesive options such as double-sided tape, glue sticks, or wax seals for a vintage touch.
Consider investing in decorative elements that align with your blog’s aesthetic. Washi tape, rubber stamps, stickers, and ribbon can transform a basic envelope into branded correspondence. According to the United States Postal Service, custom envelopes must meet specific size requirements for mailing, so keep postal regulations in mind when planning your designs.
Using Templates for Consistent Results
Templates ensure consistency across multiple envelopes, which is crucial for bloggers creating branded materials or tutorial content. You can create your own template by carefully measuring and cutting a piece of cardboard or heavy paper in your desired envelope shape. This template becomes your master pattern for tracing onto different papers.
Digital templates offer another excellent option for tech-savvy bloggers. Many free envelope templates are available online, or you can design custom templates using graphic design software. Print these templates on cardstock and cut them out for repeated use. The Smithsonian Institution notes that standardized envelope production began in the 1840s, but handmade variations continue to hold special appeal.
When using templates, pay attention to fold lines and cut lines. Score fold lines lightly with a bone folder before folding to ensure clean, professional-looking creases. This attention to detail separates amateur crafts from professional-quality results that reflect well on your blog brand.
Decorative Techniques for Blogger Branding
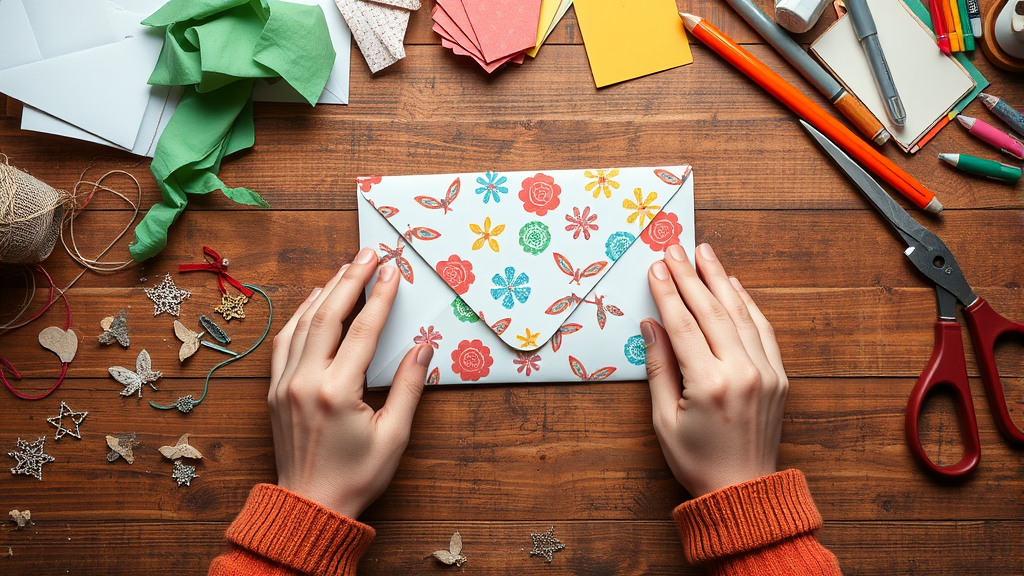
Decorating envelopes provides an opportunity to reinforce your blog’s visual identity while creating engaging content for your audience. Start with your blog’s color scheme and incorporate signature elements like logos, taglines, or characteristic design motifs. Hand-lettering the recipient’s address adds a personal touch that recipients remember.
Consider seasonal themes that align with your content calendar. Spring envelopes might feature floral patterns, while winter designs could incorporate metallic accents or snowflake motifs. These themed approaches work similarly to other craft projects, such as learning how to fold a pocket square for different occasions.
Texture adds visual interest and tactile appeal to your envelopes. Experiment with embossing techniques using stylus tools, add fabric elements like lace or burlap, or create patterns using everyday items like bubble wrap or textured fabric pressed into paint or ink. Document these techniques for potential blog content, as readers often enjoy behind-the-scenes glimpses of creative processes.
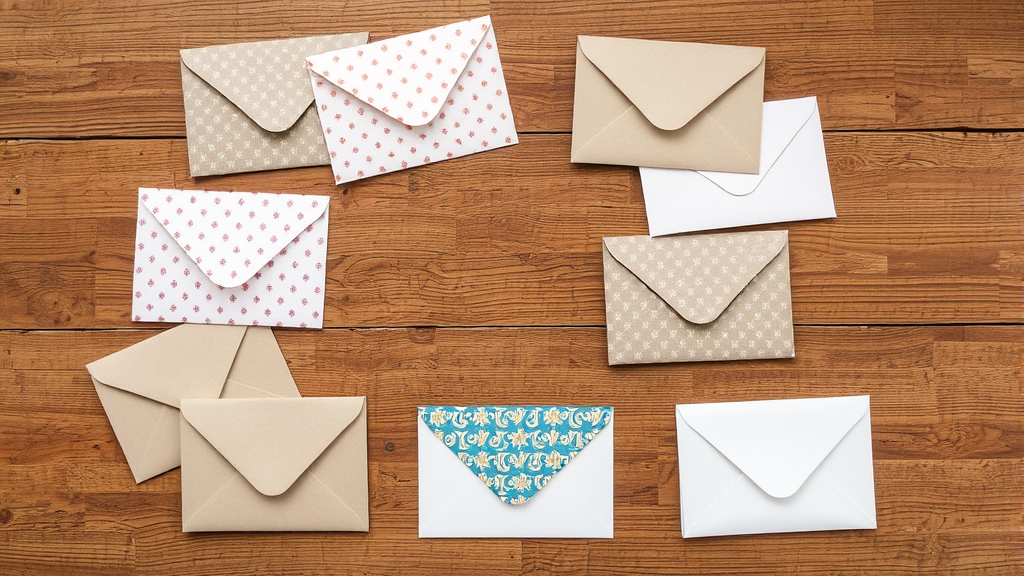
Sizing Considerations for Different Content
Different envelope sizes serve various purposes in blogger communications. Standard business envelopes work well for traditional letters and flat promotional materials, while square envelopes create unique presentations for special announcements or invitations. Consider what you’ll be mailing when determining envelope dimensions.
For small promotional items like stickers or bookmarks, create mini envelopes that serve as both packaging and presentation. These work particularly well for giveaways or as additions to larger packages. Large envelopes accommodate catalogs, media kits, or multiple items bundled together.
Keep postal requirements in mind throughout the sizing process. The USPS Domestic Mail Manual specifies minimum and maximum dimensions for different mail classes. Envelopes that are too small or unusually shaped may require additional postage or special handling.
Advanced Envelope Styles and Variations
Once you’ve mastered basic envelope construction, explore advanced styles that set your correspondence apart. Pocket envelopes feature an additional fold that creates a secure pocket for contents, while windowed envelopes allow addresses to show through transparent panels. These variations require more precise measurements but create professional results.
Origami-inspired envelopes incorporate decorative folding techniques that eliminate the need for adhesive. These designs work beautifully for special occasions or when you want to showcase particular papers or prints. The folding techniques share similarities with other paper crafts, making them approachable for bloggers familiar with various DIY projects like creative alternatives in crafting.
Consider incorporating interactive elements like pull tabs, hidden messages, or removable components that engage recipients. These features work particularly well for blogger collaborations, media kit presentations, or special subscriber communications. Document the creation process for potential tutorial content that showcases your expertise in paper crafts.
Common Issues and Solutions
Even experienced crafters encounter challenges when making envelopes. Uneven folds often result from rushing the creasing process or working with papers that resist folding. Take time to score fold lines properly and use a bone folder to create sharp, even creases. Work slowly and deliberately, especially when learning new techniques.
Adhesion problems typically stem from using inappropriate adhesives for specific paper types or environmental conditions. Test adhesives on scraps before committing to final pieces. Some papers require specific adhesives, while others work better with mechanical fasteners like decorative brads or string ties.
Size miscalculations can waste materials and time. Always measure twice and cut once, and consider making test envelopes with scrap paper before using premium materials. Keep detailed notes about successful measurements and techniques for future reference, similar to maintaining consistent results in other detailed crafts like precision tying techniques.
Paper selection challenges often arise when balancing aesthetics with functionality. Thin papers may not provide adequate protection for contents, while overly thick papers can be difficult to fold cleanly and may require extra postage. Test different paper weights and types to find the sweet spot for your specific needs.
Frequently Asked Questions
What type of paper works best for making envelopes?
Medium-weight papers between 70-90 GSM work best for most envelope applications. Cardstock provides durability but can be challenging to fold, while standard printer paper may be too flimsy. Scrapbook paper, wrapping paper, and magazine pages offer excellent alternatives with built-in decorative elements. Consider the envelope’s purpose when selecting paper weight – lighter papers work well for simple correspondence, while heavier papers suit promotional materials or special occasions.
How do I ensure my handmade envelopes meet postal requirements?
Standard letter envelopes should measure at least 3.5 x 5 inches and no larger than 6.125 x 11.5 inches for regular postage rates. The thickness should not exceed 0.25 inches, and the envelope should be rectangular with parallel opposite sides. Avoid unusual shapes, extremely glossy surfaces, or excessive decorative elements that might interfere with postal processing equipment. Always check current USPS guidelines before mailing custom envelopes.
Can I make envelopes without glue or tape?
Yes, several no-adhesive envelope techniques exist. Origami-style envelopes use interlocking folds to stay closed, while string-and-button closures provide reusable options. Wax seals offer traditional alternatives, and decorative stickers can serve both functional and aesthetic purposes. Some designs incorporate tabs and slots that lock together mechanically, eliminating the need for permanent adhesives while creating interactive opening experiences.
How can I make my envelopes waterproof or weather-resistant?
Apply clear acrylic sealers or laminating sheets to finished envelopes for weather protection. Wax-based sealers provide traditional waterproofing, while modern spray sealers offer even coverage without altering paper texture significantly. For critical mailings, consider placing handmade envelopes inside standard weather-resistant envelopes, using the custom envelope as decorative inner packaging rather than primary protection.
What’s the most efficient way to make multiple envelopes with consistent results?
Create sturdy templates from cardboard or plastic for consistent tracing and cutting. Set up assembly-line processes where you complete one step across all envelopes before moving to the next step. Pre-cut all papers, then score all fold lines, followed by folding all pieces, and finally applying adhesives or decorative elements. This batch processing approach significantly reduces production time while maintaining quality consistency across multiple pieces.
How do I calculate the right paper size for different envelope dimensions?
Use the formula: envelope width + (2 x envelope height) + 1 inch for seam allowances = minimum paper width needed. For the paper height, use: envelope height + 2 inches for flaps and seams. For example, a 4 x 6 inch envelope requires paper at least 17 inches wide (4 + 12 + 1) and 8 inches tall (6 + 2). Always add extra margin for trimming and adjustments, especially when learning new techniques.
What are some creative alternatives to traditional envelope shapes?
Explore triangular envelopes for unique presentations, circular envelopes for special announcements, or bookmark-shaped envelopes for literary-themed mailings. Pocket-style envelopes with side openings work well for flat items, while pillow boxes created from envelope techniques accommodate small three-dimensional objects. Consider your blog’s niche when designing alternative shapes – food bloggers might create recipe card envelopes, while fashion bloggers could design clothing-inspired shapes that reflect their content themes.
Related Posts

How Long to Boil Lobster Tails: Cooking Guide

How Long to Fly from New York to London? Travel Times
