
Bathtub Drain Removal: Expert Tips & Tricks
Bathtub Drain Removal: Expert Tips & Tricks
Removing a bathtub drain might seem like a daunting task, but with the right knowledge and tools, you can tackle this project yourself and save hundreds in plumbing costs. Whether you’re dealing with a clogged drain, a leaky drain assembly, or simply upgrading your bathroom fixtures, understanding the proper removal technique is essential. This comprehensive guide walks you through every step of the process, from identifying your drain type to safely extracting the old drain and preparing for installation of a new one.
A bathtub drain system consists of multiple components working together: the visible drain opening, the drain stopper mechanism, the overflow tube, and the pipe assembly that connects everything below the tub. Before you start removing anything, you need to understand which type of drain system you have and what tools will be required. Taking time to assess the situation beforehand prevents damage and ensures a smoother removal process.
Understanding Your Bathtub Drain System
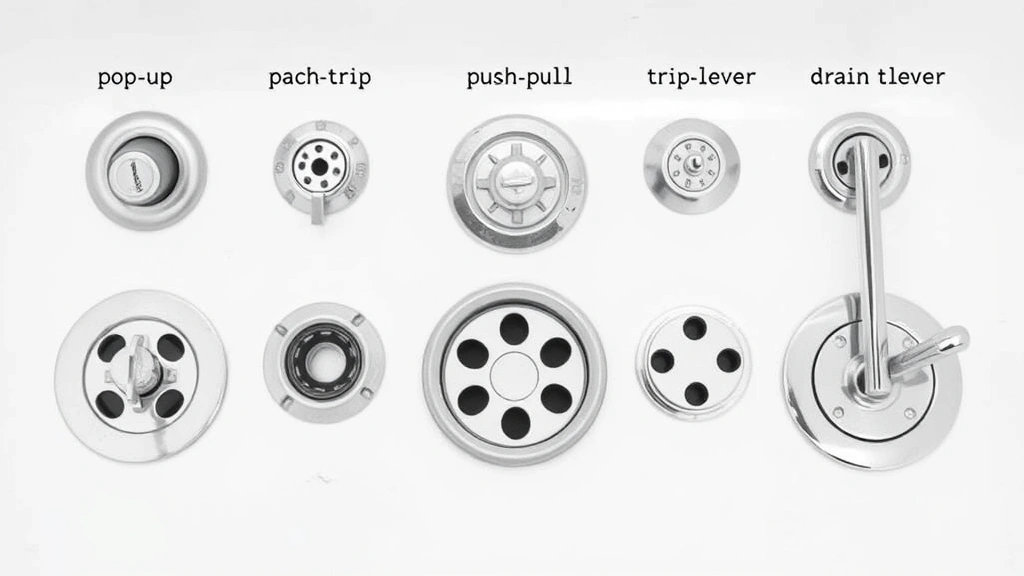
Bathtub drains come in several different configurations, and identifying yours is the first critical step. The most common types include pop-up stoppers, push-pull stoppers, toe-touch drains, and trip-lever overflow drains. Each type has a different removal procedure, so misidentifying your drain can lead to unnecessary frustration and potential damage to your fixtures.
The pop-up stopper mechanism features a visible plug that pops up and down, controlled by a lever or knob on the overflow plate. This system includes a rocker arm connected to the drain body beneath the tub. The push-pull stopper is simpler—it’s a basic plug that you manually push down to close and pull up to open. Toe-touch drains activate by stepping on them, while trip-lever systems use an overflow plate with a lever that controls a plunger mechanism inside the overflow tube.
Most bathtub drains are installed in one of two ways: either the drain body is screwed directly into the tub opening with a locknut underneath, or it’s sealed with plumber’s putty and held in place by the overflow assembly. Understanding which installation method your tub uses will determine your removal strategy. Take a moment to examine the area under your tub or access panel if you have one available.
The overflow tube is another essential component you need to understand. It’s that opening near the top of your tub that prevents water from spilling over the edge. The overflow tube connects to the main drain pipe, and in some systems, they’re inseparable. When removing the main drain, you may need to address the overflow connection as well.
Tools and Materials You’ll Need
Before you begin any removal work, gather all necessary tools and materials. Having everything on hand prevents interruptions and ensures you can work efficiently. Here’s what you’ll likely need:
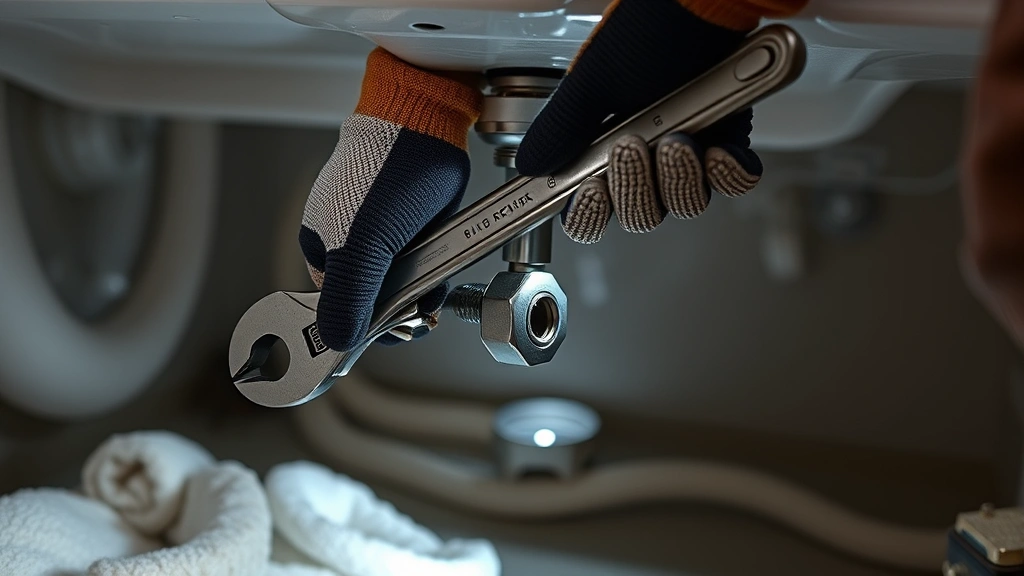
- Adjustable wrench – Essential for loosening the locknut beneath the tub
- Drain removal tool – A specialized tool designed specifically for bathtub drain removal, available at most home improvement retailers
- Plunger – Helpful for clearing debris before removal
- Flashlight – For seeing under the tub clearly
- Screwdrivers – Both Phillips and flat-head for various fasteners
- Plumber’s putty knife – For scraping away old sealant
- Bucket or towels – To catch water that may remain in the pipes
- Safety glasses – Protecting your eyes from debris and corrosion particles
- Work gloves – For grip and protection against sharp edges
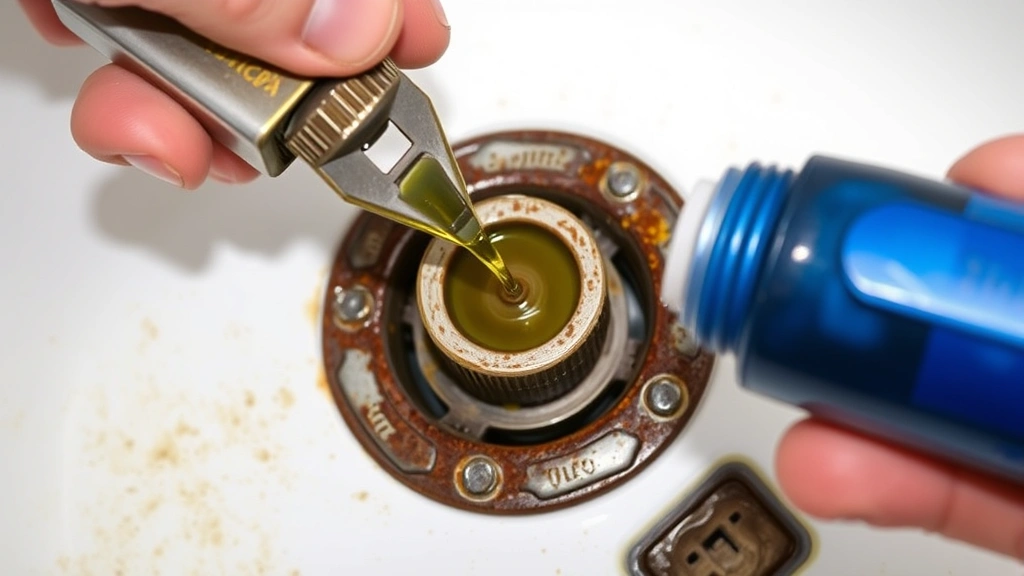
- Penetrating oil – Such as WD-40 or similar products, helpful for stuck drains
If your drain is particularly stuck or corroded, you might also consider renting a specialized drain removal tool from a tool rental center. These professional-grade tools provide significantly more leverage than standard wrenches and can make the difference between success and frustration.
Preparing Your Workspace
Proper preparation sets the stage for a successful drain removal project. Start by clearing the area around and under your bathtub. Remove any items stored beneath the tub, and if you have an access panel, remove it to give yourself clear working space. Lay down towels or newspaper to protect your flooring from water, dirt, and corrosion particles that may fall during the process.
Turn off the water supply to your bathroom if possible. While you’re only removing the drain and not replacing pipes, having the water shut off prevents accidental activation and gives you peace of mind. If you don’t have an individual bathroom shutoff valve, you may need to shut off your home’s main water supply.
Clear the drain of any debris and standing water. Use a plunger to dislodge any clogs, then remove any visible hair or debris from the drain opening. This prevents contamination and gives you a cleaner workspace. If your drain is severely clogged, you might benefit from reading about additional drain cleaning techniques and tips before proceeding.
Take photographs of your drain assembly before you begin disassembly. These photos serve as a valuable reference when you’re reassembling components or installing a new drain. Pay special attention to how the overflow tube connects and the orientation of any stopper mechanisms.
Step-by-Step Drain Removal Process
Now that you’re prepared, let’s walk through the actual removal process. The specific steps vary depending on your drain type, but these general procedures apply to most bathtub drains.
Step 1: Remove the Overflow Plate and Stopper Assembly
Start by removing the overflow plate cover, typically held in place by one or two screws. Once removed, you’ll see the stopper mechanism or lever. Carefully pull out the entire stopper assembly—this usually comes out as one unit. Some pop-up stoppers require you to remove the rocker arm first by loosening a set screw. Take your time here and note how everything fits together for reinstallation.
Step 2: Access the Drain Body
With the stopper assembly removed, you now have access to the drain body where it enters the tub. If you can see into the tub, look for the drain fitting. You may need to remove the overflow tube to access the drain body completely. The overflow tube typically connects with a slip nut—use your adjustable wrench to loosen this connection carefully.
Step 3: Locate and Loosen the Locknut
The most crucial step is finding and loosening the locknut beneath the tub. This is where the drain body screws into the bottom of the tub from underneath. If you have access from below (via a basement or crawl space), you’ll see this nut clearly. If not, you may need to work through an access panel or by reaching under the tub from the side.
Apply penetrating oil to the locknut and let it sit for 15-20 minutes. This helps break down corrosion and makes loosening significantly easier. Use your adjustable wrench or drain removal tool to turn the locknut counterclockwise. Work steadily but carefully—excessive force can crack the tub or strip the threads.
Step 4: Remove the Drain Body
Once the locknut is loose, you should be able to unscrew the drain body by hand from above. Turn it counterclockwise slowly, watching for any remaining water that might spill out. If resistance occurs, apply more penetrating oil and wait longer before trying again. Forcing a stuck drain risks damaging your tub.
As the drain body comes free, you may need to disconnect the overflow tube from the inside. This connection is typically sealed with plumber’s putty or caulk. Use your putty knife to gently scrape away the sealant, working carefully to avoid scratching the tub’s surface.
Step 5: Clean the Drain Opening
With the old drain removed, clean the drain opening thoroughly. Use your putty knife to remove all old plumber’s putty, caulk, and corrosion. A wire brush helps remove stubborn deposits. The opening must be completely clean for proper installation of a new drain and to ensure a watertight seal.
Common Challenges and Solutions
Even with careful preparation, you may encounter obstacles during drain removal. Understanding common issues and their solutions helps you overcome them without damage.
Stuck or Corroded Drains
Older drains often become stuck due to mineral buildup and corrosion. If your drain won’t budge after applying penetrating oil, try heating the area gently with a heat gun. The expansion from heat can help break corrosion bonds. Never use a torch, as this risks damaging your tub or nearby materials. Apply heat for 30 seconds, then attempt loosening again.
Cracked or Damaged Tub
If your tub cracks during removal, stop immediately. Continue attempting to remove the drain very carefully, as further damage could require tub replacement. Once removed, consult with a professional about repair options. Small cracks can sometimes be sealed, but large damage may necessitate tub replacement.
Broken Stopper Assembly
Sometimes the stopper assembly breaks during removal, leaving pieces inside the overflow tube. Use a flashlight to look inside and carefully retrieve any broken pieces with needle-nose pliers or a retrieval tool. Ensure nothing remains in the pipe before installing a new drain.
Stripped Threads
If the drain threads are stripped, the new drain won’t seal properly. In this case, you may need to use a slightly larger diameter drain body or apply plumber’s epoxy to create a proper seal. Consult with a plumbing professional if you encounter severely stripped threads, as improper repair leads to leaks.
After Removal: What Comes Next
With the old drain successfully removed, you have several options depending on your situation. If you’re simply cleaning or maintaining your drain, you might not need to install anything immediately. However, most projects involve installing a new drain.
Before installing a new drain, ensure your opening is completely clean and dry. If you need to address rust or corrosion issues on surrounding metal components, consider reading about rust removal techniques to maintain your fixtures properly. This knowledge helps you prevent future corrosion issues.
Measure your drain opening carefully to ensure you purchase the correct replacement. Bathtub drains come in standard sizes, but it’s crucial to verify yours before buying. Most drains are 1.5 inches in diameter, but some older or specialty tubs may differ.
When you’re ready to install a new drain, you’ll apply fresh plumber’s putty around the drain opening, insert the new drain body, and tighten the locknut from below. The new overflow tube connects similarly to the old one. Take your time with installation to ensure proper sealing and prevent future leaks.
If you’re not comfortable installing the new drain yourself, this is an excellent time to call a professional plumber. The removal is complete, and installation by a pro ensures your new drain functions perfectly and remains leak-free.
FAQ
How long does it typically take to remove a bathtub drain?
The time required varies based on your drain’s condition and accessibility. A straightforward removal might take 30-45 minutes, while a corroded or stuck drain could require 1-2 hours. Always allow extra time for unexpected complications.
Can I remove a bathtub drain without going underneath the tub?
Some drain types can be partially disassembled from above, but accessing the locknut typically requires working from underneath or through an access panel. If you have no access from below, you may need to remove the tub or call a professional plumber.
What should I do if water leaks from my drain after removal?
Check that all connections are tight and that old sealant has been completely removed. If you’ve already installed a new drain, ensure the locknut is properly tightened and the plumber’s putty seal is adequate. Persistent leaks may require professional assessment.
Is it necessary to replace the entire drain assembly?
Not always. Sometimes only the stopper mechanism or overflow tube needs replacement. However, if the main drain body is corroded or damaged, replacement is recommended to prevent future leaks. Assess the condition of each component before deciding.
Can I use plumber’s tape instead of plumber’s putty for sealing?
Plumber’s tape (PTFE tape) is better suited for threaded connections on pipes. For bathtub drains, plumber’s putty provides a better seal around the drain opening. Always use the appropriate sealant for each application.
What’s the best way to prevent future drain issues?
Regular maintenance is key. Use drain covers to prevent hair and debris from entering. Periodically flush your drain with hot water. Family Handyman offers excellent preventive maintenance tips for bathroom fixtures. Consider reading about corrosion prevention techniques to understand how to protect metal fixtures from deterioration.
Do I need a special license to remove my own bathtub drain?
No, removing your own drain is a DIY-friendly project in most jurisdictions. However, check your local building codes and homeowner’s insurance policy. Some areas have specific plumbing requirements, and your insurance may have restrictions on what work you can perform yourself.
Related Posts

Superscript in Google Docs: Expert Tips

Strikethrough in Excel: Easy Steps for Beginners
