
Remove Security Tags at Home? Expert Tips Inside
How to Remove Clothing Security Tags at Home: Expert Tips Inside
Accidentally bringing home a garment with a security tag still attached is a frustrating experience that happens more often than you’d think. Whether the cashier forgot to deactivate it or the tag was missed during checkout, you’re left with an unsightly plastic or metal device clinging to your new purchase. The good news is that removing clothing security tags at home is entirely possible without damaging your garment, and you likely already have the tools you need in your toolbox.
Security tags come in various styles, from hard plastic clam shells to magnetic detachers, and each requires a slightly different approach. Understanding which type you’re dealing with and knowing the safest removal methods will save you time, frustration, and protect your clothing investment. This comprehensive guide walks you through proven techniques used by professionals and experienced DIYers alike.
Types of Clothing Security Tags
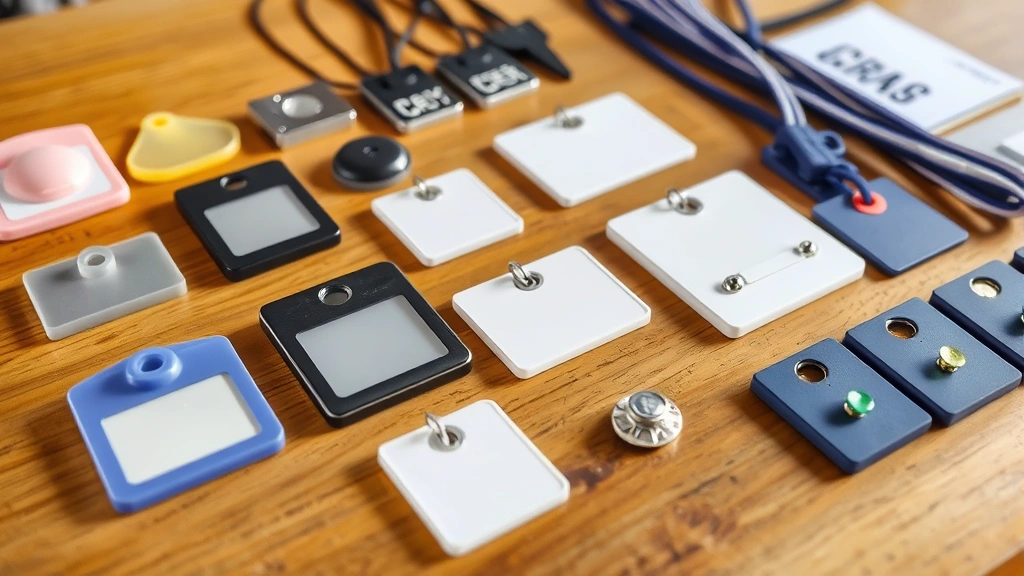
Security tags fall into several distinct categories, and identifying which type you’re dealing with is the first step toward successful removal. Hard plastic clamshell tags are the most common variety found on clothing in retail environments. These rigid plastic cases typically contain a locking mechanism and sometimes an ink cartridge designed to burst if someone attempts forced removal without authorization. They’re popular because they’re durable, reusable, and visible as a deterrent.
Magnetic detacher tags operate on a different principle entirely. These tags use magnetic technology to lock and unlock, requiring a special magnetic key or detacher tool to release them. Retailers keep these detachers behind the counter, which is why you should never attempt to force a magnetic tag open. The internal components are specifically engineered to resist tampering, and forcing one could damage both the tag and your garment.
Pin-based security tags use a simple locking pin mechanism. These are often smaller and less conspicuous than clamshell varieties. The pin slides through the garment’s fabric and locks in place, making them particularly tricky to remove without proper technique. Some retailers also use string-attached tags, which are held in place by a reinforced cord rather than a rigid mechanism. Understanding these distinctions helps you choose the most appropriate removal method for your specific situation.

Essential Tools and Materials
Before attempting to remove a security tag, gather the right tools. A flathead screwdriver is perhaps the most versatile tool for this job, allowing you to manipulate locking mechanisms and pry open plastic casings. A small hammer or mallet provides controlled striking force if you need to tap components into place. A pair of needle-nose pliers gives you precision grip and leverage for stubborn pins and mechanisms.
Scissors or a utility knife can help you access internal components, though you’ll want to be extremely careful not to cut the garment itself. A magnet, particularly a strong neodymium magnet, may help with certain tag types. Having a clean cloth nearby prevents you from marking the fabric with tool residue or dirt. For protection, wear safety glasses when working with tags that might contain ink cartridges, as accidental rupture could stain your clothing or skin.
Consider keeping a small container or tray nearby to hold tiny screws, springs, and internal components. Security tags often contain multiple moving parts, and losing even one small piece can prevent proper removal. Many people also find it helpful to consult online tutorials specific to their tag type before beginning, as visual references significantly improve success rates and reduce the risk of damage.
Safe Removal Methods
The safest approach to removing a clothing security tag depends entirely on the tag type and your comfort level with DIY tasks. For hard plastic clamshell tags, the most straightforward method involves locating the locking mechanism, usually positioned on one side of the case. Using a flathead screwdriver, gently apply pressure to this mechanism while simultaneously pulling the two halves of the casing apart. This requires patience and steady hands rather than brute force.
An alternative method for clamshell tags involves carefully drilling out the locking pin. Using a small drill bit slightly larger than the pin diameter, position your drill perpendicular to the tag and apply steady pressure. This method works well if the screwdriver approach doesn’t budge the mechanism. The key is maintaining control and avoiding slips that could damage the fabric beneath the tag.
For pin-based tags, the most effective technique is the “slide and twist” method. While gently pulling the garment fabric taut, use needle-nose pliers to grip the pin firmly and apply steady rotational pressure. Often, a slight twist combined with controlled pulling will disengage the locking mechanism. If this doesn’t work, try tapping the pliers handle gently with a hammer to encourage the pin to release its grip on the locking collar.
String-attached tags typically respond well to careful cutting. Using sharp scissors, cut the reinforced string as close to the tag as possible, then gently pull the tag away from the fabric. Once the string is severed, the tag should come free easily. Some people prefer using a utility knife for this task, as the sharper blade creates cleaner cuts with less risk of fraying.
Step-by-Step Removal Process
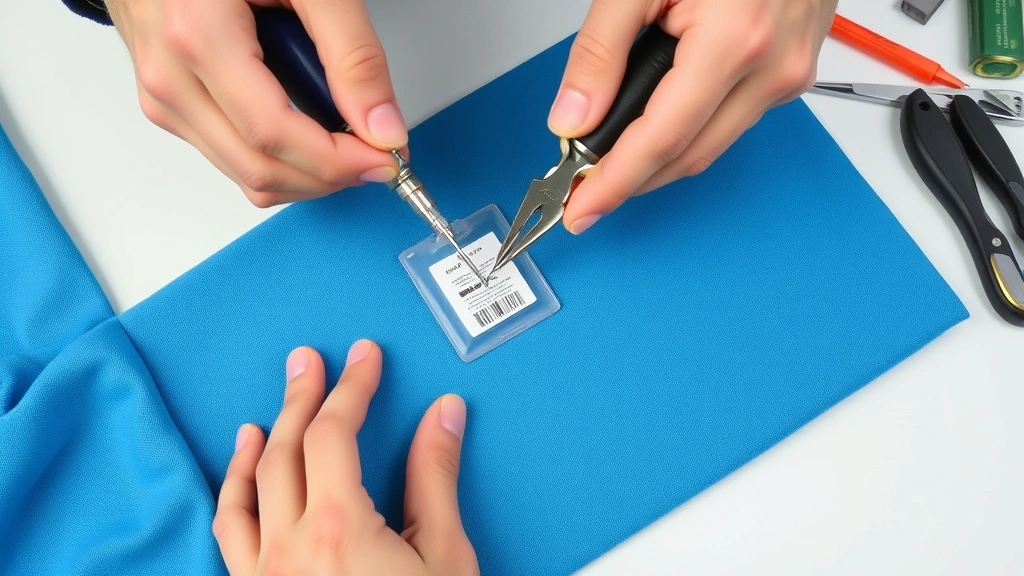
Begin by examining your security tag closely under good lighting. Identify the type, locate the locking mechanism, and assess how the tag is attached to the garment. Place the garment on a clean, flat surface with the tag positioned in an easily accessible location. Ensure the fabric is smooth and taut beneath the tag to provide stability during removal.
For clamshell tags, position your flathead screwdriver in the slot or opening where the locking mechanism is housed. Apply firm but controlled pressure, using a twisting motion rather than a prying motion. As you apply pressure, gently pull the two halves of the plastic casing apart. You should feel a click or sense of give when the mechanism releases. Once separated, slide the tag away from the garment carefully.
If the screwdriver method fails, switch to the drilling approach. Secure the garment with your other hand to prevent movement. Using a small drill bit, carefully position the drill perpendicular to the locking pin and apply steady downward pressure with medium speed. Avoid leaning heavily on the drill, as excessive force can cause the bit to slip and damage the fabric. Once you’ve drilled through the pin, the two halves should separate more easily.
For pin-based tags, grip the pin firmly with needle-nose pliers as close to the locking collar as possible. Apply steady rotational pressure while simultaneously pulling gently outward. If the pin doesn’t budge after several attempts, try tapping the pliers handle with a hammer in short, controlled strikes. This often helps dislodge stubborn locking mechanisms without requiring excessive force.
After successfully removing the tag, inspect the garment thoroughly for any damage, ink residue, or holes. If there’s a small puncture hole from the pin, consider using a needle and thread to close it, or apply a fabric patch if the hole is larger. This step is particularly important for delicate fabrics like silk or satin, where even minor damage becomes noticeable.
Prevention and Best Practices
The best approach to dealing with security tags is preventing the problem in the first place. Always check your receipt carefully before leaving a retail location, and verify that all security tags have been removed or deactivated. If you notice a tag is still attached, return to the cashier immediately rather than attempting removal at home. Most retailers are happy to remove tags for customers, and this is always the safest option.
When trying on clothing in fitting rooms, pay special attention to tags. Some retailers attach tags in inconspicuous locations, so a quick visual inspection before purchasing prevents unpleasant surprises at home. If you’re ordering clothing online, be aware that some retailers ship items with security tags attached, particularly for high-value pieces. Check your invoice or shipping information for any notes about tag removal.
If you frequently encounter this issue, consider keeping a small toolkit dedicated to security tag removal. Store it in an easily accessible location alongside your regular home maintenance supplies, similar to how you might organize tools for removing a bathtub drain or tackling other household projects. This preparation ensures you’re ready to handle the situation efficiently whenever it arises.
Document your removal attempts with photos, particularly if you’re removing a tag from a new or expensive garment. If damage occurs during removal, these photos provide evidence if you need to contact the retailer or manufacturer about a refund or replacement. Most retailers understand that tag removal can occasionally result in minor damage, and many will work with you to resolve the issue.
When to Seek Professional Help
Some situations warrant professional assistance rather than DIY attempts. If the garment is particularly delicate, expensive, or made from specialty fabrics like silk, cashmere, or leather, consider taking it to a professional tailor or dry cleaner. These professionals have specialized tools and experience removing tags without damaging fine fabrics. The small fee is worth the peace of mind, especially for high-value items.
If a security tag appears to have an ink cartridge or other potentially hazardous component, avoid attempting removal yourself. The ink inside these cartridges is designed to stain permanently, and accidental rupture could ruin your garment irreparably. Return to the retailer and explain the situation; they have the proper tools and knowledge to safely handle these tags without incident.
Some retailers offer mail-in services for tag removal if you’ve already left their location. Contact customer service with your receipt and explain the situation. Many will provide a return label and remove the tag for you, shipping the garment back without charge. This option is particularly valuable if you’re unsure about your removal abilities or if the tag appears complex or unfamiliar.
If you’ve attempted removal and the tag remains stubbornly locked, don’t continue applying force. Excessive force risks damaging the garment permanently. Instead, reach out to the retailer’s customer service department with photos of the situation. Many retailers will simply issue a refund or replacement rather than dealing with damage claims, making this often the most practical solution.
FAQ
Is it legal to remove security tags at home?
Yes, it is completely legal to remove security tags from garments you’ve purchased. You own the item, and removing the tag is a normal part of clothing preparation. However, attempting to remove tags from items you haven’t purchased, or using removal techniques to bypass security systems in stores, is illegal and constitutes theft.
What should I do if the tag has an ink cartridge?
Ink cartridges are specifically designed to rupture if tampered with, permanently staining the garment. If you see any signs of a liquid-filled component, stop immediately and return to the retailer for professional removal. The cost of potential staining far exceeds any effort saved by attempting removal yourself.
Can I use a magnet to remove any security tag?
Magnets only work on magnetic detacher tags, which are specifically designed with magnetic locking mechanisms. Using a magnet on other tag types will have no effect. Additionally, strong magnets can potentially damage electronic devices, so use this method cautiously and only on tags you’ve confirmed are magnetic.
How long does security tag removal typically take?
For straightforward clamshell tags with accessible mechanisms, removal usually takes 5-15 minutes. More complex tags or stubborn mechanisms might require 20-30 minutes. If you’re spending more than an hour on a single tag, reconsider your approach or seek professional assistance.
What if I accidentally damage the garment during removal?
Small puncture holes from pins can often be closed with careful stitching using a needle and thread matched to the fabric color. For larger damage or stains, contact the retailer immediately with photos. Most retailers will work with you on replacements or refunds for damage that occurs during tag removal, especially if you haven’t worn the garment.
Are there any tags I absolutely should not attempt to remove?
Avoid attempting removal on tags that appear to contain liquid components, tags on extremely delicate fabrics, or any tags on high-value items like designer clothing or luxury goods. When in doubt, seek professional assistance. The cost of professional removal is minimal compared to the risk of ruining an expensive purchase.
Remember that removing security tags is a normal part of clothing ownership, and most people encounter this situation at some point. By understanding the different tag types and employing the proper techniques, you can safely remove tags while protecting your garments. If you’re comfortable with DIY projects, you might also enjoy learning how to install a garbage disposal or explore other how-to guides and tutorials available on FixWiseHub. For additional professional guidance on home improvement and maintenance tasks, consult resources like This Old House or Family Handyman.
Related Posts

Superscript in Google Docs: Expert Tips

Strikethrough in Excel: Easy Steps for Beginners
