
Polish Copper Like a Pro: Easy DIY Steps
Polish Copper Like a Pro: Easy DIY Steps
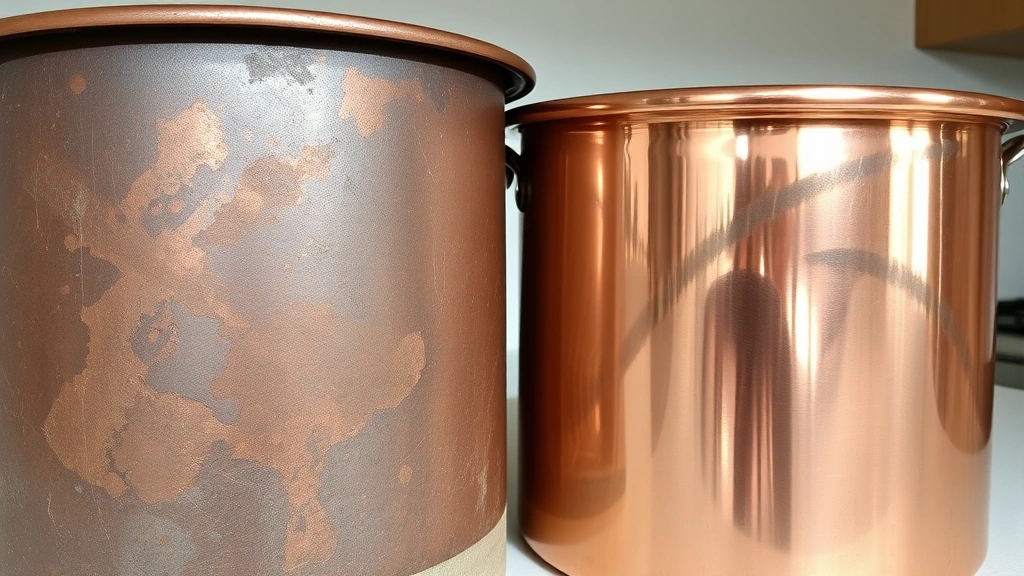
Copper is one of the most beautiful metals you can work with, but it tarnishes quickly when exposed to air and moisture. Whether you have copper cookware, decorative pieces, or plumbing fixtures, learning how to polish copper properly will keep your items looking like new. The good news? You don’t need expensive commercial products or professional services to achieve professional results. With the right techniques and household materials, you can restore your copper’s brilliant shine in just minutes.
Tarnished copper develops a dark, dull patina that many homeowners find unsightly. This oxidation happens naturally and doesn’t indicate damage, but it does diminish the metal’s aesthetic appeal. The process of polishing copper removes this layer of oxidation and reveals the lustrous metal underneath. In this comprehensive guide, we’ll walk you through proven methods that actually work, from simple vinegar-and-salt solutions to specialized polishing techniques that professionals use.
Understanding Copper Tarnish and Why It Happens
Before diving into polishing methods, it’s important to understand what causes copper to tarnish in the first place. Copper naturally reacts with oxygen in the air, creating a layer of copper oxide. This oxidation process accelerates when copper is exposed to moisture, salt air, or acidic environments. The resulting patina appears as a dark brown or black coating on the metal’s surface.
Unlike rust on steel, which compromises the metal’s structural integrity, copper tarnish is purely cosmetic. However, that doesn’t mean you should ignore it. When tarnish accumulates, it becomes increasingly difficult to remove. Additionally, tarnished copper in kitchens or dining areas can affect the presentation of your cookware and table settings. Understanding this oxidation process helps you appreciate why regular maintenance is easier than occasional deep cleaning.
The good news is that copper polishing methods are remarkably similar to cleaning other metals, making it easy to develop a routine that works for your household. Most effective polishing solutions rely on mild acids or abrasive compounds that dissolve the oxidation without damaging the underlying copper.
Essential Tools and Materials You’ll Need
Gathering the right supplies before you start ensures a smooth polishing process. Most items are already in your kitchen or can be purchased inexpensively at any grocery store. Here’s what you should have on hand:
- Soft cloths or microfiber towels – Essential for applying polish and buffing without scratching
- Soft-bristled brush – Ideal for reaching crevices and detailed areas
- White vinegar – A natural acid that dissolves tarnish effectively
- Baking soda – A gentle abrasive that removes oxidation without harsh scratching
- Lemon juice – Contains citric acid that breaks down tarnish
- Salt – Creates an abrasive paste when combined with liquids
- Ketchup – Contains vinegar and spices that help remove tarnish
- Rubber gloves – Protects your hands from prolonged contact with cleaning solutions
- Small bowls – For mixing pastes and solutions
- Old toothbrush – Perfect for detailed work on ornate pieces
If you prefer commercial solutions, This Old House recommends having a quality copper polish on hand for maintenance. However, the DIY methods listed below are equally effective and more economical for regular use.
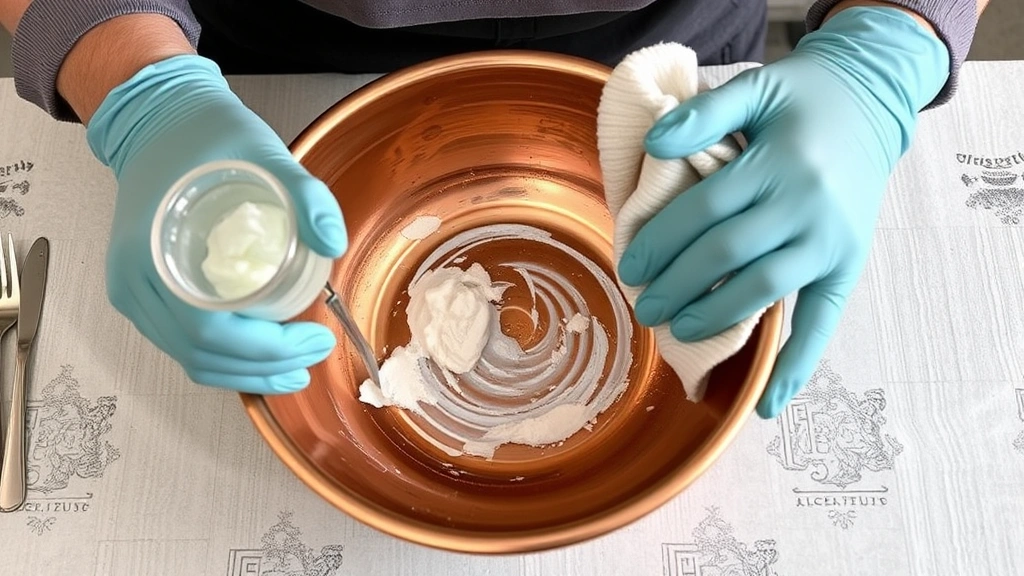
Method 1: Vinegar and Salt Paste
This is arguably the most popular and effective DIY method for polishing copper at home. The combination of vinegar’s acidity and salt’s abrasive properties creates a powerful cleaning agent that removes even stubborn tarnish.
Step-by-step process:
- Mix equal parts white vinegar and salt in a small bowl
- Stir until you achieve a paste-like consistency
- Apply the paste directly to the tarnished copper using a soft cloth
- Rub gently in circular motions, allowing the paste to work on the oxidation
- For heavily tarnished areas, let the paste sit for 5-10 minutes before rubbing
- Rinse thoroughly under running water to remove all paste residue
- Dry immediately with a clean, soft cloth
This method works exceptionally well on copper pots, pans, and decorative items. The vinegar dissolves the tarnish while the salt provides gentle abrasion. For items with intricate details, apply the paste with an old toothbrush to ensure you reach every crevice. Similar metal cleaning techniques apply here—patience and gentle pressure yield better results than aggressive scrubbing.
Pro tip: If you’re polishing copper cookware, this method is food-safe once thoroughly rinsed. Many home chefs prefer it because no harsh chemicals touch their cooking surfaces.
Method 2: Lemon and Baking Soda
For those seeking a gentler approach, the lemon and baking soda method is excellent for delicate copper items or pieces with protective finishes. This combination is less acidic than vinegar while still effectively removing tarnish.
Application steps:
- Cut a lemon in half and dip the cut end into baking soda
- Alternatively, mix lemon juice with baking soda to create a paste
- Apply directly to tarnished areas and rub gently with the lemon
- For paste application, use a soft cloth or sponge to work it into the copper
- Allow the mixture to sit for several minutes on stubborn tarnish
- Rinse thoroughly with water and dry immediately
This method is particularly effective on copper jewelry and delicate decorative pieces. The natural citric acid in lemon combined with baking soda’s mild abrasive action removes tarnish without harsh chemicals. Many people appreciate this approach because it smells fresh and uses completely natural ingredients.
When working with jewelry, use extra care and consider using only the paste method rather than direct rubbing. This prevents potential damage to solder joints or gemstone settings that might be present alongside copper components.
Method 3: Ketchup and Worcestershire Sauce
This unconventional method surprises many people, but it’s genuinely effective. Both ketchup and Worcestershire sauce contain vinegar and other acidic compounds that dissolve copper tarnish. This approach works particularly well when you’re already in the kitchen and need a quick solution.
How to use this method:
- Apply ketchup directly to the tarnished copper surface
- Alternatively, mix ketchup with a small amount of Worcestershire sauce for enhanced results
- Use a soft cloth to rub the mixture onto the copper in circular motions
- Let it sit for 10-15 minutes for better tarnish removal
- Wipe away the mixture with a damp cloth
- Rinse thoroughly with clean water
- Dry completely with a soft towel
While this method might seem unconventional, it’s surprisingly popular among experienced home maintenance enthusiasts. The combination of ingredients in commercial condiments was actually formulated to break down various substances, making them ideal for tarnish removal. This method works well on copper cookware and decorative pieces but may leave a slight residue if not rinsed thoroughly.
Method 4: Commercial Copper Polish
For those who prefer ready-made solutions or have extremely tarnished copper, commercial copper polishes offer convenience and reliability. Family Handyman recommends several quality brands available at hardware stores and online retailers.
Using commercial polish properly:
- Read the product instructions carefully—formulations vary by brand
- Test on an inconspicuous area first, especially on valuable pieces
- Apply a small amount to a soft cloth rather than directly to the copper
- Rub gently in circular motions, working on small sections at a time
- Allow the polish to dry slightly if the product instructions indicate this
- Buff with a clean cloth to bring out the shine
- Rinse if the product requires it, and dry thoroughly
Commercial polishes often contain specialized compounds that work faster than household methods. However, they typically cost more and introduce chemical products to your home. For regular maintenance of frequently-used items, DIY methods are usually more economical and equally effective. Reserve commercial products for occasional deep cleaning or particularly stubborn tarnish.
Polishing Techniques for Best Results
The method you choose matters less than the technique you employ. Proper polishing technique ensures even results and prevents damage to your copper items.
Circular motion approach: Always polish in gentle circular motions rather than back-and-forth scrubbing. This distributes pressure evenly and produces a more uniform finish. Start from the center of a tarnished area and work outward toward clean copper.
Pressure management: Let the polishing compound do the work. Excessive pressure doesn’t accelerate the process and can scratch the copper surface. Use only enough pressure to maintain contact with the metal.
Working in sections: Divide larger items into manageable sections. This prevents the polishing compound from drying out and allows you to focus on achieving consistent results across the entire surface.
Layering approach: For heavily tarnished copper, apply multiple thin layers of polish rather than one thick application. This is more effective and prevents compound buildup in crevices.
Detail work: Use soft-bristled brushes or old toothbrushes for decorative copper items with intricate patterns. Apply your chosen polish with the brush, work it gently into the details, and buff with a soft cloth.
These techniques apply whether you’re using professional polishing methods or household solutions. The consistency and care you bring to the process matters more than the specific product.
Protecting Your Copper After Polishing
Once you’ve achieved that beautiful shine, protecting your copper prevents rapid re-tarnishing and extends the time between polishing sessions. Several protective measures work well depending on your copper’s use and location.
Clear protective coatings: Applying a clear lacquer or polyurethane coating creates a barrier between copper and air. This significantly slows oxidation. Hardware stores carry copper-safe protective sprays designed for this purpose. Apply in a well-ventilated area and follow all product instructions.
Wax protection: Furniture wax or specialized metal wax creates a protective layer while maintaining the copper’s appearance. Apply thin coats and buff thoroughly. This method works well for decorative pieces that don’t require frequent handling.
Regular maintenance: The best protection is routine cleaning. Light polishing every few weeks maintains shine and prevents heavy tarnish buildup. This is far easier than deep cleaning heavily oxidized copper.
Storage considerations: Store copper items in cool, dry locations away from humidity. Consider storing decorative pieces in acid-free tissue paper or cloth bags to minimize air exposure. For copper cookware, ensure it’s completely dry before storing.
Humidity control: In kitchens and bathrooms where humidity is high, copper tarnishes faster. Ensure adequate ventilation and wipe down copper items regularly to remove moisture.
Similar to maintaining jewelry shine, consistent care prevents major cleaning projects. Small maintenance efforts compound into years of beautiful copper appearance.
FAQ
What’s the fastest way to polish copper?
For quick results, the vinegar and salt paste method works fastest. Mix, apply, let sit for 5-10 minutes, rinse, and dry. This entire process typically takes 15-20 minutes for most items. Commercial polishes are also quick but cost more.
Can I use steel wool to polish copper?
Avoid steel wool as it can scratch copper and leave tiny steel particles that may rust. Instead, use soft cloths, soft-bristled brushes, or specialized non-scratching pads designed for polished metals.
Is it safe to use these methods on copper cookware?
Yes, all the household methods mentioned—vinegar and salt, lemon and baking soda, and ketchup—are food-safe once thoroughly rinsed. Ensure complete removal of all residue before cooking. Commercial polishes should be completely rinsed if used on cookware.
How often should I polish my copper items?
This depends on usage and environment. Frequently-used copper cookware might need polishing every 2-4 weeks, while decorative pieces might need it monthly or quarterly. Store items in dry conditions to extend polishing intervals.
Why does my copper still look dull after polishing?
Insufficient rinsing often leaves residue that dulls the finish. Ensure you rinse thoroughly with clean water and dry immediately with a lint-free cloth. If tarnish is extremely heavy, multiple applications of your chosen method may be necessary.
Can I mix different polishing methods?
While you can experiment, stick with one method per session to avoid unpredictable chemical reactions. If you want to try a different method later, ensure the copper is thoroughly rinsed and dried first.
What’s the difference between patina and tarnish?
Patina is an intentional, decorative finish that develops over time and is often preserved. Tarnish is unwanted oxidation. Some people prefer aged copper’s patina appearance, while others prefer the bright, polished look. Your choice determines whether you polish regularly.
Related Posts

Superscript in Google Docs: Expert Tips

Strikethrough in Excel: Easy Steps for Beginners
