

Hide Excel Columns: Expert Tips & Tricks
How to Hide Columns in Excel: Expert Tips & Tricks
Managing large spreadsheets can feel overwhelming when you’re drowning in data. Whether you’re working with financial reports, inventory lists, or project timelines, Excel columns multiply quickly. Sometimes you need to focus on specific information while keeping other data safely stored but out of sight. Hiding columns in Excel is one of the most practical skills you can master to streamline your workflow and create cleaner, more professional-looking spreadsheets.
This comprehensive guide walks you through every method to hide columns in Excel, from basic techniques to advanced tricks that will transform how you organize your data. Whether you’re a spreadsheet novice or looking to refine your skills, you’ll discover multiple approaches suited to different situations and Excel versions.

Why Hide Columns in Excel?
Before diving into the how, let’s understand the why. Hiding columns serves several important purposes in spreadsheet management. First, it reduces visual clutter. When you’re presenting data to stakeholders, you might want to show only the most relevant information without deleting supporting data. Second, it protects sensitive information. Financial spreadsheets often contain cost data or salary information that shouldn’t be visible to all viewers. Third, it improves focus and readability. Your team can concentrate on key metrics without distraction from auxiliary columns.
Hiding columns is also non-destructive—the data remains intact and recoverable. Unlike deleting columns, which permanently removes information, hidden columns preserve your original data structure. This makes hiding an ideal solution for temporary data organization needs. Additionally, when you explore other how-to guides and tips, you’ll find that data organization is fundamental to effective spreadsheet management across all industries.
Another advantage is maintaining formula integrity. If your spreadsheet contains complex formulas referencing hidden columns, those calculations continue working perfectly. This makes hiding columns particularly valuable in workbooks with intricate data relationships.
Method 1: Right-Click Context Menu
The right-click context menu is the quickest and most intuitive way to hide columns in Excel. This method works consistently across Windows and Mac versions, making it the go-to approach for most users.
Step-by-step instructions:
- Click on the column header letter (A, B, C, etc.) that you want to hide. The entire column will highlight in blue.
- Right-click on the selected column header. A context menu will appear with various options.
- Look for the “Hide” option in the menu and click it.
- The column immediately disappears from your view. You’ll notice the column letters jump (for example, from A, B, C to A, C, D if column B is hidden).
This method works for both single columns and multiple adjacent columns. To hide several consecutive columns, click the first column header, hold Shift, and click the last column you want to hide. Then right-click and select Hide. This approach is particularly useful when you have a block of related data you want to temporarily conceal.
The beauty of this method lies in its simplicity. No memorizing menu paths or keyboard combinations—just a straightforward right-click action. This makes it perfect for users who prefer visual navigation over keyboard shortcuts.
Method 2: Format Menu Approach
If you prefer using the menu bar, Excel’s Format menu provides another reliable path to hiding columns. This method offers slightly more control and visibility into what you’re doing.
Following the Format menu route:
- Select the column or columns you want to hide by clicking the column header.
- Click the “Format” menu in the menu bar (on Mac, this appears in the top menu; on Windows, it’s in the ribbon).
- Look for “Column” options in the dropdown menu.
- Select “Hide” from the submenu.
- Your selected columns will immediately disappear from view.
This method is especially useful in corporate environments where users follow standardized procedures. It also provides excellent visibility for training purposes—if you’re teaching someone how to hide columns, using the menu system makes each step clearly visible to the entire group.
The Format menu approach also gives you access to related column management features. While you’re in the Format menu, you can adjust column width, set optimal sizing, or access other column formatting options without navigating away from your current task.
Method 3: Keyboard Shortcuts
For power users and efficiency enthusiasts, keyboard shortcuts are the fastest way to hide columns. These shortcuts eliminate the need to navigate menus or use the mouse, keeping your hands on the keyboard and your workflow uninterrupted.
Windows keyboard shortcut: Select your desired column(s) and press Ctrl + Minus (-) on the numeric keypad. A dialog box may appear asking what you want to delete or hide. Select “Entire Column” and click OK.
Mac keyboard shortcut: Select your column(s) and press Control + Minus (-). Follow the same dialog box instructions.
These keyboard shortcuts work brilliantly when you’re working rapidly through a spreadsheet. Once you develop muscle memory for the shortcut, hiding columns becomes a reflex action, allowing you to maintain your concentration on the actual data work rather than interface navigation.
However, note that the keyboard shortcut approach sometimes triggers a delete dialog rather than a simple hide action. If this happens, choose the “Hide” option in the dialog box rather than “Delete.” This ensures you’re concealing the columns rather than removing them permanently.
Hiding Multiple Non-Adjacent Columns
What happens when you need to hide columns that aren’t sitting right next to each other? Excel handles this scenario elegantly, though it requires slightly different technique than hiding consecutive columns.
To hide non-adjacent columns:
- Click the first column header you want to hide.
- Hold down the Ctrl key (or Command on Mac).
- While holding Ctrl/Command, click each additional column header you want to hide. You can select as many non-adjacent columns as needed.
- Once all desired columns are selected (they’ll appear highlighted), right-click and select “Hide” or use your preferred hiding method.
This technique is invaluable when working with spreadsheets that have scattered sensitive data or when you need to remove visual noise from non-consecutive columns. For example, you might hide columns B, D, F, and H while keeping columns A, C, E, and G visible.
The Ctrl+click method provides maximum flexibility in column selection. You can build your selection gradually, clicking columns in any order, and Excel will remember all your selections until you execute the hide command. This makes it easy to adjust your selection if you accidentally include or exclude a column.
Unhiding Hidden Columns
Hiding columns is only half the equation. You’ll eventually need to unhide them, whether to access the data temporarily or to restore the spreadsheet to its original state. Fortunately, unhiding is just as straightforward as hiding.
Basic unhiding procedure:
- Select the columns on either side of the hidden column(s). For example, if column C is hidden between B and D, click column B header, hold Shift, and click column D header.
- Right-click on the selected columns.
- Choose “Unhide” from the context menu.
- The previously hidden columns reappear in their original positions.
Alternatively, you can select all columns by clicking the “Select All” button (the intersection of row and column headers in the top-left corner), then right-click and choose “Unhide” to reveal all hidden columns at once. This method is helpful when you’ve hidden multiple columns throughout your spreadsheet and want to restore complete visibility.
Using the Format menu, you can also navigate to Format > Column > Unhide to accomplish the same result. This provides the same visual menu-based approach as the hiding process, maintaining consistency in your workflow.
One important note: if you hide all columns in a range, you won’t be able to select those specific columns anymore. In this rare situation, select all cells and use the Format menu or right-click option to unhide everything, then selectively hide the columns you actually need to conceal.
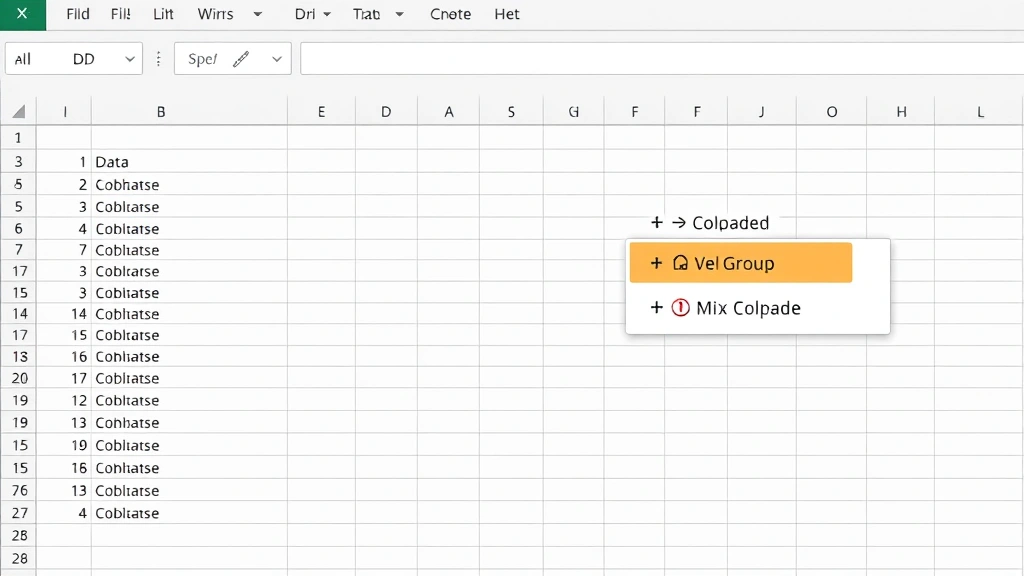
Using Excel Groups and Outlines
For advanced data organization, Excel’s grouping and outlining features provide sophisticated alternatives to simple hiding. These tools are particularly valuable for hierarchical data structures or when you want to create expandable/collapsible sections.
Creating groups in Excel:
- Select the columns you want to group together.
- Go to the Data menu and select “Group” (or “Group and Outline” > “Group” depending on your Excel version).
- Excel will add group controls (typically showing as minus and plus signs) on the left side of your spreadsheet.
- Click the minus sign to collapse (hide) the group or the plus sign to expand (show) it.
This approach is superior to simple hiding when you have multiple related column groups. Users can toggle visibility of entire sections with a single click, making it perfect for financial reports with category groupings or project management sheets with phase-based columns.
Grouping also creates outline levels, allowing you to hide multiple levels of detail. You can create a high-level view showing only summary columns, then drill down to see progressively more detail. This hierarchical approach to data visibility is particularly powerful in business intelligence and reporting scenarios.
The grouping feature integrates seamlessly with your data organization practices, creating professional-looking spreadsheets with intuitive navigation for users of all skill levels.
Advanced Techniques for Data Management
Beyond basic hiding, several advanced techniques enhance your ability to manage complex spreadsheets effectively.
Using filters with hidden columns: Excel’s AutoFilter feature works independently of hidden columns. You can hide certain columns while applying filters to others, creating customized data views for specific purposes. This combination is powerful for creating dashboard-style reports where different stakeholders see different column subsets.
Protecting hidden columns: For sensitive data, you can protect your spreadsheet to prevent users from unhiding certain columns. Go to Tools > Protect Sheet (or Format > Cells > Protection on some versions), set your protection options, and hidden columns will remain concealed even if someone tries to unhide them. This adds a security layer to your data management strategy.
Conditional hiding with VBA: For power users comfortable with Visual Basic for Applications, you can create macros that automatically hide or show columns based on specific conditions. For example, you might create a macro that hides all cost columns when you’re preparing a report for external stakeholders, then reveals them again for internal analysis.
Named ranges and hidden columns: When you create named ranges in Excel, they continue to reference hidden columns perfectly. This means you can build formulas and functions that use hidden data without any issues. Your step-by-step approach to data management should consider how hidden columns integrate with your broader spreadsheet architecture.
Printing considerations: By default, hidden columns don’t print. This is usually desirable, but if you need to print hidden columns, you’ll need to unhide them first or adjust your print area settings. Always verify your print preview before printing important documents that contain hidden columns.
Sharing spreadsheets with hidden columns: When sharing spreadsheets with colleagues, remember that recipients can unhide columns unless you’ve protected the sheet. If the hidden columns contain truly sensitive information, consider using sheet protection or creating separate versions of the spreadsheet for different audiences.
Excel also allows you to create multiple views of the same data using different window arrangements. You can hide different column sets in different windows, allowing multiple users to work with customized views simultaneously. This advanced technique is particularly useful in collaborative environments where team members need different data perspectives.
Understanding these advanced techniques transforms you from a casual Excel user into someone who can architect sophisticated data management solutions. Whether you’re building financial models, creating operational dashboards, or managing complex project data, these tools enable professional-grade spreadsheet design.
FAQ
Can I hide rows the same way I hide columns?
Absolutely! The exact same methods work for hiding rows. Select row numbers instead of column letters, then right-click and choose Hide, or use the Format menu. Keyboard shortcuts and grouping techniques also work identically for rows.
Will hidden columns affect my formulas?
No, hidden columns function normally in formulas. References to hidden columns continue to calculate correctly. The data is simply out of view, not affected in any functional way.
Is there a limit to how many columns I can hide?
Excel allows you to hide as many columns as you want. You can hide all but one column if necessary, though this would defeat the purpose of using a spreadsheet.
How do I know which columns are hidden?
Look at the column letter sequence. If you see A, B, D (skipping C), then column C is hidden. Some Excel users add a visual indicator like a note or special formatting to mark where hidden columns exist.
Can I unhide specific columns without unhiding all of them?
Yes. Select the columns immediately before and after the hidden column(s), then right-click and unhide. This reveals only those specific hidden columns, leaving others concealed.
What’s the difference between hiding and deleting columns?
Hiding preserves the data and formulas—everything remains intact but invisible. Deleting removes columns permanently. Always use hiding if you might need the data later.
Do hidden columns show up in CSV exports?
No, hidden columns don’t export to CSV files. Only visible columns are included in the export, which is actually a safety feature preventing accidental exposure of hidden data.
Can I hide columns in Excel Online?
Yes, Excel Online supports column hiding through the Format menu. The functionality is slightly simplified compared to desktop Excel, but the core hiding and unhiding features work perfectly.
Related Posts

Superscript in Google Docs: Expert Tips

Strikethrough in Excel: Easy Steps for Beginners
