
Cultivating Peanuts: Expert Tips for Beginners
Cultivating Peanuts: Expert Tips for Beginners
Growing peanuts at home might seem like an unusual gardening project, but it’s entirely achievable for beginners willing to learn the fundamentals. Unlike many crops that require extensive farming knowledge, peanuts are surprisingly forgiving plants that thrive in warm climates with proper care and attention. Whether you’re looking to expand your gardening skills or simply want to experience the satisfaction of growing your own food, peanuts offer a rewarding challenge that yields delicious results.
The process of cultivating peanuts differs significantly from growing traditional vegetables or grains. Peanuts develop underground after flowering, making them unique among legume crops. This underground development means understanding soil conditions, moisture levels, and harvest timing becomes critical to your success. By following the expert guidance in this comprehensive guide, you’ll learn everything needed to grow healthy, productive peanut plants from seed to harvest.
Understanding Peanut Growing Basics
Before you invest time and resources into cultivating peanuts, understanding the fundamental requirements of these plants is essential. Peanuts are warm-season crops that demand temperatures between 70 and 85 degrees Fahrenheit to thrive. They require a growing season of 120 to 150 days, depending on the variety you choose, which means timing your planting correctly is crucial for successful harvests.
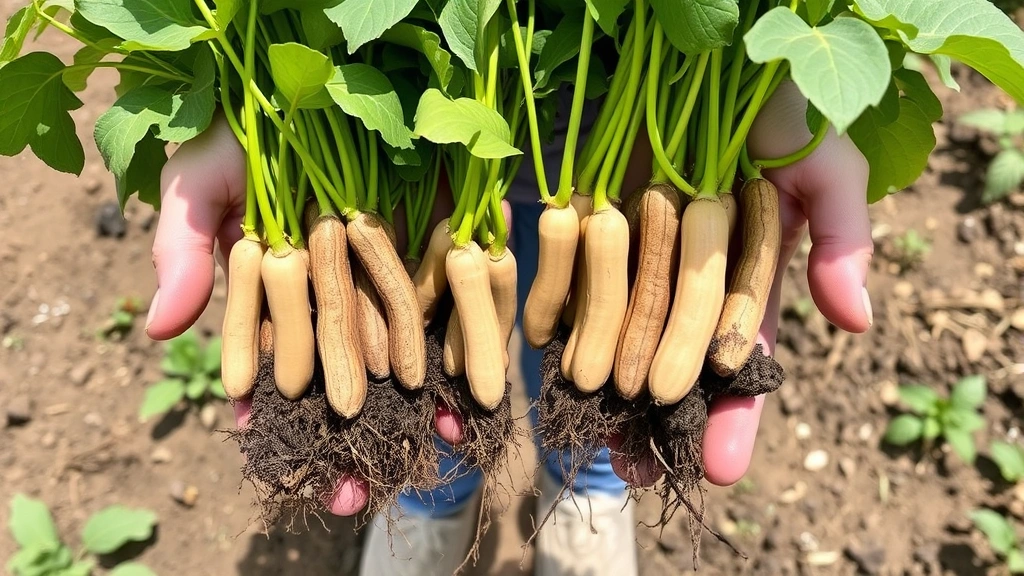
The unique characteristic of peanuts is their reproductive cycle. After the peanut flower is pollinated, the flower stem elongates and pushes the developing pod into the soil, where the peanuts actually develop. This means your soil must be loose, well-draining, and free from compaction to allow these pods to penetrate and expand properly. Without understanding this critical aspect, many beginner growers struggle with poor yields and underdeveloped nuts.
Peanuts are nitrogen-fixing legumes, which means they form a symbiotic relationship with soil bacteria that allows them to convert atmospheric nitrogen into usable plant nutrients. This characteristic makes peanuts excellent for crop rotation and sustainable gardening practices. Unlike many crops, peanuts don’t require heavy nitrogen fertilization, which can actually reduce yields and increase disease susceptibility.
Selecting the Right Peanut Varieties
Choosing the appropriate peanut variety is your first critical decision when learning how to cultivate peanuts successfully. The four main commercial types include Virginia, Spanish, Valencia, and Runner varieties, each with distinct characteristics suited to different growing conditions and preferences.
Virginia peanuts are the largest varieties, producing big kernels perfect for roasting and eating whole. They require longer growing seasons (140-160 days) and perform best in areas with warm, humid climates. Virginia varieties are ideal if you’re in the southeastern United States or have an extended frost-free period.
Spanish peanuts are smaller with thinner shells and higher oil content, making them excellent for peanut butter production. These varieties mature faster (120-130 days) and are more drought-tolerant than Virginia types, making them suitable for gardeners in drier climates. The reddish-brown skin of Spanish peanuts gives them distinctive appearance and flavor.
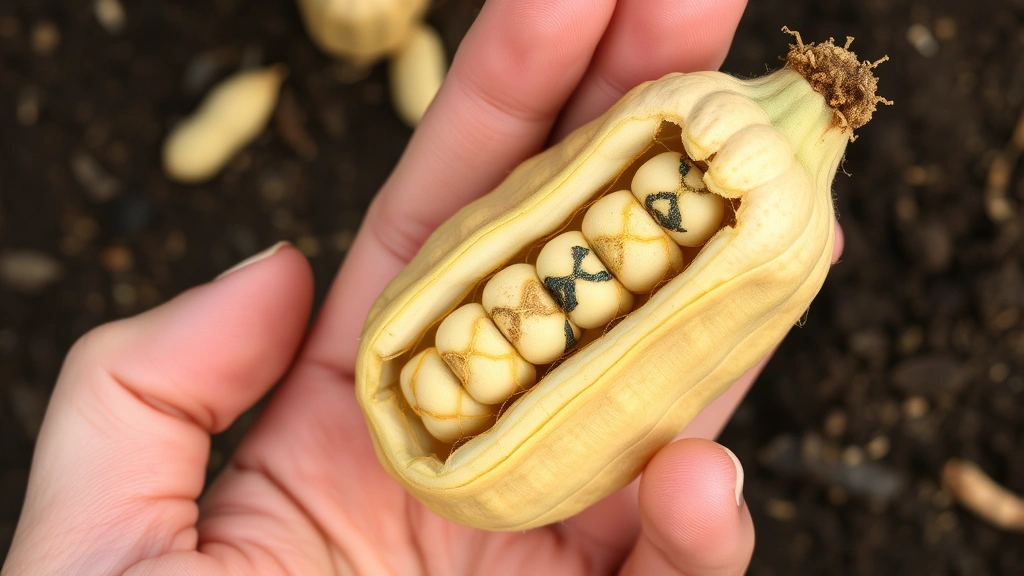
Valencia peanuts are known for their superior taste and are often found in premium peanut products. They have three or more kernels per pod and require 110-120 days to mature, making them one of the quickest-maturing options. Valencia varieties are increasingly popular among home growers seeking gourmet results.
Runner peanuts represent a middle ground between Virginia and Spanish varieties, offering good size and flavor with moderate maturity times. They’re the most commonly grown commercial variety and are widely available for home gardeners, making them an excellent choice for beginners.
Preparing Your Soil and Garden Space
Success in peanut cultivation begins with proper soil preparation. Peanuts thrive in sandy loam or light loamy soils with pH levels between 5.9 and 6.3. Unlike many crops, peanuts prefer slightly acidic conditions and perform poorly in heavy clay soils that restrict pod development and promote fungal diseases.
Start by testing your soil composition and pH levels using a soil testing kit from This Old House. If your soil is too acidic, add lime; if it’s too alkaline, incorporate sulfur. The goal is achieving that optimal 5.9-6.3 pH range where peanuts absorb nutrients most efficiently.
Soil structure is equally important as pH. Till your garden bed 8-10 inches deep, breaking up compacted layers and removing rocks, roots, and debris. Peanut pods must penetrate soft soil easily, so consider adding 2-3 inches of compost or well-rotted organic matter to improve soil texture. This addition increases water retention while maintaining the loose structure peanuts require.
Calcium is another critical nutrient for peanut cultivation. Many soils lack sufficient calcium, leading to hollow heart disease and other pod development problems. Apply gypsum (calcium sulfate) at rates recommended by your soil test, typically 500-1000 pounds per acre for home gardens, translating to about 1-2 pounds per 100 square feet.
Choose a garden location receiving full sun—at least 6-8 hours of direct sunlight daily. Peanuts are sun-loving plants that produce better yields with abundant light. Ensure adequate drainage, as waterlogged conditions promote root rot and fungal diseases that devastate peanut crops.
Planting Peanuts Step-by-Step
Timing your peanut planting correctly is essential for successful harvests. Plant peanuts after your last spring frost when soil temperatures reach 65 degrees Fahrenheit, ideally waiting until soil is closer to 70 degrees. In most regions, this means planting from April through June, depending on your location.
Use raw peanuts in the shell rather than roasted varieties, as roasting damages the seed’s viability. You can purchase peanut seeds from specialty seed catalogs or reputable peanut suppliers. Some gardeners save peanuts from previous harvests, though purchased seeds offer better germination rates and disease resistance.
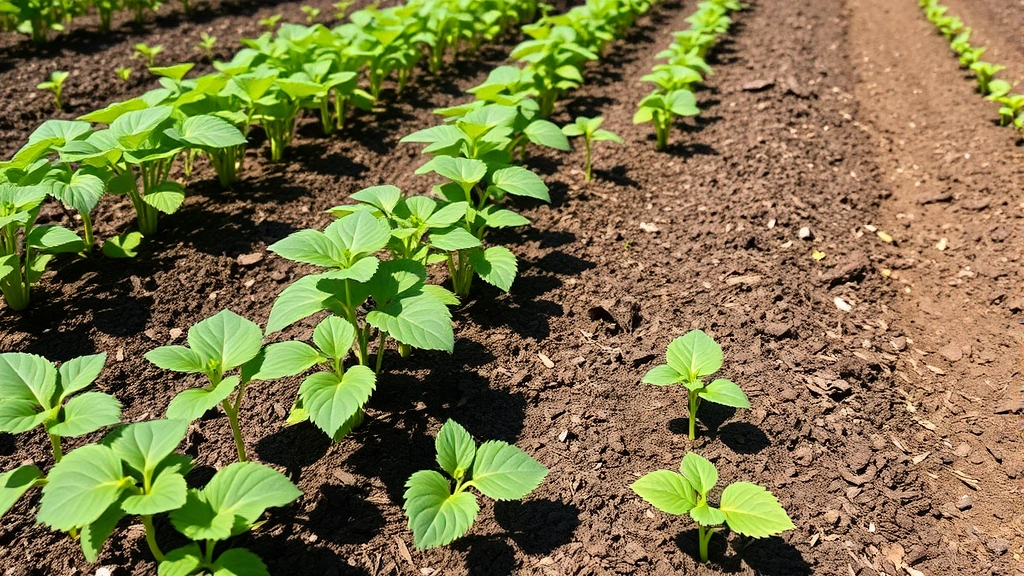
Plant peanut seeds 1.5 inches deep and 4-6 inches apart in rows spaced 24-36 inches apart. Closer spacing increases yields but may require more intensive pest management. Water gently after planting to settle soil without creating a crust that inhibits germination. Seeds typically germinate within 10-14 days if soil moisture and temperature are optimal.
Consider starting peanuts indoors 4-6 weeks before your last frost, then transplanting seedlings outdoors. This method extends your growing season in regions with shorter frost-free periods. Harden seedlings by gradually exposing them to outdoor conditions before final transplanting.
Mulching around peanut plants with 2-3 inches of straw or wood chips helps regulate soil temperature, suppress weeds, and improve soil structure as it decomposes. However, avoid piling mulch directly against plant stems, which can promote rot and disease.
Watering and Irrigation Techniques
Proper irrigation is fundamental to successful peanut cultivation. Peanuts require consistent moisture throughout the growing season, with approximately 1-1.5 inches of water weekly from rain or irrigation combined. However, this requirement varies based on your climate, soil type, and rainfall patterns.
During the first 60 days after planting, focus on maintaining consistent soil moisture as plants establish root systems and foliage. This period is critical for vegetative growth and flower development. Insufficient water during this phase results in reduced plant size and fewer flowers, directly impacting final yields.
From day 60 onward, when flowering and pod development occur, water becomes even more critical. Inconsistent watering during this period causes pod abortion, malformed nuts, and reduced kernel quality. Maintain steady moisture without waterlogging, as saturated soil promotes fungal diseases and root rot.
Implement drip irrigation or soaker hoses rather than overhead sprinklers when possible. These methods deliver water directly to soil, reducing disease pressure from wet foliage while improving water efficiency. If using sprinklers, water early morning to allow foliage to dry quickly, minimizing fungal disease risk.
Monitor soil moisture by inserting your finger 2-3 inches into soil. If it feels dry at that depth, irrigation is needed. In most climates, peanuts require watering 2-3 times weekly during dry periods, though this varies based on local conditions.
Managing Pests and Diseases
Like all crops, peanuts face pest and disease pressures that can devastate yields if left unmanaged. Common peanut pests include spider mites, thrips, and various caterpillar species that feed on foliage and developing pods. Regular scouting—checking plants twice weekly for pest presence—allows early detection and intervention before populations explode.
Aphids frequently colonize peanut plants, particularly during spring growth phases. These insects weaken plants by removing sap and can transmit viruses. Spray affected plants with insecticidal soap or neem oil, repeating applications every 7-10 days as needed. Strong water sprays from hoses often dislodge aphids without chemical intervention.
Leaf spot diseases, including early leaf spot and late leaf spot, are the most significant fungal threats to peanut crops. These diseases cause brown spots on foliage, eventually leading to defoliation and reduced yields. Prevent leaf spot by maintaining good air circulation, avoiding overhead watering, and removing infected leaves promptly. Apply fungicides containing chlorothalonil or mancozeb if disease pressure becomes severe.
Aspergillus and aflatoxin contamination represents a serious concern in warm, humid climates. This fungus produces toxins that accumulate in peanut kernels, making them unsafe for consumption. Minimize risk by harvesting at optimal maturity, drying peanuts properly, and storing them in cool, dry conditions. Avoid plant stress through proper irrigation and disease management, as stressed plants are more susceptible to fungal colonization.
Southern corn rootworm and other soil insects occasionally damage peanut roots and underground pods. Crop rotation with non-host crops helps break pest life cycles. Avoid planting peanuts in the same location for at least two consecutive years.
Harvesting and Curing Your Peanuts
Determining harvest timing is critical because premature or delayed harvesting significantly impacts kernel quality and yield. Most peanut varieties mature 120-160 days after planting, though variety-specific maturity dates guide more precise timing. Monitor plants closely during the final weeks of the growing season for harvest readiness indicators.
Examine pod development by carefully digging up a few plants and checking pod color and size. Mature pods have netted patterns on shells and contain fully developed kernels filling pod cavities. Immature pods appear smooth and contain underdeveloped kernels, while overmatured pods may show deterioration.
Harvest peanuts by loosening soil around plant bases with a spade or garden fork, then pulling entire plants from the ground. Shake excess soil gently, being careful not to damage pods. Lay plants in a warm, well-ventilated location for 2-3 weeks to cure and allow kernels to fully mature.
After curing, thresh peanuts by hand or using a mechanical thresher to remove pods from plant material. Store pods in mesh bags in a cool, dry location with good air circulation. Properly cured peanuts store for several months, though quality gradually declines over time.
Roasting peanuts at home enhances flavor and extends shelf life. Spread shelled peanuts on baking sheets and roast at 350 degrees Fahrenheit for 20-25 minutes, stirring occasionally, until skins darken and desired roast level is achieved. Cool completely before storing in airtight containers.
Storage and Post-Harvest Care
Proper storage preserves your peanut harvest and maintains nutritional quality for months. Store in-shell peanuts in cool (50-70 degrees Fahrenheit), dry (below 65% humidity) conditions with good air circulation. Mesh bags or open containers work better than sealed containers, which trap moisture and promote mold growth.
Shelled peanuts require more careful storage due to increased surface area exposure. Keep shelled nuts in airtight containers in cool conditions, ideally below 60 degrees Fahrenheit. Refrigeration extends shelf life significantly, while freezing preserves peanuts for a year or longer without quality loss.
Monitor stored peanuts periodically for signs of mold, off-odors, or insect activity. Discard any affected nuts immediately, as mold contamination can spread to surrounding peanuts. Proper storage conditions prevent most post-harvest problems, making preventive care your best strategy.
Save some of your highest-quality peanuts for next year’s seed. Store seed peanuts separately in cool conditions away from kitchen moisture and temperature fluctuations. Properly stored seed peanuts maintain viability for 1-2 years, though germination rates decline with age.
Consider processing your harvest into peanut butter using a food processor. Roasted peanuts blend into creamy butter within 5-10 minutes with no added ingredients required. Homemade peanut butter offers superior flavor compared to commercial varieties and eliminates unwanted additives.
FAQ
How long does it take to grow peanuts from planting to harvest?
Most peanut varieties require 120-160 days from planting to harvest maturity. Specific timing depends on your chosen variety, local climate conditions, and growing season length. Plan accordingly if you’re in regions with shorter frost-free periods.
Can I grow peanuts in containers?
Yes, peanuts can be grown in large containers (5-gallon minimum) with quality potting soil and proper drainage. Container growing works well for gardeners with limited space or poor native soil conditions. Ensure containers receive full sun and maintain consistent moisture throughout the season.
What’s the minimum temperature for peanut cultivation?
Peanuts require soil temperatures of at least 65 degrees Fahrenheit for germination, with optimal growth occurring between 70-85 degrees. Temperatures below 60 degrees slow growth significantly, while freezing kills plants. Avoid planting until soil has warmed sufficiently in spring.
Do peanuts need fertilizer?
Peanuts require minimal nitrogen fertilizer due to their nitrogen-fixing abilities but benefit from phosphorus, potassium, and micronutrient applications based on soil testing. Excessive nitrogen reduces yields and increases disease susceptibility. Follow soil test recommendations for best results.
What causes hollow heart disease in peanuts?
Hollow heart disease results from calcium deficiency during pod development. Prevent this condition by applying gypsum before planting and maintaining consistent moisture throughout the season. Proper soil preparation and calcium application eliminate most hollow heart problems.
How do I know when peanuts are ready to harvest?
Harvest when pod interiors show netted patterns and kernels fill pod cavities completely. Dig sample plants to check maturity before harvesting entire crop. Pods should be firm with developed, full-sized kernels—immature kernels indicate premature harvesting.
Can I save peanut seeds for next year?
Yes, save high-quality peanuts from your harvest for next year’s seeds. Store seed peanuts in cool, dry conditions away from kitchen moisture. Viability remains good for 1-2 years, though germination rates gradually decline with age.
Related Posts

Superscript in Google Docs: Expert Tips

Strikethrough in Excel: Easy Steps for Beginners
