
Clear Check Engine Light? Expert Tips Inside
How to Clear Check Engine Light: Expert Tips and DIY Solutions
The check engine light is one of the most common warning indicators on your vehicle’s dashboard, and it can trigger anxiety in even the most experienced car owners. When that little amber light illuminates, it signals that your vehicle’s onboard diagnostic system has detected a problem with the engine, emissions system, or transmission. The good news is that not every check engine light indicates a catastrophic failure, and many drivers can diagnose and resolve the issue themselves without immediately heading to an expensive mechanic.
Understanding what triggers your check engine light and how to properly address it can save you hundreds of dollars in unnecessary repairs. Whether you’re dealing with a loose gas cap or a more serious emission system malfunction, this comprehensive guide will walk you through the diagnostic process and provide you with actionable steps to clear that pesky warning light.
Understanding Your Check Engine Light
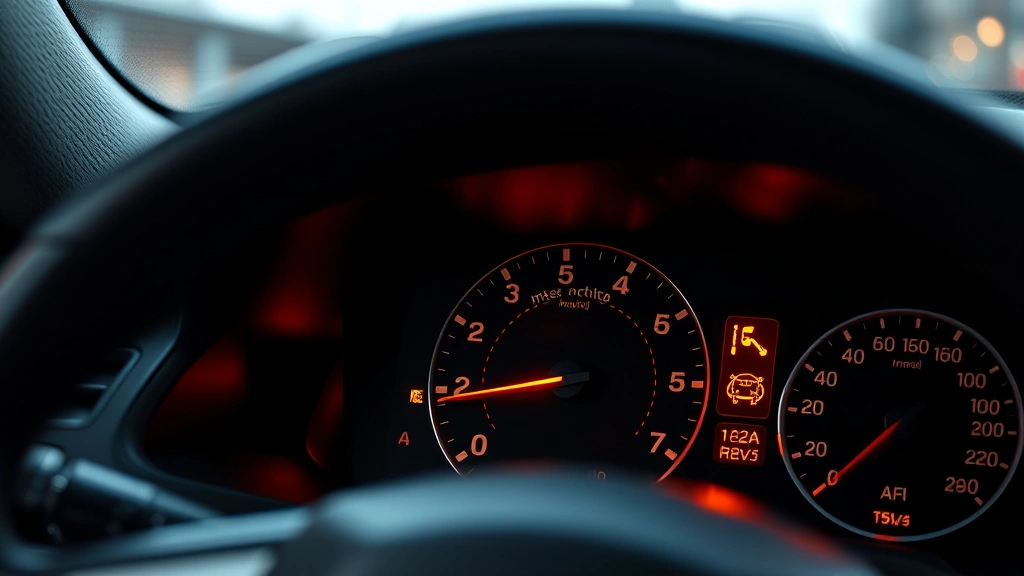
The check engine light, also called the malfunction indicator lamp (MIL), is connected to your vehicle’s onboard diagnostic system. This sophisticated computer monitors hundreds of sensors throughout your engine and emissions system, constantly checking for problems that could affect performance, fuel economy, or emissions output. When the system detects something amiss, it stores a diagnostic trouble code (DTC) in the vehicle’s computer memory and illuminates the warning light on your dashboard.
It’s crucial to understand that the check engine light doesn’t always mean your car is in immediate danger. Sometimes the issue is minor, such as a loose fuel cap that’s allowing gasoline vapors to escape. Other times, the problem might be more significant, like a faulty oxygen sensor or catalytic converter issue. The key is to read the diagnostic code stored in your vehicle’s computer to understand exactly what triggered the light.
Modern vehicles have been equipped with this diagnostic system since 1996, and it’s become increasingly sophisticated. The system can detect problems ranging from a misfiring cylinder to issues with your vehicle’s transmission. Understanding how this system works is the first step toward becoming a more informed vehicle owner who can make better decisions about repairs and maintenance.
Safety First: Before You Begin Diagnostics
Before you start any diagnostic work on your vehicle, it’s essential to prioritize safety. Park your vehicle on a level surface away from traffic, and ensure the engine is completely cool before touching any components. If the check engine light is accompanied by other warning signs—such as the engine overheating, loss of power, rough idling, or unusual noises—you should not continue driving and should seek professional help immediately.
Make sure you have basic safety equipment on hand, including work gloves, safety glasses, and a flashlight. If you’re working in a garage, ensure proper ventilation if you’ll be running the engine. Keep a fire extinguisher nearby, and never work under a vehicle that’s only supported by a jack; always use jack stands for added safety.
If your vehicle is still under warranty, be aware that attempting certain repairs yourself might void your warranty. Check your owner’s manual and warranty documentation before proceeding. Additionally, if you’re not comfortable working with your vehicle, there’s no shame in consulting a professional mechanic.
Step-by-Step Diagnostic Process
The diagnostic process is methodical and doesn’t require expensive equipment to start. Begin by noting when the check engine light appeared and whether your vehicle is exhibiting any unusual behavior. Did it appear while driving on the highway, during city driving, or when parked? Is your vehicle running normally, or do you notice hesitation, rough idling, or reduced fuel economy?
Step 1: Check the Gas Cap
This might sound overly simple, but a loose or damaged fuel cap is one of the most common causes of check engine lights. Your fuel cap serves an important purpose—it maintains pressure in your fuel system and prevents fuel vapors from escaping. Remove your gas cap and inspect it for cracks or damage. If it appears damaged, replace it. If it looks fine, reinstall it firmly until you hear it click. Clear the code and see if the light returns after a few driving cycles.
Step 2: Assess for Obvious Problems
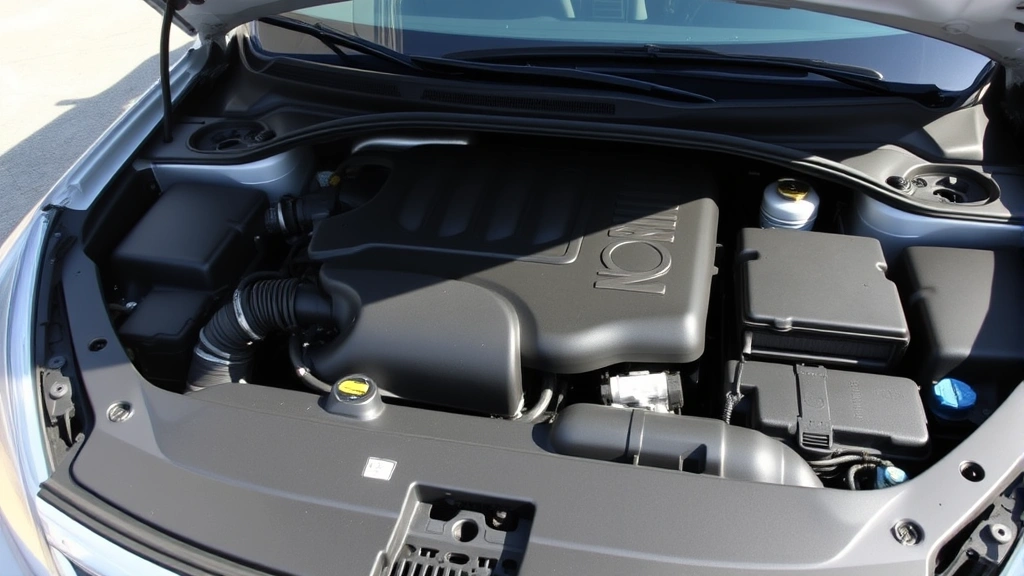
Pop your hood and visually inspect your engine bay for obvious issues. Look for disconnected hoses, loose wiring, or anything that appears out of place. Check your battery terminals to ensure they’re clean and securely connected. A loose battery connection can trigger various warning lights, including the check engine light.
Step 3: Gather Information
Before heading to a mechanic or attempting repairs, gather as much information as possible. Note any unusual sounds, smells, or performance changes. This information will be invaluable when diagnosing the problem. If you’ve recently had work done on your vehicle, consider whether the check engine light appeared after that service.
Common Issues and Solutions
Understanding the most common causes of check engine lights can help you narrow down the problem. Many of these issues are relatively straightforward to diagnose and repair, even for those without extensive automotive knowledge.
Oxygen Sensor Issues
Your vehicle’s oxygen sensors monitor the amount of unburned oxygen in your exhaust system. A faulty oxygen sensor is one of the most common reasons for check engine lights, accounting for roughly 16% of all check engine light occurrences. Symptoms include poor fuel economy, rough idling, and hesitation during acceleration. Replacing an oxygen sensor typically costs between $150 and $400 at a shop, but it’s a task some experienced DIYers can handle themselves.
Catalytic Converter Problems
Your catalytic converter is a critical emissions component that converts harmful gases into less harmful substances. When it fails, it triggers a check engine light and can significantly reduce your vehicle’s performance. Catalytic converter repairs are expensive, often costing $400 to $2,500 or more, making this one of the pricier check engine light repairs. However, before replacing the converter, ensure other issues like faulty sensors aren’t causing the problem.
Mass Air Flow Sensor Malfunction
The mass air flow (MAF) sensor measures the amount of air entering the engine. A dirty or faulty MAF sensor can cause poor fuel economy, rough idling, and hesitation. The good news is that sometimes a MAF sensor just needs cleaning. You can purchase specialized MAF sensor cleaner and attempt to clean it yourself, though you must be extremely careful not to damage the sensor’s delicate filament.
Loose or Damaged Fuel Cap
As mentioned earlier, a loose fuel cap is one of the easiest problems to fix. Simply ensure it’s tight, and the light may clear itself after a few driving cycles. If the cap is damaged, replacement is inexpensive, usually costing less than $20.
Spark Plug Issues
Worn or fouled spark plugs can trigger a check engine light and cause misfiring, poor fuel economy, and rough idling. Spark plug replacement is a common maintenance task that many DIYers can handle themselves. Modern spark plugs typically need replacement every 30,000 to 100,000 miles, depending on the type.
EVAP System Leaks
Your vehicle’s evaporative emissions (EVAP) system captures fuel vapors from your tank and fuel system to prevent them from being released into the atmosphere. Leaks in this system are common and can trigger a check engine light. Identifying an EVAP leak requires specialized equipment, making this a task best left to professionals.
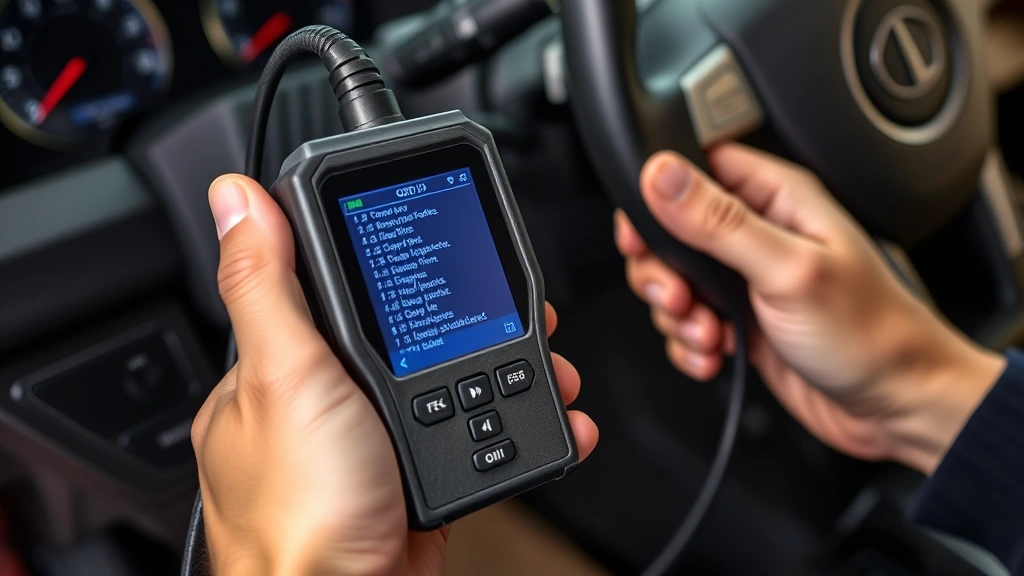
Using an OBD-II Scanner
An OBD-II (On-Board Diagnostics II) scanner is an invaluable tool for reading the diagnostic trouble codes stored in your vehicle’s computer. These scanners range from basic code readers costing around $25 to advanced diagnostic tools costing hundreds of dollars. For most DIY purposes, an inexpensive scanner is sufficient to read codes and clear the check engine light.
How to Use an OBD-II Scanner
First, locate your vehicle’s OBD-II port, typically found under the steering column on the driver’s side. Plug your scanner into this port and turn the ignition key to the “On” position without starting the engine. Follow the scanner’s menu prompts to read the diagnostic trouble codes. The scanner will display codes like “P0420” (Catalyst System Efficiency Below Threshold) or “P0171” (System Too Lean), which you can then research to understand the specific problem.
Write down all codes that appear, as multiple codes can help you understand the full scope of the problem. Some codes are more serious than others. For example, a code related to the oxygen sensor might indicate a simple sensor replacement, while a code related to the catalytic converter might indicate a more expensive repair.
Recommended OBD-II Scanners
For basic diagnostics, consider tools like the ANCEL AD310 Classic Enhanced Universal OBD-II Scanner or the BlueDriver, which connects to your smartphone via Bluetooth. These tools provide detailed code information and can help you make informed decisions about repairs. Many auto parts retailers like AutoZone and O’Reilly offer free code reading services, making this a no-cost option if you’re not ready to purchase a scanner.
Manual Clearing Methods
Once you’ve identified and fixed the problem causing the check engine light, you’ll need to clear the code from your vehicle’s computer. There are several methods to accomplish this, ranging from simple to more involved.
Method 1: Disconnect the Battery
The most common manual method is disconnecting your vehicle’s battery. This forces the computer to clear all stored codes and resets the system. To do this safely, turn off the engine and locate the negative terminal on your battery. Using an appropriate wrench, disconnect the negative cable and leave it disconnected for at least 15 minutes. Reconnect the cable and start your vehicle. Note that this method will also clear any saved settings in your vehicle’s computer, such as radio presets and seat position memory.
Method 2: Use an OBD-II Scanner to Clear Codes
Most OBD-II scanners have a function to clear diagnostic trouble codes. After plugging in your scanner and reading the codes, look for a “Clear Codes” or “Erase Codes” option in the menu. Select this option, and the scanner will clear the codes from your vehicle’s computer. This method is cleaner than disconnecting the battery because it doesn’t affect other vehicle settings.
Method 3: Drive Multiple Cycles
In some cases, the check engine light will clear itself after you’ve fixed the underlying problem and completed several driving cycles. A driving cycle typically consists of starting your vehicle, driving it through various speeds and conditions, and bringing it back to idle. Some vehicles may require multiple cycles before the light clears automatically.
Method 4: Professional Code Clearing
If you’re uncomfortable clearing codes yourself, many auto parts retailers and mechanics will clear the code for free or for a small fee. This is a quick process that takes only a few minutes.
When to Seek Professional Help
While many check engine light issues can be diagnosed and resolved by DIYers, some situations warrant professional help. If you lack the proper tools or knowledge to safely complete a repair, consulting a professional mechanic is the right choice. Additionally, if the check engine light returns shortly after clearing it, the underlying problem likely wasn’t fully resolved, and professional diagnosis is necessary.
Certain diagnostic scenarios require specialized equipment. For instance, identifying EVAP system leaks often requires a smoke test machine, which most home mechanics don’t own. Similarly, if your vehicle exhibits severe symptoms like engine overheating, loss of power, or unusual noises, professional help is essential for safety.
When choosing a mechanic, seek recommendations from friends and family, check online reviews, and verify that the shop is certified by the National Institute for Automotive Service Excellence (ASE). A reputable mechanic will perform a thorough diagnostic before recommending repairs and will explain their findings in clear terms.
According to This Old House, understanding your vehicle’s warning systems is part of responsible vehicle ownership. Similarly, Family Handyman emphasizes the importance of addressing vehicle issues promptly to prevent more serious problems from developing.
For those interested in broader vehicle maintenance, learning how-to guides and tutorials can help you become more self-sufficient with vehicle care. While automotive work differs from home improvement, the same principles of safety and methodical problem-solving apply. Just as you might learn about how to install gutters or other home projects, understanding your vehicle’s systems empowers you to make better decisions about repairs and maintenance.
FAQ
Is it safe to drive with the check engine light on?
In most cases, it’s safe to drive with the check engine light on, though you should address the problem as soon as possible. However, if the light is flashing, this indicates a severe problem like engine misfiring, and you should not drive the vehicle. A flashing check engine light can cause serious damage to your catalytic converter if ignored.
How much does it cost to fix a check engine light?
The cost depends entirely on the underlying problem. Simple fixes like replacing a gas cap cost less than $20, while more serious issues like catalytic converter replacement can cost $2,500 or more. Oxygen sensor replacement typically costs $150 to $400, and spark plug replacement ranges from $100 to $300.
Can I clear the check engine light myself?
Yes, you can clear the check engine light yourself using an OBD-II scanner or by disconnecting your vehicle’s battery. However, clearing the light doesn’t fix the underlying problem. You must identify and resolve the issue causing the light to appear, or the light will return.
What does a flashing check engine light mean?
A flashing check engine light indicates a serious problem that requires immediate attention. This typically means your engine is misfiring, which can damage your catalytic converter. You should stop driving immediately and have your vehicle diagnosed by a professional mechanic.
How long does it take to clear a check engine light?
The time required depends on the underlying problem. Simple fixes like tightening a fuel cap take seconds. Using an OBD-II scanner to clear codes takes just a few minutes. However, diagnosing and fixing the root cause of the light might take hours or even days, depending on the complexity of the problem.
Will the check engine light come back if I just clear it?
If you only clear the code without fixing the underlying problem, the check engine light will return within a few driving cycles. This is actually useful information because it confirms that the problem still exists and needs attention.
Do I need a mechanic to read my check engine code?
No, many auto parts retailers like AutoZone and O’Reilly Auto Parts offer free code reading services. Alternatively, you can purchase an inexpensive OBD-II scanner for $25 to $100 and read codes yourself. This gives you valuable information for diagnosing the problem.
What’s the difference between a check engine light and other warning lights?
The check engine light specifically indicates problems with your engine, emissions system, or transmission. Other warning lights indicate different issues, such as low oil pressure (oil can icon), battery problems (battery icon), or brake system issues (brake icon). Each light has a specific meaning and requires different actions.
Related Posts

Superscript in Google Docs: Expert Tips

Strikethrough in Excel: Easy Steps for Beginners
