

Installing Gutters? Pro Tips for Success
Installing Gutters? Pro Tips for Success
Gutters are one of the most critical components of your home’s exterior, yet many homeowners overlook their importance until water damage appears. A properly installed gutter system protects your foundation, basement, and landscaping by directing rainwater away from your home. Whether you’re replacing old gutters or installing a new system, understanding the installation process can save you thousands in potential damage and contractor fees.
Installing gutters yourself is an achievable DIY project if you have basic carpentry skills, the right tools, and patience. This comprehensive guide walks you through everything you need to know about how to install gutters like a professional, from planning and material selection to final installation and testing.
Tools and Materials You’ll Need
Before climbing a ladder, gather all necessary tools and materials. Having everything on hand prevents frustrating trips back to the hardware store and keeps your project moving smoothly. The right tools also ensure accurate measurements and secure installation.
Essential Tools:
- Extension ladder (20-24 feet for single-story homes)
- Level (4-6 feet long for checking slope)
- Tape measure (25-foot minimum)
- Hacksaw or power miter saw for cutting gutters
- Drill with bits and screwdriver bits
- Tin snips or aviation shears
- Caulking gun for sealant application
- Chalk line for marking slope
- Safety glasses and work gloves
- Roofing cement or gutter sealant
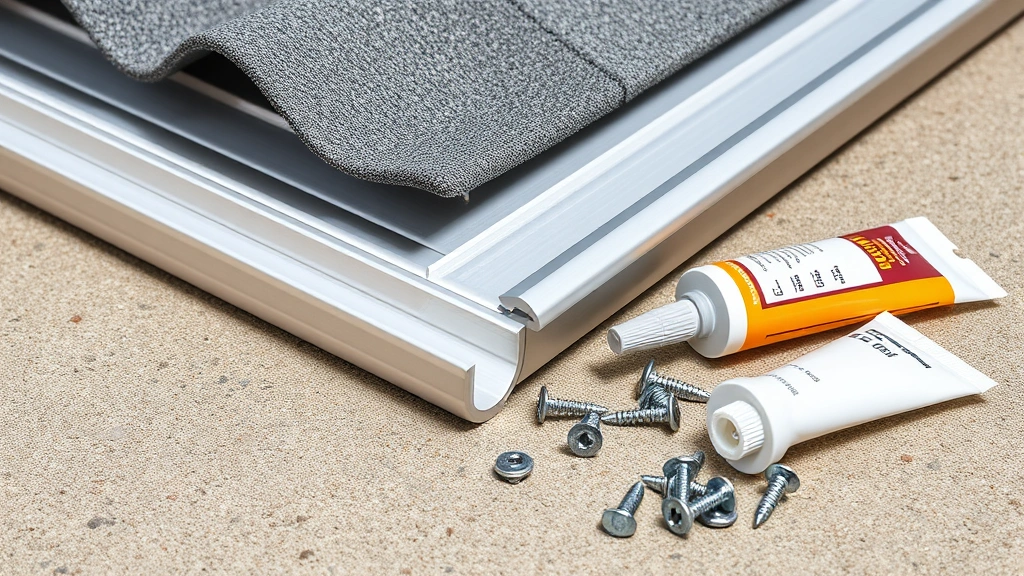
Materials Required:
- Gutter sections (typically 10 feet long)
- End caps and corners (inside and outside)
- Gutter hangers or brackets (spaced 24-32 inches apart)
- Downspout sections and elbows
- Downspout brackets and straps
- Fasteners (screws or rivets, depending on material)
- Gutter sealant and caulk
- Downspout extensions or splash blocks
Visit This Old House’s gutter guide for detailed product recommendations based on your climate and home style.
Measuring and Planning Your Gutter System
Accurate measurements are the foundation of a successful gutter installation. A miscalculation early on compounds problems throughout the project, affecting water drainage and system longevity.
Step 1: Measure Your Roof’s Perimeter
Walk around your entire home with a tape measure, recording the length of each section where gutters will be installed. Pay special attention to corners, roof edges, and any architectural features that affect gutter placement. Document measurements for each side of your home separately—the front may be 40 feet while the back is 35 feet.
Step 2: Calculate Downspout Locations
Downspouts should be positioned to efficiently drain water away from your foundation. Plan for one downspout every 30-40 feet of gutter length. Homes with multiple stories or complex roof designs may need additional downspouts. Mark these locations on your roof line before purchasing materials.
Step 3: Identify Slope Direction
Water must flow toward downspouts, which means your gutters need a gentle slope. The standard slope is 1/2 inch of drop for every 10 feet of gutter. If your gutter runs 40 feet to a downspout, the starting point should be 2 inches higher than the downspout end. Use a chalk line to mark this slope on your fascia board before installation begins.
Step 4: Create a Materials List
Calculate the total linear feet of gutter needed, accounting for all corners, angles, and sections. Gutters come in 10-foot sections, so a 40-foot run requires 4 sections plus connectors. Don’t forget end caps for all termination points. Having a complete materials list prevents installation delays.
Choosing the Right Gutter Type and Material
Gutter material significantly impacts durability, maintenance requirements, and installation difficulty. Different materials suit different climates and budgets. Understanding each option helps you make an informed decision.
Aluminum Gutters
Aluminum is the most popular choice for DIY installations because it’s lightweight, rust-resistant, and affordable. These gutters are easy to cut and handle, making them ideal for homeowners tackling their first installation. Aluminum gutters typically last 20-30 years and require minimal maintenance. They’re available in numerous colors and can be painted to match your home.
Vinyl Gutters
Vinyl offers the easiest installation process—pieces simply snap together without tools. They’re lightweight, affordable, and require no painting. However, vinyl becomes brittle in cold climates and may crack or warp in extreme temperatures. If you live in areas with harsh winters, aluminum or steel is a better choice. Vinyl gutters typically last 10-15 years.
Steel Gutters
Steel gutters are extremely durable and strong, capable of handling heavy snow loads and debris. They’re more expensive than aluminum and require regular maintenance to prevent rust. Steel installation is heavier work, requiring more fasteners and support. These gutters are ideal for climates with significant precipitation or homes in areas prone to heavy debris accumulation.
Copper and Zinc Gutters
Premium materials offering superior longevity (50+ years) and distinctive aesthetics. Copper develops a beautiful patina over time, while zinc resists corrosion exceptionally well. These materials are expensive and typically require professional installation due to specialized techniques and tools needed. They’re best reserved for high-end homes or historic renovations.
Installing Hangers and Brackets
Proper hanger installation is critical—this is where your gutters attach to your home. Inadequate support leads to sagging, water pooling, and eventual failure. Hangers must be secured into the fascia board or roof structure, not just the gutter itself.
Spacing Requirements
Install hangers every 24-32 inches along the gutter run. For aluminum gutters, 32-inch spacing is standard. In areas with heavy snow, ice, or rain, reduce spacing to 24 inches for additional support. Each hanger must be fastened with at least two fasteners (screws or bolts) to ensure stability.
Hanger Installation Process
- Mark hanger locations using a measuring tape, starting from one end of your gutter run. Mark every 24-32 inches with a pencil on the fascia board.
- Pre-drill holes at marked locations using a drill bit slightly smaller than your fasteners. This prevents splitting the fascia board, especially with wood fascia.
- Secure hangers according to manufacturer instructions. Hidden hangers attach inside the gutter, while strap hangers bolt across the top. Use corrosion-resistant fasteners (stainless steel or galvanized) to prevent rust.
- Check alignment as you progress, ensuring hangers are level and properly spaced. Misaligned hangers create stress points and water pooling.
- Account for slope when installing hangers—remember that your system needs to slope toward downspouts. Use shims under hangers if necessary to achieve the correct slope.
For detailed instructions on securing fasteners properly, check Family Handyman’s comprehensive gutter installation guide.
Cutting and Connecting Gutter Sections
Joining gutter sections requires precision and the right connectors. Poor connections lead to leaks, water damage, and premature failure. Take time to ensure clean cuts and secure connections.
Cutting Gutters Accurately
Measure twice before cutting. Use a hacksaw for aluminum or vinyl gutters, making smooth, perpendicular cuts. A power miter saw with a fine-toothed blade produces cleaner cuts and reduces burrs. After cutting, smooth any sharp edges with a file or sandpaper to prevent injuries and ensure proper fitting.
Using Gutter Connectors
Gutter connectors (also called splices) join two gutter sections end-to-end. Slip connectors fit inside the gutter, while strap connectors bolt across the top. Apply a bead of gutter sealant to both inside surfaces before connecting sections. This prevents water from seeping through the joint, which is a common leak source. Secure connectors with fasteners spaced evenly along the connector length.
Installing Corners and End Caps
Inside and outside corners redirect water flow around roof edges. Install corners the same way as connectors—apply sealant, then secure with fasteners. End caps seal the termination points of gutter runs, preventing water from spilling over the sides. Position end caps at the highest point of each gutter section.
Sealing All Joints
This step cannot be overstated—joints are the most common failure points in gutter systems. Use a high-quality, waterproof gutter sealant designed for your gutter material. Apply a continuous bead of sealant inside the joint before connecting pieces. Allow sealant to cure per manufacturer instructions (typically 24-48 hours) before exposing the system to water.
Setting the Proper Slope
The most common gutter installation mistake is failing to establish proper slope. Even a perfectly installed gutter system with incorrect slope leads to water pooling, ice dams, and damage. Slope is non-negotiable for functionality.
Understanding Slope Mathematics
Standard slope is 1/2 inch per 10 feet of gutter. This gentle angle is barely noticeable to the eye but critical for drainage. Calculate your required slope by dividing gutter length by 10, then multiplying by 1/2 inch. A 40-foot gutter run needs a 2-inch elevation difference between the high and low ends.
Marking Slope Before Installation
Use a chalk line to mark slope on your fascia board before installing hangers. Snap a line from the starting point to the downspout location, accounting for your calculated slope. This visual guide ensures hangers are positioned correctly and maintains consistent slope throughout installation.
Checking Slope During Installation
Use a 4-6 foot level to verify slope as you install hangers and gutter sections. Place the level along the gutter bottom and adjust hanger height until it matches your marked line. Check slope every 10 feet to catch errors early. A slight slope adjustment now prevents major problems later.
Adjusting for Complex Roof Lines
Homes with multiple roof sections may require different slope directions. Each gutter run should slope toward its designated downspout. If your home has a central peak, gutters on both sides slope inward toward center downspouts. Sketch your slope plan before starting installation to avoid confusion.
Installing Downspouts and Drainage
Downspouts complete your gutter system by directing water away from your foundation. Proper downspout installation is as important as the gutter itself—water must flow away from your home, not create new problems at ground level.
Positioning Downspouts
Install downspouts at the lowest points of your gutter system, typically at corners or designated drainage locations. Downspouts should be positioned to direct water at least 4-6 feet away from your foundation. In areas with heavy rainfall or poor drainage, extend downspouts 8-10 feet from the home using elbows and extensions.
Connecting Downspout Elbows
Use elbows to redirect water flow from the vertical downspout to horizontal drainage. Two 45-degree elbows or one 90-degree elbow work equally well. Secure elbows to downspouts with fasteners spaced 12-18 inches apart. Ensure all connections are tight to prevent separation during heavy rain or wind.
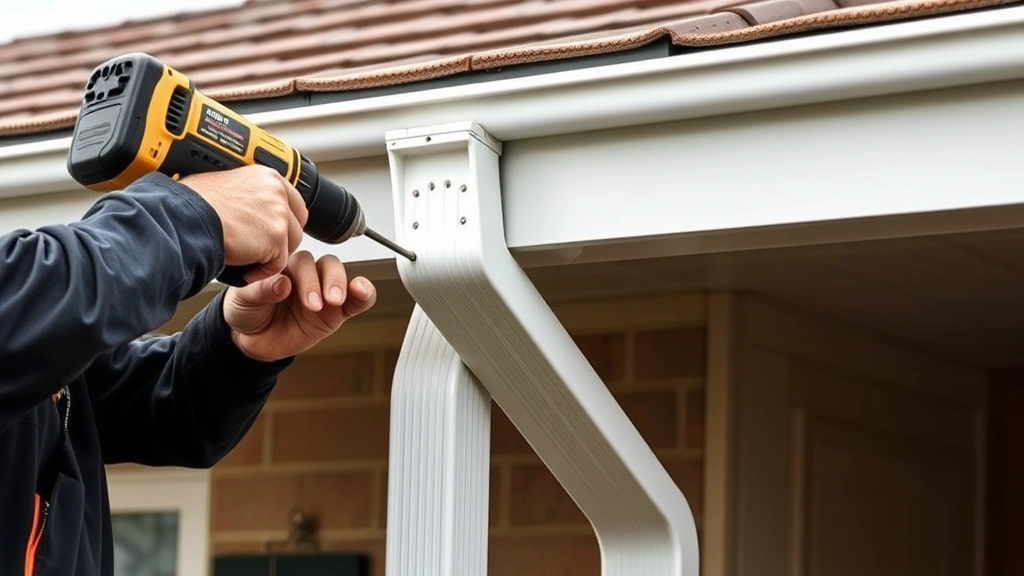
Installing Downspout Brackets
Brackets support downspouts and keep them aligned with your home’s exterior. Install brackets every 4 feet along vertical downspout runs. Brackets should be fastened into solid structure (fascia board, siding, or brick) using appropriate fasteners for your home’s material. Ensure brackets are snug but don’t over-tighten, which can crack or dent downspouts.
Extending Water Away from Foundation
The endpoint of your downspout extension is critical. Water must flow away from your foundation to prevent basement flooding and foundation damage. Use splash blocks, rain barrels, or underground drainage systems to manage runoff. In areas with clay soil or poor drainage, consider connecting downspouts to underground drainage pipes or French drains.
Sealing and Finishing Touches
Sealing your gutter system protects it from leaks and extends its lifespan. Final touches ensure professional appearance and optimal functionality.
Applying Gutter Sealant
After all sections are connected and installed, apply additional sealant to any visible joints or potential leak points. Run a bead of sealant along the inside seam where the gutter bottom meets the sides. Smooth the sealant with a wet finger or caulk tool for a clean finish. Allow full curing time before exposing the system to water.
Installing Gutter Guards (Optional)
Gutter guards prevent debris accumulation and reduce maintenance requirements. Several types are available: mesh screens, foam inserts, and surface-tension guards. Install guards after your gutter system is complete and fully sealed. Proper guards reduce leaf and debris buildup, though they don’t eliminate the need for occasional cleaning.
Testing Your Installation
Before considering your project complete, test the entire system. Run water from a hose into the gutter at the highest point and observe flow toward downspouts. Water should move steadily without pooling or overflowing. Check all joints and connections for leaks. If you notice water seeping from joints, apply additional sealant and allow curing time.
Maintenance and Inspection
Even well-installed gutters require periodic maintenance. Clean gutters twice yearly (spring and fall) to remove leaves and debris. Inspect for damage, rust, or separation after heavy storms. Check downspout extensions to ensure water is still flowing away from your foundation. Regular maintenance catches small problems before they become expensive repairs.
For additional gutter maintenance tips and best practices, visit Lowe’s gutter installation resource or check your local building codes for specific requirements in your area.
FAQ
How long does gutter installation typically take?
A typical single-story home with 120-150 linear feet of gutter takes 4-8 hours for an experienced DIYer. Two-story homes or complex roof designs may require 8-12 hours. Breaking the project into multiple days reduces fatigue and improves accuracy.
Can I install gutters myself, or should I hire a professional?
DIY gutter installation is feasible if you’re comfortable working at heights, have basic carpentry skills, and own proper tools. The main challenges are working on ladders safely and achieving proper slope. If you’re uncomfortable with heights or lack experience, professional installation ensures warranty protection and expert execution. Many homeowners tackle this project successfully after reviewing comprehensive guides and videos.
What’s the difference between K-style and half-round gutters?
K-style gutters have a decorative front profile and flat bottom, fitting flush against fascia boards. Half-round gutters are curved with a rounded bottom, offering a traditional appearance. K-style is more common in modern homes and easier to install. Half-round gutters suit historic homes and have excellent drainage capacity. Both function equally well when properly installed.
How do I fix a sagging gutter?
Sagging usually results from inadequate hangers, improper spacing, or water-logged debris. First, clean the gutter completely and remove debris. If sagging persists, add additional hangers between existing ones, spacing them 24 inches apart. If the gutter is severely damaged or old, replacement may be more cost-effective than repair. Check that slope is still adequate after adding hangers.
Should I caulk or seal gutter seams?
Yes, sealing all seams is essential for preventing leaks. Apply sealant before connecting sections (inside the joint) and after installation (inside visible seams). Use gutter-specific sealant rated for your material and climate. Regular caulk or silicone may fail prematurely. Proper sealing prevents water seepage, the most common cause of gutter-related damage.
What permits or inspections do I need?
Gutter installation requirements vary by jurisdiction. Some municipalities require permits for any exterior work, while others don’t. Check with your local building department or review your area’s building standards before starting. Obtaining permits ensures your work meets code requirements and may be necessary for insurance claims or future home sales.
How often should gutters be cleaned?
Most experts recommend cleaning gutters twice yearly—in spring after trees finish shedding and in fall after leaves drop. Homes surrounded by trees may need quarterly cleaning. If you install gutter guards, cleaning frequency decreases but doesn’t eliminate the need entirely. Clogged gutters defeat the purpose of your entire system, so maintenance is crucial.
Installing gutters yourself is an achievable project that saves money and provides the satisfaction of completed home improvement work. Follow these steps carefully, prioritize safety, and don’t skip the sealing process. Your properly installed gutter system protects your home for decades, preventing costly water damage and foundation problems. Whether you’re tackling this as your first major DIY project or adding to your home improvement resume, the effort invested in quality installation pays dividends in home protection and longevity. Visit the FixWise Hub Blog for more home improvement guides and tips.
Related Posts

Superscript in Google Docs: Expert Tips

Strikethrough in Excel: Easy Steps for Beginners
