
Add a Checkbox in Excel: Easy Beginner Steps
How to Insert a Checkbox in Excel: Easy Beginner Steps
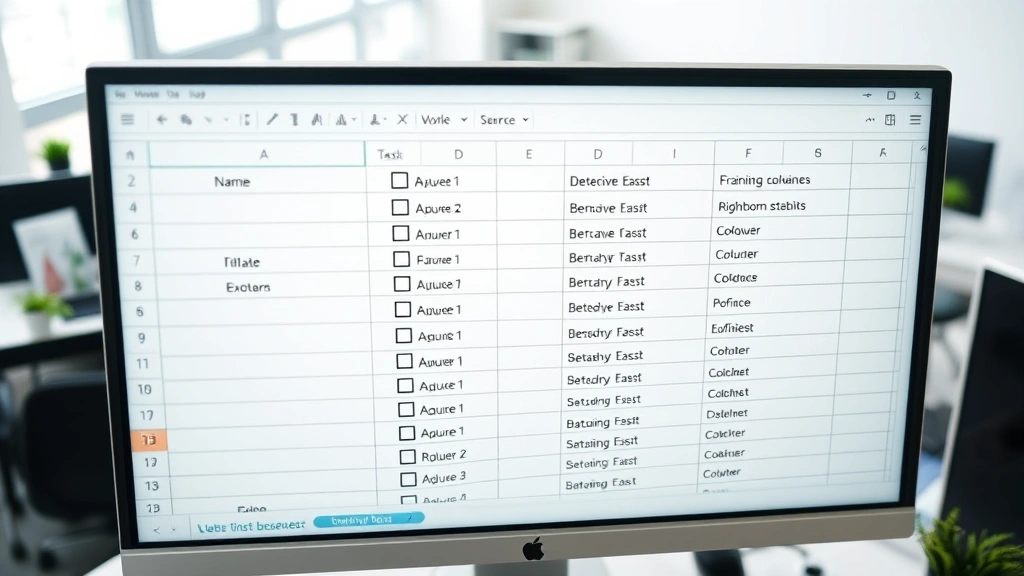
Adding checkboxes to your Excel spreadsheets is one of the most practical ways to create interactive task lists, tracking sheets, and dynamic forms. Whether you’re managing a project timeline, creating a shopping list, or building a survey template, checkboxes make it easy to mark items as complete with a single click. This comprehensive guide walks you through every method to insert checkboxes in Excel, from the simplest approach for beginners to advanced customization options that will elevate your spreadsheet game.
Excel checkboxes aren’t just decorative elements—they’re functional form controls that can trigger calculations, change cell values, and automate workflows. By the end of this tutorial, you’ll understand how to insert checkboxes, link them to cells, format them professionally, and use them to build powerful tracking systems that save you time and reduce manual data entry errors.
What Are Excel Checkboxes and Why Use Them
Excel checkboxes are interactive form controls that allow users to toggle between checked and unchecked states. Unlike simple text entries, checkboxes provide a visual, intuitive way to mark completion status, preferences, or yes/no decisions. They’re particularly valuable in shared spreadsheets where multiple users need to update status information quickly and consistently.
The primary advantages of using checkboxes include improved data accuracy, faster data entry, cleaner visual presentation, and the ability to create conditional formatting rules based on checkbox states. When you explore our how-to guides collection, you’ll notice that systematic organization—just like checkbox implementation—makes complex tasks manageable. Checkboxes transform raw spreadsheet data into organized, actionable information that teams can understand at a glance.
Common use cases for Excel checkboxes include project management dashboards, quality control checklists, inventory tracking systems, event registration forms, employee onboarding checklists, and bug tracking spreadsheets. Once you understand the basics, you can adapt these techniques to virtually any tracking or approval workflow.
Method 1: Insert Checkboxes Using the Developer Tab
The most straightforward way to insert checkboxes in Excel is through the Developer tab, which contains all form controls and macro tools. If you don’t see the Developer tab in your ribbon, you’ll need to enable it first—this one-time setup takes less than a minute.
Enable the Developer Tab
Start by right-clicking on any tab in the Excel ribbon at the top of your screen. Select “Customize the Ribbon” from the context menu. In the Excel Options dialog that opens, look for the list on the right side labeled “Main Tabs.” Scroll down until you find “Developer” and check the box next to it. Click “OK” to apply the changes. You’ll now see the Developer tab permanently in your ribbon.
Insert Your First Checkbox
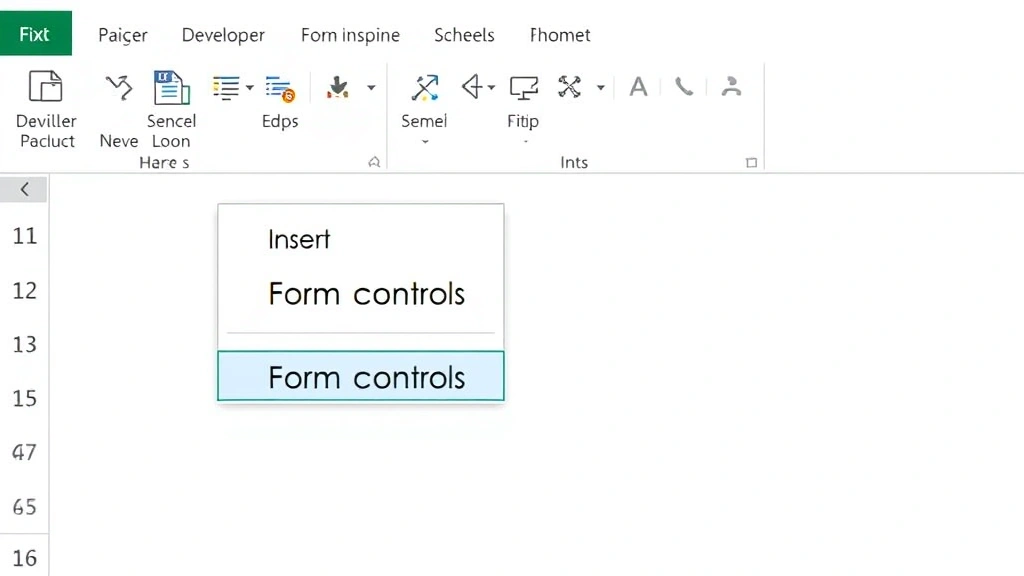
Click the Developer tab, then locate the “Insert” button in the Controls group. You’ll see a dropdown arrow—click it to reveal your options. Under “Form Controls,” you’ll see a checkbox icon (it looks like a small square with a checkmark). Click this icon, and your cursor will change to a crosshair.
Now click and drag on your spreadsheet to create the checkbox. Start at the cell where you want the checkbox to appear and drag slightly to define its size. Release the mouse button, and your checkbox is created. You can immediately click it to test the functionality—it should toggle between checked and unchecked states.
Resize and Position Your Checkbox
After creating a checkbox, you can adjust its size and position by clicking and dragging its corners or edges. Hold down the Shift key while dragging a corner to maintain proportions. To move the checkbox without resizing, click in the center and drag it to a new location. Most users position checkboxes in a dedicated column, typically leaving one column width for each checkbox to prevent overlap with adjacent content.
Method 2: Using Form Controls vs. ActiveX Controls
Excel offers two types of checkboxes: Form Controls and ActiveX Controls. Understanding the differences helps you choose the right tool for your specific needs.
Form Controls Checkboxes
Form Controls are the standard checkboxes most users work with. They’re stable, compatible across different Excel versions, and don’t require macro expertise. Form Controls are ideal for most business spreadsheets because they work reliably in shared workbooks and don’t cause compatibility issues when files are shared with colleagues using older Excel versions. These checkboxes integrate seamlessly with Excel’s native features and don’t require Visual Basic knowledge to implement.
ActiveX Controls Checkboxes
ActiveX Controls offer more customization options and can trigger VBA macros directly. They’re more powerful but require more technical knowledge and can cause compatibility issues if your file is shared with users on different platforms or older Excel versions. ActiveX checkboxes are best reserved for advanced users building complex automation systems or standalone spreadsheets that won’t be shared broadly.
For most beginners and standard business applications, Form Controls checkboxes are the recommended choice. They provide all the functionality you need without the technical complexity or potential compatibility headaches.
Linking Checkboxes to Cells
The real power of Excel checkboxes emerges when you link them to cells. This connection allows checkboxes to store TRUE or FALSE values that you can reference in formulas, conditional formatting, and other Excel functions.
Create a Checkbox Link
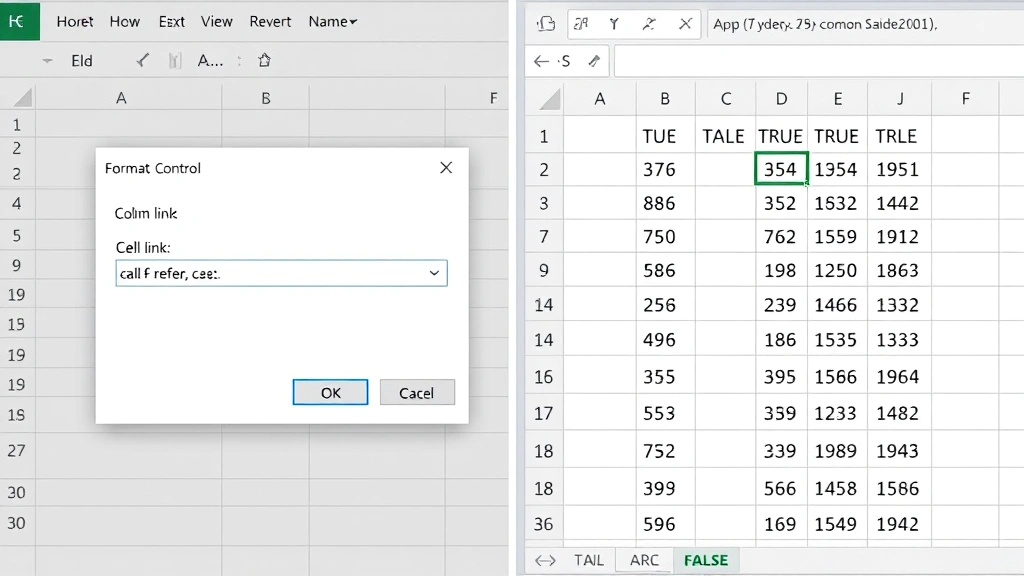
Right-click on any checkbox you’ve created and select “Format Control” from the menu. The Format Control dialog opens with several tabs. Click the “Control” tab to access linking options. You’ll see a field labeled “Cell link”—this is where you specify which cell will store your checkbox’s TRUE/FALSE value.
Click in the Cell link field and type a cell reference (for example, “B2”) or click on the cell in your spreadsheet where you want the checkbox value stored. When you click OK, your checkbox is now linked. Every time you check or uncheck the box, the linked cell will automatically display TRUE or FALSE.
Using Checkbox Values in Formulas
Once your checkbox is linked to a cell, you can reference that cell in any Excel formula. For example, if a checkbox in row 3 is linked to cell C3, you could create a formula like =IF(C3=TRUE,”Complete”,”Pending”) in another cell to display status text. This creates a dynamic tracking system where changing the checkbox automatically updates related information throughout your spreadsheet.
You can also use checkbox values with SUMIF, COUNTIF, and other aggregate functions to create summary dashboards. For instance, =COUNTIF(C2:C100,TRUE) counts how many checkboxes are checked in that range, perfect for progress tracking.
Formatting and Styling Your Checkboxes
Excel allows extensive customization of checkbox appearance, making them blend seamlessly with your spreadsheet design.
Change Checkbox Text
Right-click a checkbox and select “Edit Text” to add or modify the label displayed next to the checkbox. Type your desired text (like “Task Complete” or “Approved”) and click outside the checkbox to apply the change. The text helps users understand what each checkbox controls, making your spreadsheet more intuitive.
Adjust Size and Font
Right-click the checkbox and select “Format Control.” In the Font tab, you can change text size, style, and color. These adjustments help checkboxes match your spreadsheet’s overall design aesthetic. Consistent formatting across all checkboxes creates a professional appearance that users find easier to navigate.
Apply Colors and Borders
The Colors and Lines tab in Format Control lets you customize the checkbox’s appearance with different border colors, fill colors, and line styles. While the default appearance works well in most cases, customization helps create branded templates or visually distinct sections in complex spreadsheets.
Use Conditional Formatting with Checkboxes
Create rules that automatically format entire rows or cells based on checkbox status. Select the range you want to format, go to Home tab, click Conditional Formatting, and create a formula-based rule like =C2=TRUE. When this condition is true, you can apply fill colors, fonts, or borders. This creates visual feedback—for example, completed tasks might automatically turn green while pending tasks stay red.
Advanced Checkbox Techniques
Once you’re comfortable with basic checkbox implementation, these advanced techniques unlock powerful automation possibilities.
Creating Dependent Checkboxes
You can create checkboxes that enable or disable other checkboxes based on conditions. Using VBA macros or conditional logic, you might prevent users from checking “Project Complete” until all prerequisite task checkboxes are marked. This enforces workflow sequences and prevents incomplete submissions.
Building Progress Tracking Dashboards
Combine multiple checkboxes with formulas to create visual progress indicators. Link checkboxes to cells, then use COUNTIF to count checked items and divide by total items to calculate percentage completion. Use this percentage with data bars or other conditional formatting to create dashboard-style progress visualizations that update automatically as users check boxes.
Implementing Timestamp Features
When a checkbox is marked, you might want to automatically record when it was checked. Using helper columns with NOW() formulas and conditional logic, you can create systems that timestamp checkbox changes, creating audit trails for compliance and tracking purposes.
Protecting Checkbox Functionality
Protect your spreadsheet while allowing checkbox interaction by going to Review tab, clicking Protect Sheet, and configuring permissions. Users can modify checkbox states but can’t change formulas or formatting. This balance maintains data integrity while keeping spreadsheets user-friendly. For critical workflows, consider using Microsoft’s comprehensive protection features to enforce stricter controls.
Troubleshooting Common Checkbox Issues
Even experienced Excel users encounter checkbox problems occasionally. These solutions address the most common issues.
Checkbox Won’t Check or Uncheck
If clicking a checkbox produces no response, the spreadsheet is likely in edit mode. Press Escape to exit edit mode, then try clicking the checkbox again. If the problem persists, right-click the checkbox and verify it’s properly configured in the Control tab. Ensure the cell link field contains a valid cell reference.
Linked Cell Not Updating
Verify that the cell reference in the checkbox’s Cell link field is correct. Common mistakes include referencing the wrong sheet (use SheetName!CellReference for other sheets) or using absolute references when relative references would work better. Check that the cell isn’t formatted as text, which prevents TRUE/FALSE values from displaying properly.
Checkboxes Moving or Resizing Unexpectedly
When rows or columns are inserted or deleted, checkboxes might shift position. Prevent this by right-clicking the checkbox, selecting “Format Control,” and in the Properties tab, ensuring “Don’t move or size with cells” is unchecked (this allows the checkbox to move with cells, which is usually desired). Alternatively, check this option if you want checkboxes to remain in fixed positions regardless of row/column changes.
Checkbox Appears Grayed Out
A grayed-out checkbox usually indicates the cell it’s linked to is protected or the spreadsheet is in read-only mode. Check file properties to ensure the file isn’t read-only, and verify sheet protection settings aren’t preventing checkbox interaction. Unprotect the sheet temporarily to test if protection is the issue.
Compatibility Issues with Other Users
If colleagues using older Excel versions report checkbox problems, you might be using ActiveX controls. Switch to Form Controls instead, which have better backward compatibility. Save your file in .xlsx format rather than .xlsm to avoid macro-related compatibility issues, unless your checkboxes specifically require VBA code.
FAQ
Can I use checkboxes in Excel Online?
Excel Online has limited support for checkboxes. Form Control checkboxes might not function properly in the web version. For cloud-based collaboration, consider using Microsoft Forms or integrated form solutions instead. If you must use Excel Online, test thoroughly before sharing with team members.
How do I delete a checkbox?
Click the checkbox to select it (you’ll see selection handles around it), then press Delete. The checkbox will be removed without affecting other spreadsheet content. If you accidentally delete a checkbox, use Ctrl+Z to undo immediately.
Can checkboxes trigger automatic emails or notifications?
Standard Excel checkboxes can’t directly send emails, but you can use Power Automate (formerly Flow) to create workflows triggered by checkbox changes in cloud-connected spreadsheets. VBA macros in desktop Excel can also send emails when checkboxes are marked, though this requires more technical knowledge.
What’s the difference between a checkbox and a dropdown list?
Checkboxes are best for yes/no or true/false decisions, while dropdown lists work better when users need to select from multiple options. Use checkboxes for simple binary choices and dropdowns for selections with more than two options. You can combine both in the same spreadsheet for different types of data.
How do I copy a checkbox to multiple rows?
Select the checkbox, copy it (Ctrl+C), then select the range where you want copies and paste (Ctrl+V). Excel will automatically adjust cell links for each copied checkbox. Alternatively, create one checkbox with a cell link, then copy and paste it—each copy will increment the cell reference automatically.
Can I make checkboxes required fields?
Excel doesn’t have built-in required field validation for checkboxes, but you can create workarounds using data validation and conditional formatting. For example, prevent form submission until a checkbox is checked by using formulas that check the linked cells. This requires either VBA code or integration with Power Automate for web-based forms.
How do I create a master checkbox that controls multiple checkboxes?
Use VBA macros to link a master checkbox to multiple dependent checkboxes, or use formulas that copy the master checkbox’s value to linked cells of other checkboxes. This requires more advanced Excel skills but creates powerful “select all” functionality.
Are checkboxes secure for confidential data?
Checkboxes themselves don’t encrypt data, but combined with sheet protection and workbook passwords, they can be part of a secure system. For highly sensitive information, use Excel’s built-in encryption features alongside checkbox implementation.
Related Posts

Superscript in Google Docs: Expert Tips

Strikethrough in Excel: Easy Steps for Beginners
